
5 Easy Ways to Copy Contacts from Lava Yuva 3 to iPhone 14 and 15 | Dr.fone
5 Easy Ways to Copy Contacts from Lava Yuva 3 to iPhone 14 and 15

Upgrading to iPhone 14 or 15 after using an Android smartphone for a long time is indeed a big leap. Why so? The simplest explanation is that these two mobile devices run on a completely different operating system. But don’t worry. With regard to data migration, the process has become much more convenient today than before. Big thanks to highly advanced technology and modern practices.
The contact list is among the most important data stored on our mobile phones. That’s why it is the first thing users want to secure during transfer. Adding the phone numbers manually to the mobile directory is undoubtedly the safest migration method. But in today’s digital world, there are lots of easy techniques to copy contacts from Lava Yuva 3 to iPhone. No need to exert much time and tremendous effort. You can literally get this done within a few minutes.
In this article, we will provide a few tutorials on how to export contacts from Lava Yuva 3 to iPhone. We will also list down some preparation tips to help you finish the procedures smoothly. Continue reading below to learn more.
Can You Copy Contacts From Lava Yuva 3 to iPhone?
Data transfer doesn’t only happen when you get a new mobile device. In fact, it is actually a common procedure that many users initiate from time to time. Let’s say you’re asked to send a particular contact detail to a specific person at your place of work. Another possibility is that you prefer to view Your Lava Yuva 3book from both your personal and business smartphones. That’s why having a convenient and effective means to copy contacts from Lava Yuva 3 to iPhone is very helpful. Imagine all it takes is a few taps to send your address book from one end to another.
There are numerous ways to export contacts from Lava Yuva 3 to iPhone 14 or 15. But to get promising results, you definitely have to choose the best method applicable to your current situation. Take note that you’re transferring files between two devices with different operating systems. Therefore, there’s probably no direct method to commence such procedures. You have to go through a series of steps in order to copy contacts from Lava Yuva 3 to iPhone. But don’t worry. Most of them are indeed a walk in the park. No technical skills or advanced equipment are required to complete the process.
5 Techniques to Export Contacts From Lava Yuva 3 to iPhone 14 or iPhone 15
“How do I transfer contacts from Lava Yuva 3 to iPhone 14 or iPhone 15?” As mentioned earlier, data transfer between two devices is now as easy as falling off a log. It’s no longer required to engage in manual work because most of the steps involve automation. To help you in this regard, below are the top five techniques to copy contacts from Lava Yuva 3 to iPhone. Just try to commence each solution and find the best one that brings good progress.

Method 1: Import vCard to iCloud
You can instantly copy contacts from Lava Yuva 3 to iPhone 14 or 15 by simply uploading your contact list to iCloud. Just make sure you’re uploading a Virtual Card File and your device is synced to your iCloud account. Here’s a quick guide on how to do it in easy steps.
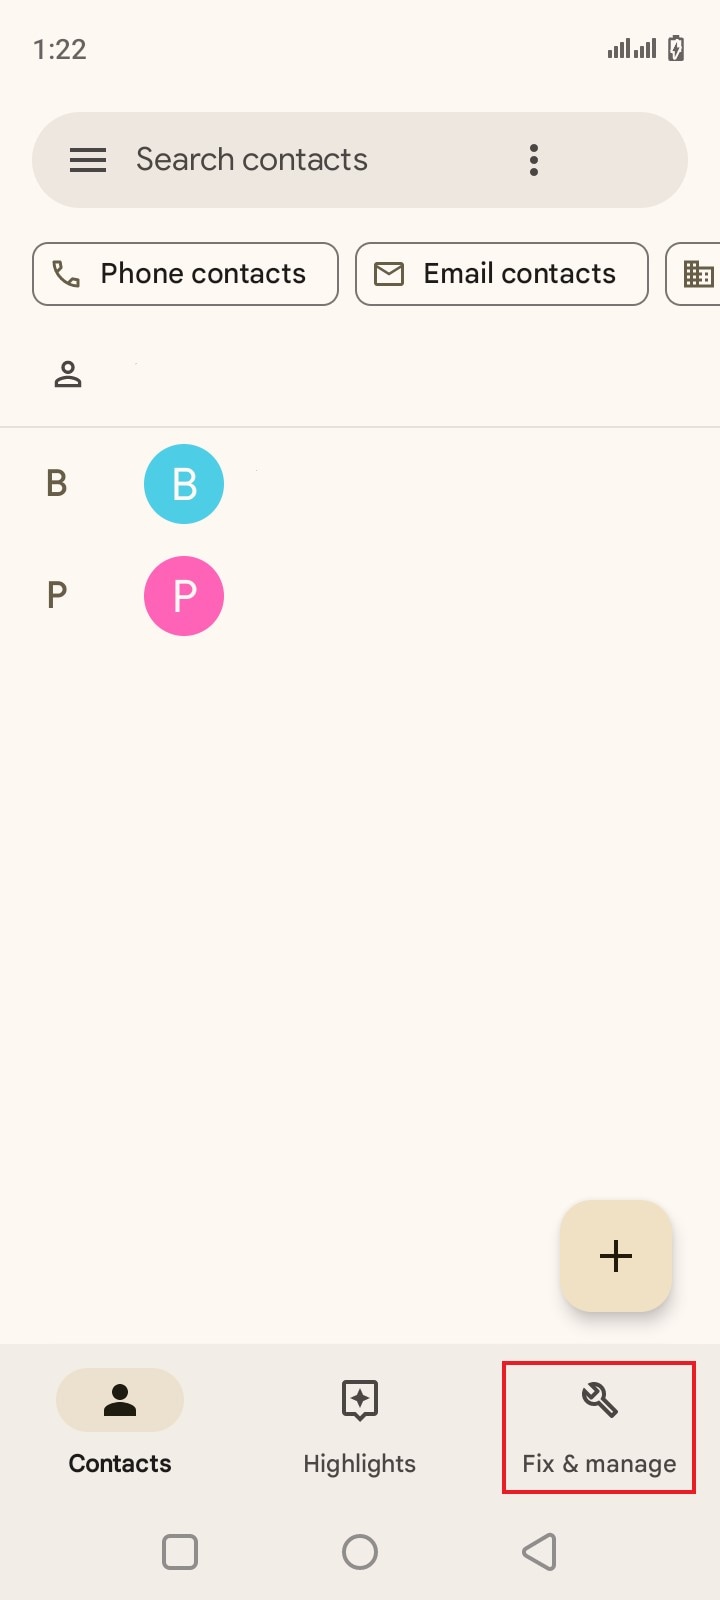
- Step 1: Open the Contacts app on your Android smartphone.
- Step 2: Click Fix & Manage to bring out the settings.
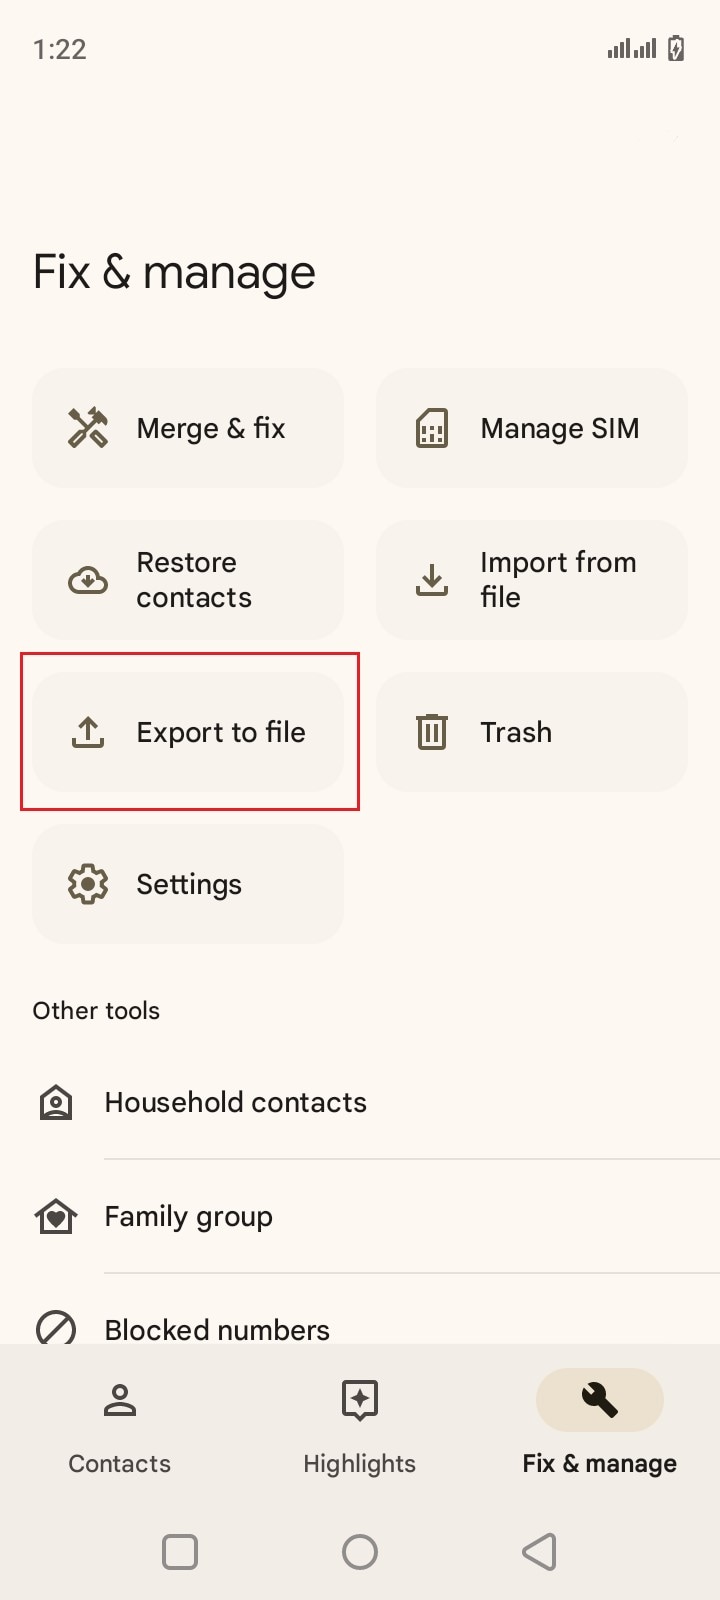
- Step 3: Click Export to File.
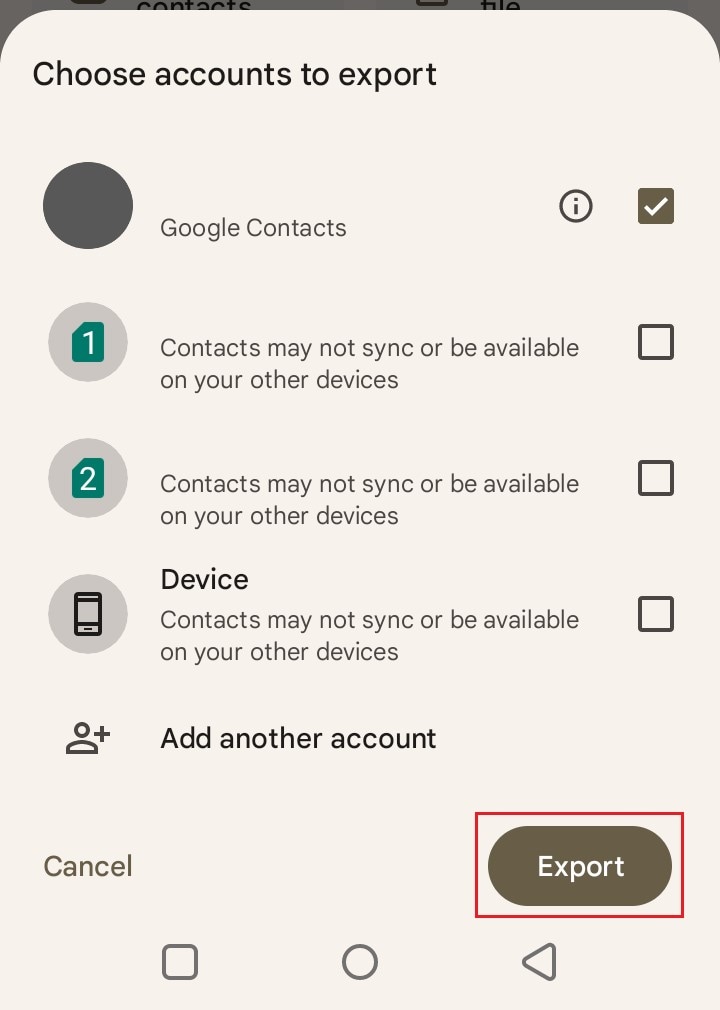
- Step 4: Choose the contact list you want to export. Then click Export.
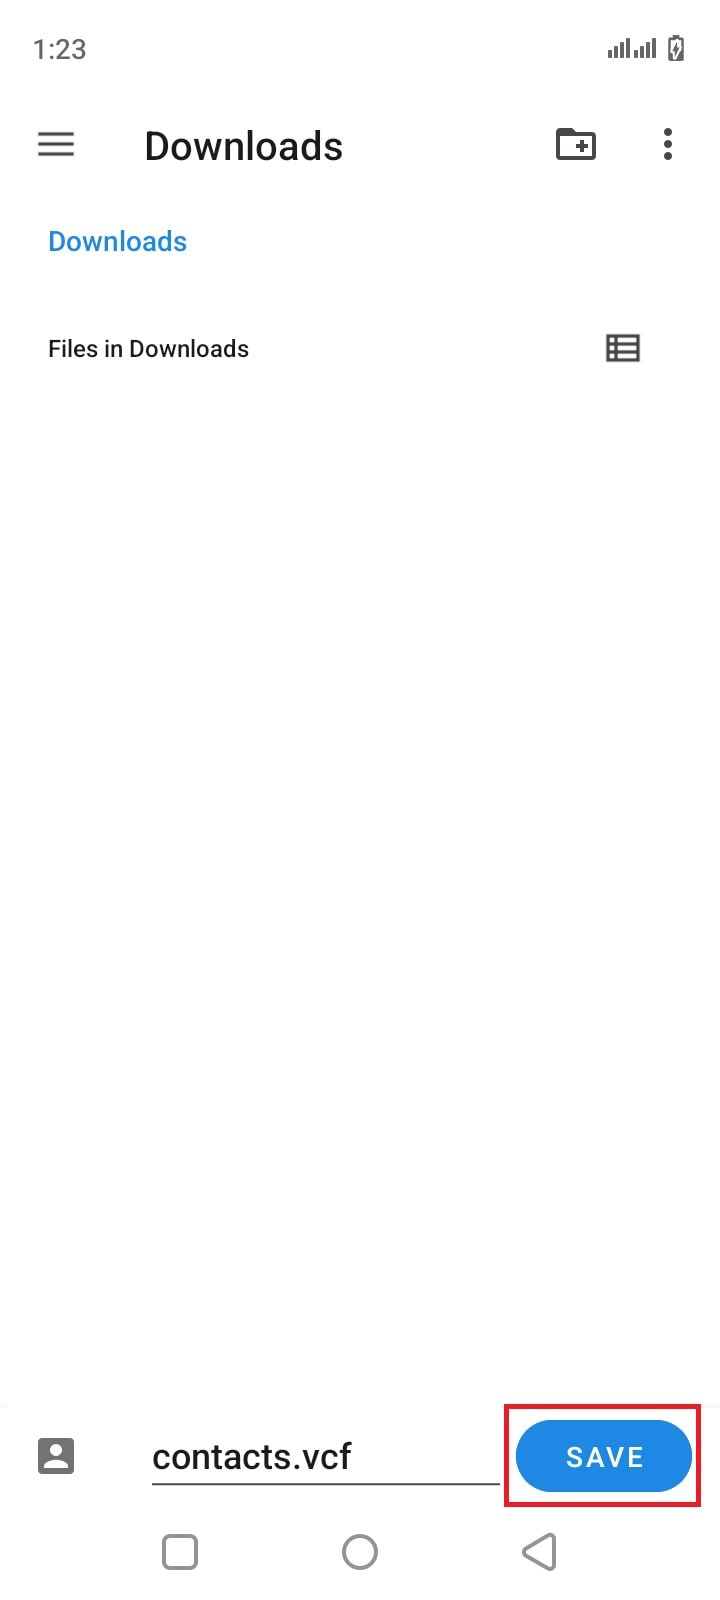
- Step 5: Choose a specific folder where you want to save the exported VCF. Right after, click Save.
- Step 6: Upload the vCard to your iCloud account. Log in to icloud.com using your Apple and then click Contacts > Settings gear icon > Import vCard.
- Step 7: Lastly, sync your iPhone to iCloud and then check your contact list from the app.
Method 2: Import contacts from Google account
Are you using Google Contacts on your Android smartphone? Or, at the very least, do you back up your phone book to your Google account? If so, you can easily export contacts from Lava Yuva 3 to your iPhone via your Gmail account. Here’s how to do it in easy steps.
- Step 1: Launch the Settings app on your iPhone.
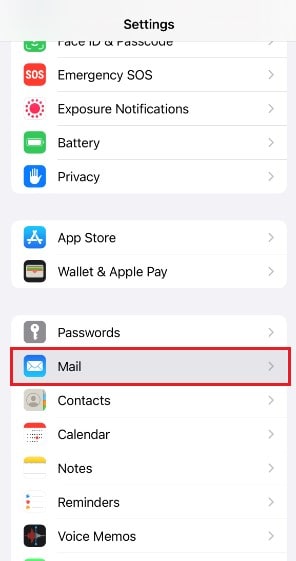
- Step 2: Click Mail.
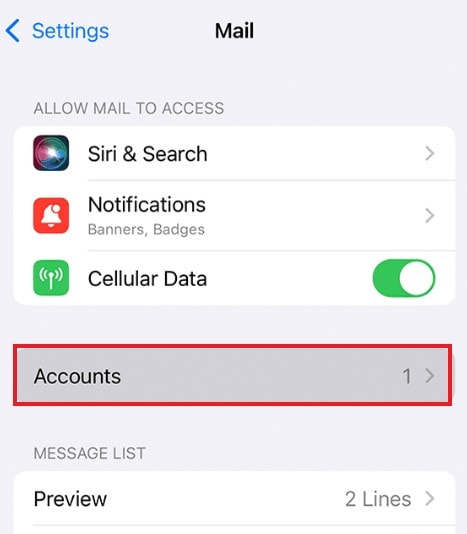
- Step 3: Click Accounts.
- Step 4: Select Google.
- Step 5: Log in to your Gmail account that contains your contact list.
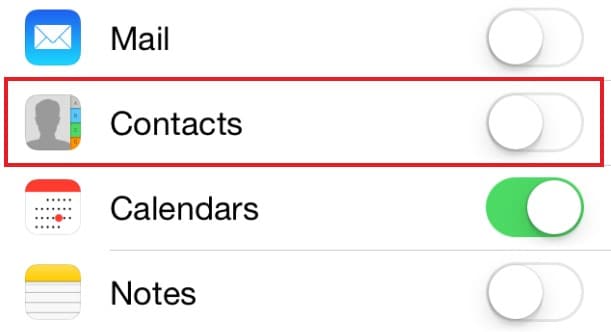
- Step 6: The settings for your Gmail account will appear once you have successfully logged in on your iPhone. Toggle on the radio button next to Contacts to sync your phonebook with the new device.

Method 3: Copy contacts from the SIM card to your iPhone
Another way to export contacts from Lava Yuva 3 to iPhone is with the aid of your SIM card. Simply save your phonebook to the SIM card and import it on your iPhone. Here’s a simple guide to help you commence this procedure.
- Step 1: On your Android smartphone, move all your contacts to the SIM card. Once completed, eject the card and insert it into your new iPhone 15. Wait until the SIM card has been recognized.
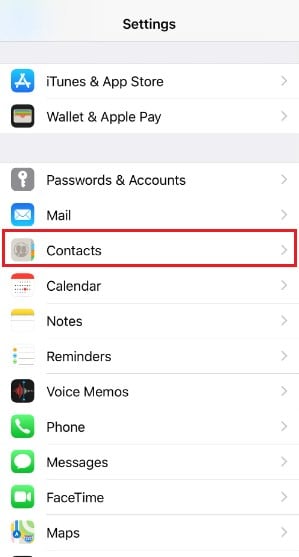
- Step 2: Open the Settings app on your iPhone.
- Step 3: Click Contacts.
- Step 4: Click Import SIM Contacts.
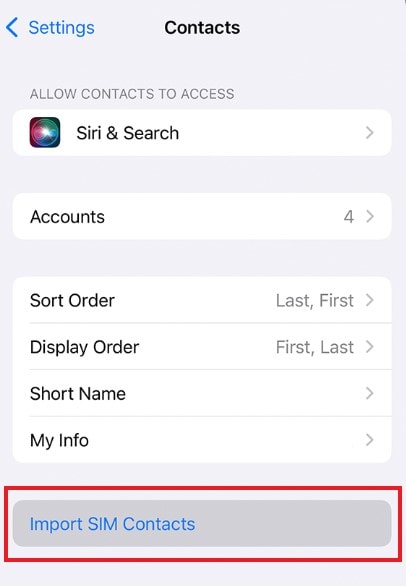
- Step 5: Once completed, check the Contacts app and find the newly imported directories.

Method 4: Export contacts from Lava Yuva 3 to iPhone using Move to iOS
Move to iOS is an Android mobile application you can use to migrate your files to your new iPhone 14. It is free and easy to navigate. Here’s a quick guide on how to copy contacts from Lava Yuva 3 to iPhone using the Move to iOS app.
- Step 1: Download the Move to iOS application on your Android smartphone.
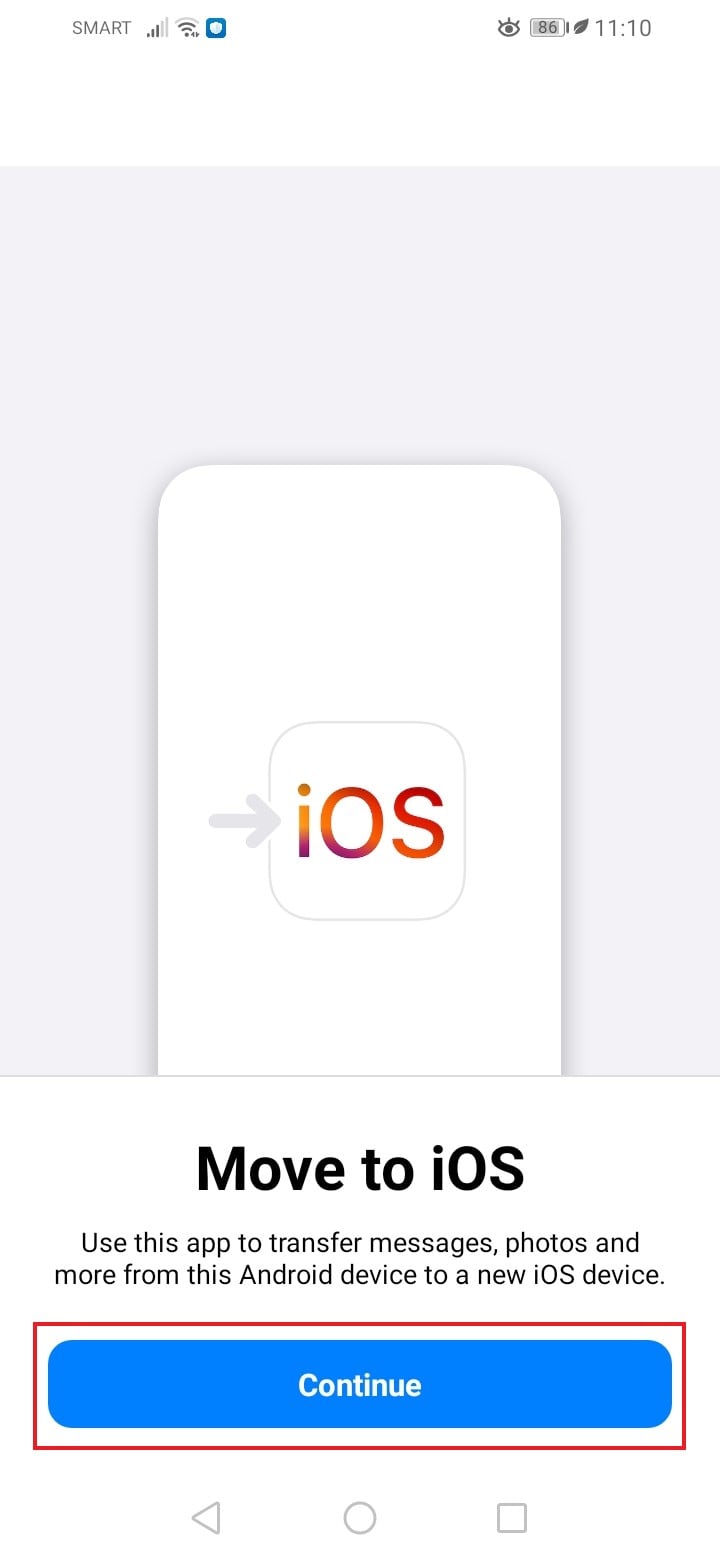
- Step 2: Launch the app on your device afterward.
- Step 3: Click Continue.
- Step 4: Read the Terms and Conditions and then click Agree.
- Step 5: On the Find Your Code page, click Continue.
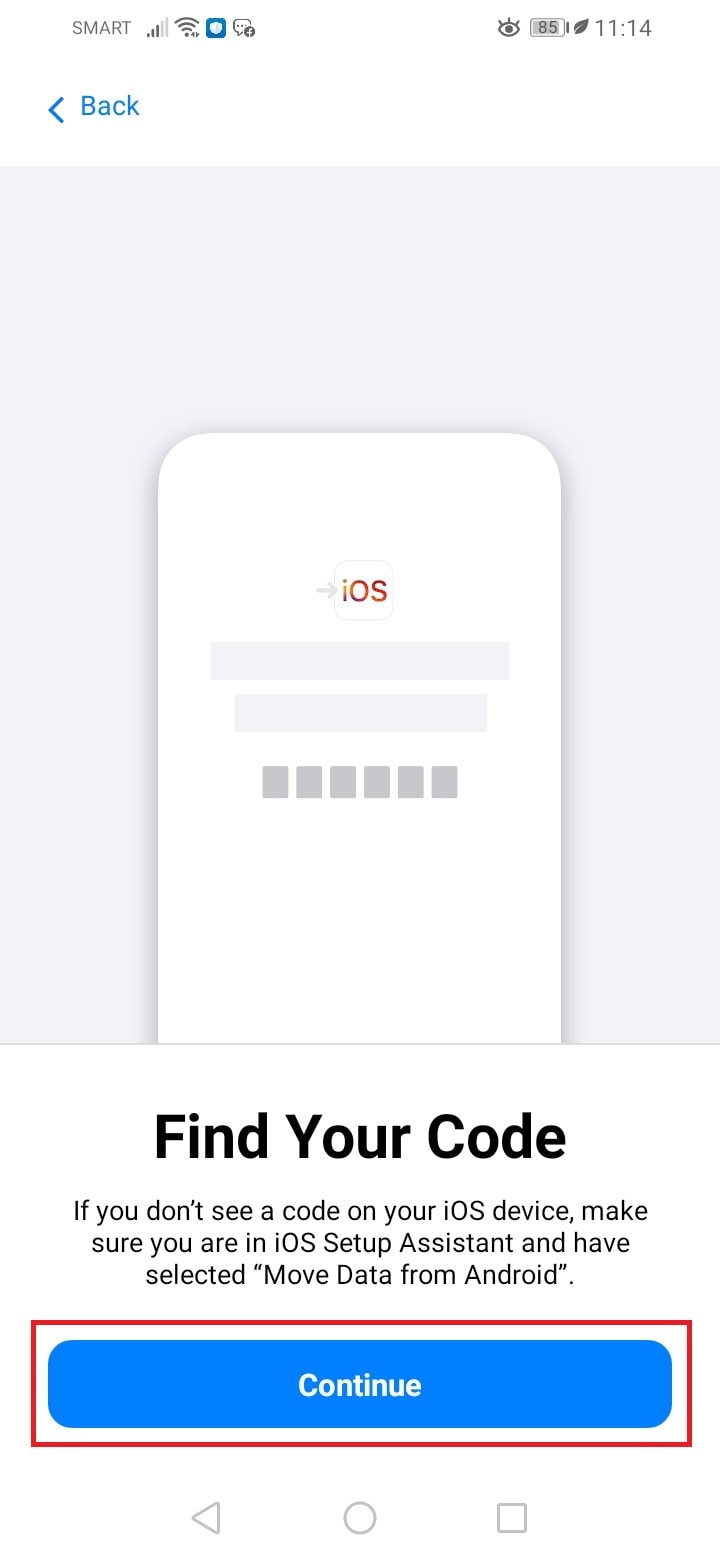
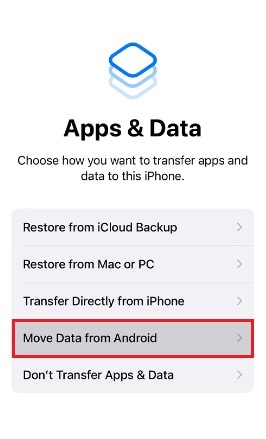
- Step 5: To proceed, make sure your iPhone is on the iOS setup page. From there, click Move Data From Android. Your iPhone will then show a unique code.
- Step 6: On your Android smartphone, key in the code displayed on your iPhone screen.
- Step 7: Choose Contacts. After that, wait for the data transfer to start and finish.
Method 5: Copy contacts from Lava Yuva 3 to iPhone using Wondershare Dr.Fone
The easiest way to export contacts from Lava Yuva 3 to iPhone is by means of third-party phone transfer software. Wondershare Dr.Fone is one of the best tools that can help you a lot in this regard. Its phone transfer feature is designed to initiate and complete data migration with just the snap of a finger. Here’s a short guide on how to use it in easy steps.
- Step 1: Download Wondershare Dr.Fone from its official website. Install it on your computer.
- Step 2: Launch the newly installed Wondershare Dr.Fone on your desktop. Wait until the application has fully loaded.
- Step 3: Navigate the left-side panel and then click Toolbox. On the main dashboard, click Phone Transfer.

- Step 4: Connect your Android smartphone and iPhone to the computer using a data cable.
- Step 5: Once the two devices have been recognized on the platform, set your Lava Yuva 3 as the Source and your iPhone as the Target. Alternatively, click the Flip button to specify the direction of the transfer.

- Step 6: After that, choose the categories of the files you want to transfer. From there, click Contacts and then tap Start Transfer to proceed.

- Step 7: Wait while the data transfer is ongoing. Avoid using both your devices during the process to avoid unwanted disruptions.

- Step 8: After completing the process, click OK to wrap it up. Check your iPhone contacts afterward and find the newly imported contacts from your old Android phone.

Simple Reminders to Copy Contacts From Lava Yuva 3 to iPhone Smoothly
It’s true to say that the five data transfer methods above are safe and effective. But generally speaking, we can’t deny that any process that involves the migration of data is sensitive in nature. That’s why it’s important to prepare both devices before officially initiating the data transfer process. Here are some reminders you need to keep in mind before you export contacts from Lava Yuva 3 to iPhone.
- Make sure your iPhone is fully charged and carrying enough internal storage.
- Incoming phone calls might interrupt the data transfer process in some ways. Hence, it’s best to turn the Airplane mode on both devices while the contacts are being migrated.
- Don’t use both devices once the data transfer has started.
- Lastly, create a backup file for your contact list. You never know what’s going to happen with the transfer. It’s best to be prepared to avoid data loss. Don’t worry. Wondershare Dr.Fone has a file backup feature that can help you a lot.
Conclusion
Data transfer is a sensitive procedure. That’s why it’s highly recommended to opt for a conservative yet effective migration method to prevent serious issues. The five techniques above can surely help you copy contacts from Lava Yuva 3 to iPhone 14 or any model. Just make sure to prepare your mobile devices beforehand and settle on the data transfer option suitable to your needs. For a more convenient phone transfer solution, install Wondershare Dr.Fone on your computer. It is equipped with data migration features that can help you export contacts from Lava Yuva 3 to iPhone securely.
How to Transfer Contacts from Lava Yuva 3 to Other Android Devices Using Bluetooth?
One of the first and the most important things people care about while upgrading their phones today is how to transfer contacts from one phone to another phone. 2022 has just begun, new devices from smartphone companies are coming in and one of the most anticipated of them is Samsung Galaxy S22 series that is rumored to launch just this February. For some, the upgrade fever is coming on! And, it pays to be prepared in advance. If you are going to be upgrading your old Android to one of the fancy new Android smartphones soon, you are in the right place. You will learn how to transfer contacts from the old device to the new one easily and smoothly.
Part I: How to Transfer Contacts from Lava Yuva 3 to Other Android Devices via Bluetooth?
This method works if you are not trading in your old smartphone to offset the cost of the new, as to transfer contacts from one Android smartphone to another using Bluetooth you will require both devices present and in close proximity, a few feet away at best. There are advantages to transferring contacts using Bluetooth, such as no need for using the internet, going through any other hoops, or opening special apps! Everything you need to share contacts from one Android phone to another is built right into your phone! Now, to transfer contacts from one Android smartphone to another using Bluetooth, you must first pair the two devices together so as to allow for seamless contacts transfer.
I.I: Pairing Two Android Devices Together
Here’s how to pair your old and new phone together via Bluetooth:
Step 1: On your old and new devices, go to Settings, then Bluetooth
Step 2: Make sure Bluetooth is “On” on both of them
Step 3: If everything is done correctly, both devices will show themselves to each other
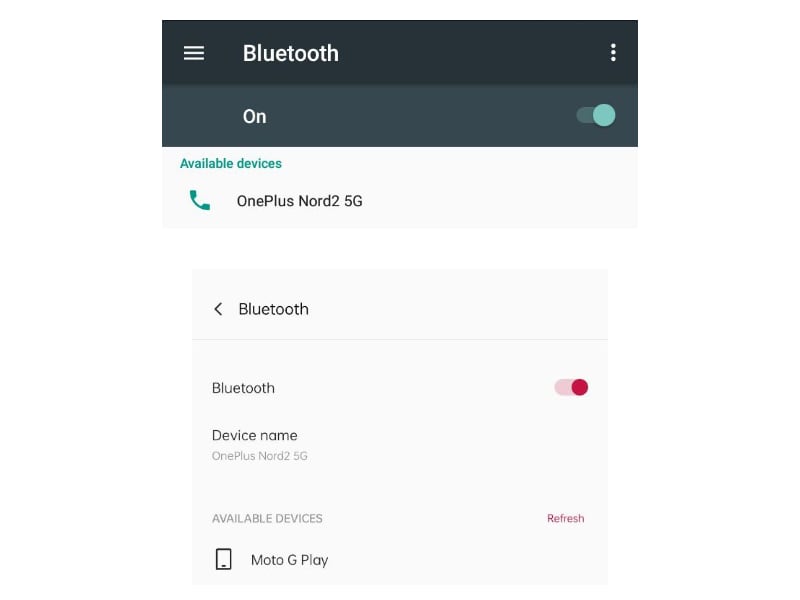
Step 4: Tap the other device on either of them. Here, the Moto G4 Play was tapped on OnePlus Nord 2:
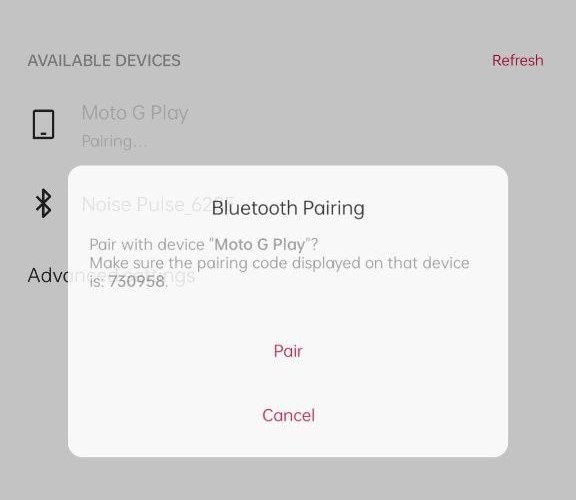
Step 5: A prompt to pair with the new phone will come on the other device as well. For your device, make sure that the PIN is the same on both devices to ensure the security of the connection. This PIN is generated afresh and is unique, so the PIN in the image is not the PIN you will see on your devices. Tap Pair on your old device to pair the two devices together using Bluetooth.
Step 6: After pairing is complete, both devices will show under paired devices on each other:
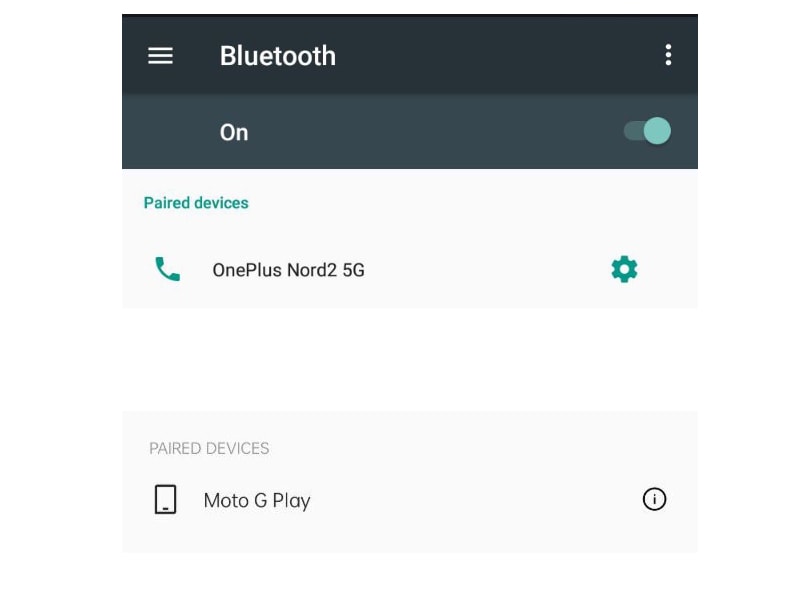
And that’s how simple it is to pair devices to each other using Bluetooth!
I.II: Transfer Contacts from One Android Smartphone to Another Using Bluetooth
Here is how to transfer contacts from one Android to another, easily, using Bluetooth:
Step 1: Go to Phone on your old phone and select the Contacts tab
Step 2: Tap the vertical ellipses and select Import/ Export.
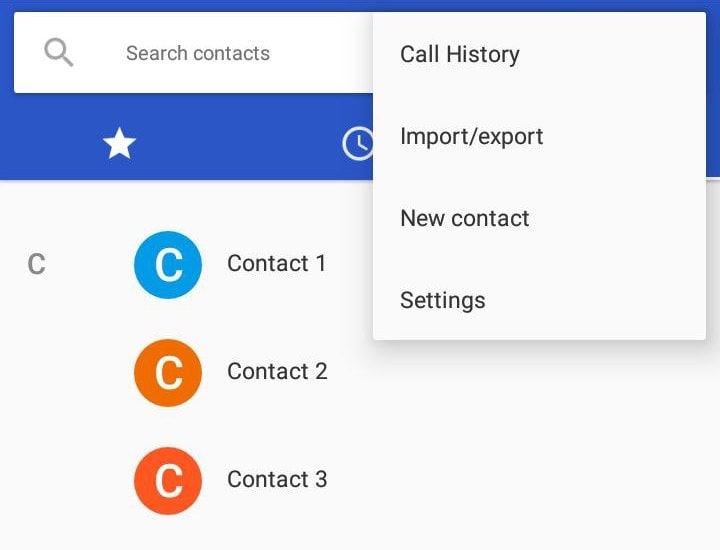
This particular option can vary by your phone model and Android flavor, this is on Android 7 running on Motorola G4 Play. If you are unable to find a way to select contacts or share contacts in the Phone app on your phone, use the Contacts app on your phone for the same effect.
Step 3: A popup will emerge:

Select Share All Contacts.
Step 4: When you do that, this will come up:
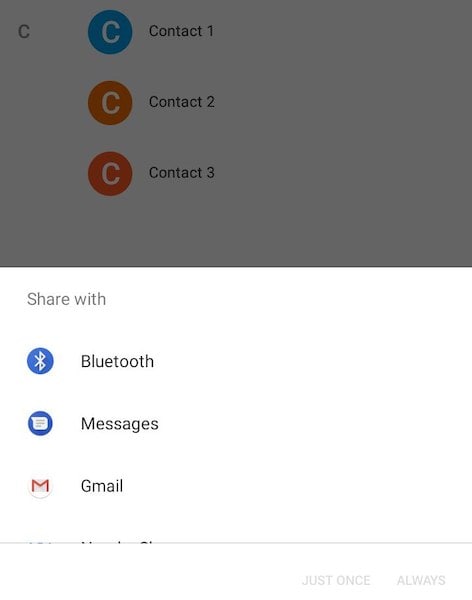
Select Bluetooth in the Share With menu. You may select Always or Just Once and proceed.
Step 5: Choose the paired handset, in this case, the OnePlus Nord 2:
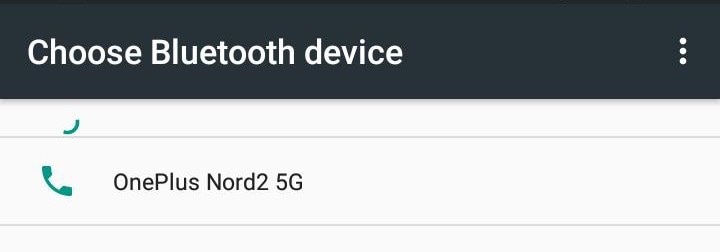
Step 6: The VCF file will be exported to Nord 2 and you can accept it on the Nord 2 (new device).
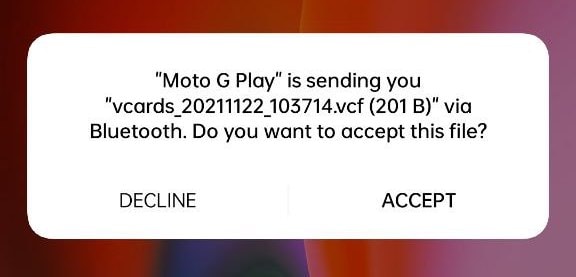
And that is how to transfer contacts from an Android smartphone to another using Bluetooth!
Part II: Other Methods to Transfer Contacts from Lava Yuva 3 to Other Android Devices
What are other ways to transfer contacts from one Android smartphone to another? Glad you asked. Because there are other ways to transfer contacts from an Android smartphone to another that do not use Bluetooth and can be both seamless and more powerful than the Bluetooth method, depending on your tastes and needs.
### II.I: Sync Contacts Using Google AccountThis is another method to transfer your contacts on one Android device and restore them on another Android device. Here’s how to transfer contacts from one Android smartphone to another using Google Sync:
Step 1: Go to Settings on your old device
Step 2: Tap Accounts
Step 3: Tap the account you want to transfer contacts from
Step 4: Make sure that there is a checkmark next to Contacts, or, in other words, Contacts sync is enabled/ toggled.
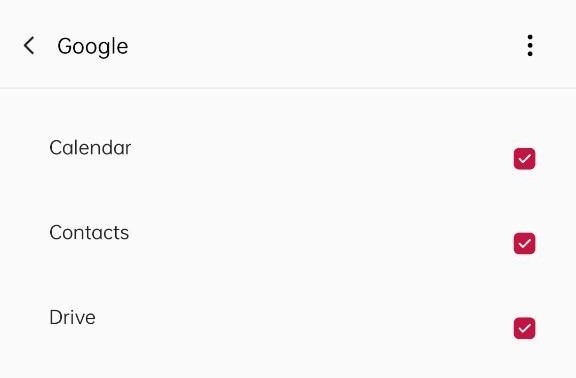
Now, Google will sync your contacts from the Lava Yuva 3 device onto the cloud, and your new device signed into the same Google Account will automatically download the contacts.
II.II: Transfer Contacts from An Android Smartphone To Another Using Manufacturer Apps
Now, if you have an LG phone, you might be more willing to use LG apps than, say, Xiaomi apps. Same for Xiaomi users who would probably scoff at using Samsung apps on their beloved Xiaomi devices. Manufacturers provide apps on Google Play Store that make transferring content from another device to their devices easy because that suits them to make the processes as seamless and easy for their customers. Even Apple is no different in that regard, they have an app to make it easy for people to switch from Lava Yuva 3 to iOS.
There are apps by most major manufacturers like Samsung and Xiaomi, including the older titans such as LG that have now stopped manufacturing phones recently. More or less, the steps that users would need to take to transfer contacts from their old devices to the new are fairly common, and you can use the app for your manufacturers, such as Mi Mover for Xiaomi and Samsung Smart Switch. Here is how to transfer contacts from old Android to new Samsung devices using Samsung Smart Switch.
Step 1: Download Samsung Smart Switch on both your old Android and the new Samsung device
Step 2: Keep the Lava Yuva 3 devices close by, say, on the table. This will not work if the Lava Yuva 3 devices are in different rooms or too far away.
Step 3: Launch Smart Switch on both the Lava Yuva 3 devices
Step 4: Tap Send Data on old Android
Step 5: Tap Receive Data on the new Samsung device
Step 6: Tap Wireless method on both devices
Step 7: Tap Allow on your old device to start the transfer process. Don’t worry, this will not dump all your content just yet.
Step 8: On your new Samsung device, choose what you want to transfer - Contacts, in this case.
Step 9: Tap Transfer and when the transfer is done, tap Close.
That’s all it takes to transfer contacts from old phone to new using Samsung Smart Switch. The process is fairly similar for all other apps from manufacturers. You tap Send on the old device, tap Receive on the new device, choose what you want to receive, and that’s it.
Limitations Of App-based Transfer Methods
It must be noted that there is one binding limitation with such apps - these apps are not two-way streets. You cannot use Samsung Switch to transfer contacts from Samsung phones to another manufacturer’s phones. The same goes for all other manufacturers. All of them allow data into their devices, not out of their devices onto another manufacturer’s devices, using their apps.
In that regard, using a third-party solution such as Dr.Fone allows you complete freedom to do whatever you want and whenever you want, and even so, Dr.Fone is a great tool to have in one’s arsenal to use every day. How? Because not only does Dr.Fone allow you to transfer contacts from one Android device to another, you have complete freedom to mix the Lava Yuva 3 devices in all possible ways. So, if you want to transfer from Samsung to Xiaomi, you can do that. You want to transfer from Xiaomi to Samsung, Dr.Fone does that. Transfer from Apple iPhone to Xiaomi? Yes! Xiaomi or Samsung to Apple iPhone? You bet, all supported! And with a clean, easy-to-use interface that does the job quickly and safely.
II.III: Transfer Contacts from Lava Yuva 3 to Other Android Devices Using Dr.Fone - Phone Transfer
Video Tutorial: How to Transfer Data from Lava Yuva 3 to Other Android Devices
Now, how about a method that frees you from all limitations and any possible hiccups you might encounter with the previous methods? Yes, that is what Dr.Fone promises.
Dr.Fone is a set of modules that specialize in particular tasks that users need to perform with their phones. Phone Transfer is one such module that helps users to easily and quickly transfer contacts and other data from any smartphone to any other smartphone. That means you only need one Dr.Fone to transfer from iPhone to Samsung, Xiaomi to Samsung, LG to Xiaomi, Samsung to Oppo, the combinations are endless since Dr.Fone does not limit you in any way!
Here’s how to transfer contacts from, say, an iPhone to an Android device using Dr.Fone:
Step 1: Download Dr.Fone
Step 2: Launch Dr.Fone
Step 3: Select the Phone Transfer module and connect your Lava Yuva 3s to the computer

Step 4: When the Lava Yuva 3 devices are connected, select the Contacts category to transfer and click Start Transfer. Within seconds, your contacts will be transferred to the new device.

That’s it! It is that easy. Connect your devices, select what to transfer, click Start Transfer, and boom! You’re good to go. If you are thinking about WhatsApp chats, that is handled easily, too, using the WhatsApp Transfer module. You’re going to have a wide smile plastered all over your face when you try this and experience how seamless and easy this is, everything integrated into one easy-to-use app called Dr.Fone.
Transferring contacts from one Android to another Android can be done in two broad ways. One is to transfer contacts from an Android smartphone to another using Bluetooth, which means you can transfer between any smartphone easily and whenever you wish to, without limitations such as which manufacturer the smartphone belongs to. But, how about some more control over what you transfer? If you do not want to use Bluetooth, there is the other way to simply enable Sync in your Google Account, post which your contacts will be uploaded to your Google Account and downloaded to your other device. Or, when you want to do more than transfer, or when you want to have the convenience of doing things from your computer, you have a third way, where you can use Dr.Fone with the Phone Transfer module that lets you select what to transfer, and importantly, lets you transfer between manufacturers easily. So you want to transfer from Lava Yuva 3 to iPhone, you can do that. You want to transfer from an Android smartphone to another, you can do that. You want to transfer contacts and other data from one manufacturer to another, you can do that. All in just three steps - connect, select, click.
Best 3 Software to Transfer Files to/from Your Lava Yuva 3 via a USB Cable
If you are worried about deleting important information from your Lava Yuva 3, you may wish to simply transfer it up to your computer to keep it. Or you may simply want to transfer the photos from your day at the beach onto your computer.
However, due to the open nature of the Google Android operating system, there are several software available that aim to help you manage your Lava Yuva 3 through your computer. In this article, we will look at some of the best Android software management software available. Note that all the software enables you to connect Android to PC for file transfer , as well as allowing the selection of specific files onto your computer. But, some are better than other.
Wondershare Dr.Fone
Wondershare Dr.Fone
One-Stop Solution for Android USB File Transfer
- Transfer files between Android and computer, including contacts, photos, music, SMS, and more.
- Manage, export/import your music, photos, videos, contacts, SMS, Apps, etc.
- Easily integrate the entire iTunes library with a click.
- Work much faster and incredibly stable.
- Transfer iTunes to Android (and vice versa).
- Manage your Lava Yuva 3 on your computer.
- Fully compatible with the latest Android version.
4,761,338 people have downloaded it
Refer to the following guide for Android USB file transfer:
Step 1. Download Dr.Fone and install it on your computer. Connect your Lava Yuva 3 to your PC with USB Cable. Notice how it displays the same image that is on the screen of your device.

Step 2. Click on your Lava Yuva 3, such as Galaxy S22 > Export All Data among other options. The following main interface for Wondershare Dr.Fone will be displayed.
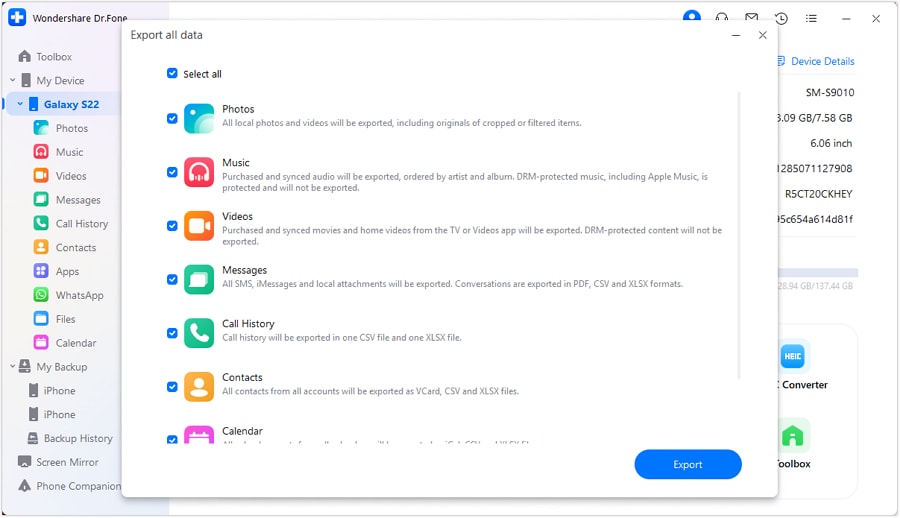
Step 3. You can select the file type you want to transfer to the computer or select all file types. Then, click “Export”. Wait for the transfer process to complete.

Video Guide: How to Achieve Android USB File Transfer with PC?
Wondershare Dr.Fone also features other helpful tools, such as the De-Duplicate option, which automatically scans all your contacts for any repetitions, which is always a nuisance (you often end up with duplicate contacts if you sync your contacts with Facebook, as well as already having them on your device, for example).
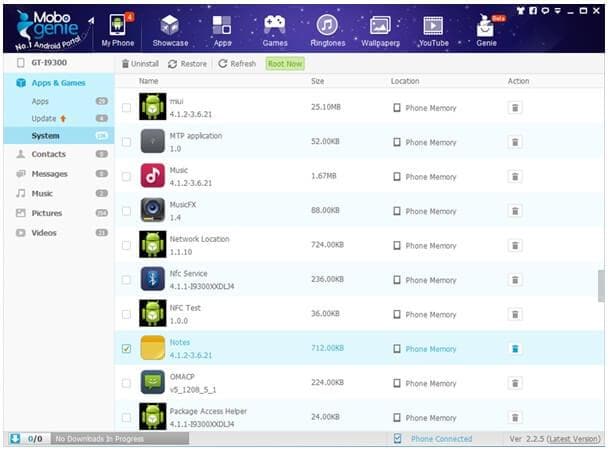
Mobogenie Android USB File Transfer
Advantages:
- Uninstall stock apps in batches.
- Easy-to-use interface.
- Easily download and manage apps.
- Easily transfer multiple files from your PC to your Android, and vice versa.
- Free of charge.
Disadvantages:
- USB only.
- Only connect one Android device at a time.
- Does not have integrated music sharing.
Overview:
Download Mobogenie and run it, and connect your Lava Yuva 3 to the computer. Once your device has been connected, you will be prompted to install the driver for your device so that the application is automatically downloaded onto it. Once you have completed this process, you will be taken to the home screen:
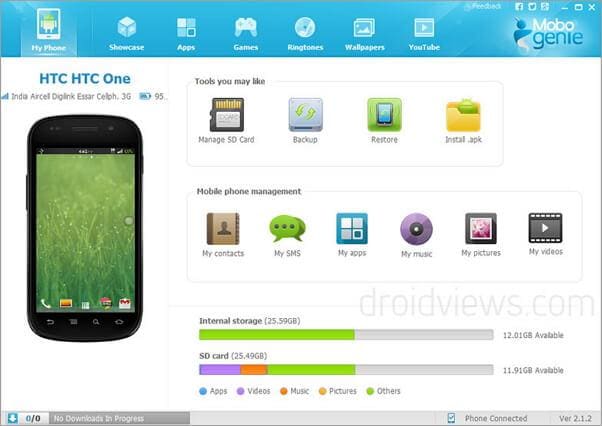
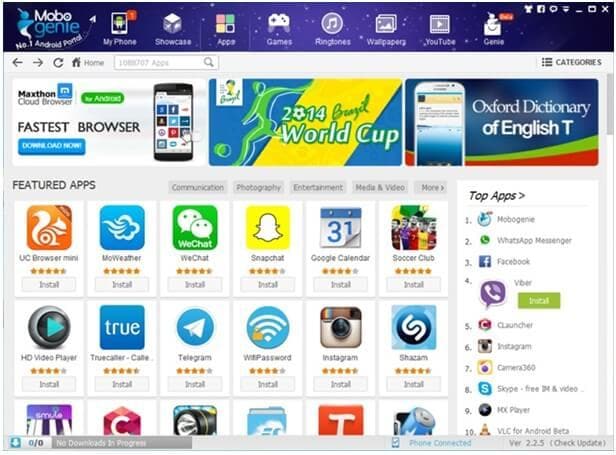
As with other data management software, you can download and install apps onto your Lava Yuva 3 from your PC. The advantage of this is that apps can be downloaded quickly, and also without costing you in terms of data roaming charges.
A neat feature is the ability to uninstall apps that came preloaded on the phone as often we find ourselves with apps that we never use that we cannot delete.
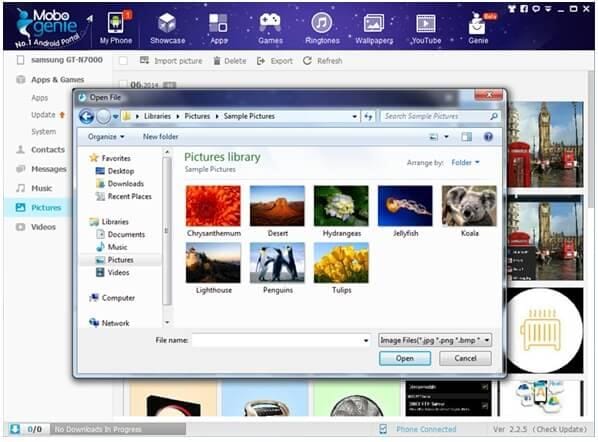
The transfer of photo files is straightforward, and several photos can be selected from your computer to import onto your device at once, or vice versa.
Features:
- Free.
- Support wireless connection of devices on the same network (although temperamental).
- Support multiple devices.
- Download apps onto it through app store.
- Simple to use.
Overview:
Download MoboRobo and install this Android USB file transfer tool on your computer. Upon opening it, you will be prompted to connect your Lava Yuva 3 with a USB cable or over WiFi, and then once connected, you will be asked permission to install the app on your Lava Yuva 3 as well.
Once connected, you will be brought to this home page, notice the options to use different devices as well as connected through Wi-Fi.
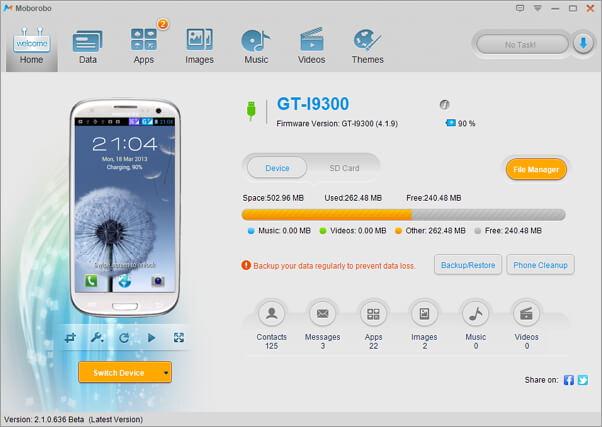
As with Mobogenie, once you are on the software, it is fairly easy to navigate around, and you can do everything from sending SMS from your PC to transferring apps and contacts. However, a drawback is that the management of your music requires you to have all your MP3 files on your PC and move them on to the software- not extremely inconvenient, but as we will see much easier solutions exist.
We recommend the use of Wondershare Dr.Fone, as it is more reliable and provides a simple user-friendly interface that allows you to manage your Lava Yuva 3 with ease. You can also transfer files between Android and Mac easily.
- Title: 5 Easy Ways to Copy Contacts from Lava Yuva 3 to iPhone 14 and 15 | Dr.fone
- Author: Nova
- Created at : 2024-08-20 17:26:30
- Updated at : 2024-08-21 17:26:30
- Link: https://blog-min.techidaily.com/5-easy-ways-to-copy-contacts-from-lava-yuva-3-to-iphone-14-and-15-drfone-by-drfone-transfer-from-android-transfer-from-android/
- License: This work is licensed under CC BY-NC-SA 4.0.