
5 Techniques to Transfer Data from Motorola Moto E13 to iPhone 15/14/13/12 | Dr.fone
5 Techniques to Transfer Data from Motorola Moto E13 to iPhone 15/14/13/12
It comes as no surprise that the new iPhone 15 series is turning heads and making a splash worldwide. Well, why not? These recently launched Apple devices are packed with highly advanced features that offer an unparalleled mobile experience to everyone. Among them are the USB-C port for faster charging and the improved A16 Bionic chip for smoother performance. Therefore, it’s fair to say that any model from the iPhone 15 catalog is worthy of ultimate consideration.
Switching to a brand-new smartphone requires plenty of work. You first need to set up the new device and configure your digital accounts. But with regard to data transfer and file synchronization, you don’t have to worry a lot. There are many ways you can try to quickly transfer data from Motorola Moto E13 to iPhone 15.
In this article, we’ll talk about the essential factors involved in data migration of two devices with different operating systems. We will also provide a few tutorials on how to transfer data from Motorola Moto E13 to iPhone 15 conveniently. Continue reading below to learn more.
Factors to Consider When Transferring Data From Motorola Moto E13 to iPhone
It’s probably true to say that data migration is a major procedure. It’s not just a simple file-sharing method that can be completed in no time. A lot of things are involved when data is transferred from one device to another. To help you understand it better, below is a list of factors affecting the quality and speed of data migration.
File Size
The size of files being transferred affects the process in general. This is because the Motorola Moto E13 device on the receiving end needs to allocate the data individually to the available space. That’s why the procedure often takes some time to complete if the volume of files is quite large. On the hand one hand, data migration gets completed in a snap if the file size is smaller.
File Type
The type of files involved in the data transfer is also a factor. Why so? The simplest explanation is that compatibility matters a lot in any form of file transfer. For instance, the procedure will likely fail if the receiver’s device does not support the data you’re trying to send. But don’t worry. There are lots of methods to transfer data from Motorola Moto E13 to iPhone 15 if your first try doesn’t work out.
Device Storage
Device storage is definitely the first thing you should check before going ahead with the data transfer. It is important that the receiver’s device has adequate memory to accommodate the incoming files. Otherwise, the transfer will likely not push through.

Operating Systems
Migrating files between two smartphones with the same operating system is convenient. It’s because these two devices share an identical data-sharing structure. On the one hand, data migration between two smartphones with different operating systems is almost similar to the former. It’s just that the steps for the latter are quite longer. But don’t sweat it. There are many tutorials that can help you transfer data from Motorola Moto E13 to iPhone 15 conveniently.
5 Various Ways to Transfer Data From Motorola Moto E13 to iPhone 15
Sharing files between Android and iOS smartphones has become a lot easier today than ever before. In fact, you can actually complete the entire process in just a matter of minutes. No need for any advanced intervention or external assistance. Just initiate the specific technique that perfectly matches your circumstances. With that said, listed below are the top five methods to transfer data from Motorola Moto E13 to iPhone 15.

Method 1: Transfer contacts from Motorola Moto E13 to iPhone 15 using iCloud
Do you need to transfer contacts from Motorola Moto E13 to iPhone 15? Well, you can easily do that by importing your Android contacts to iCloud. Don’t worry. The steps are very simple. Here’s how to do it quickly and easily.
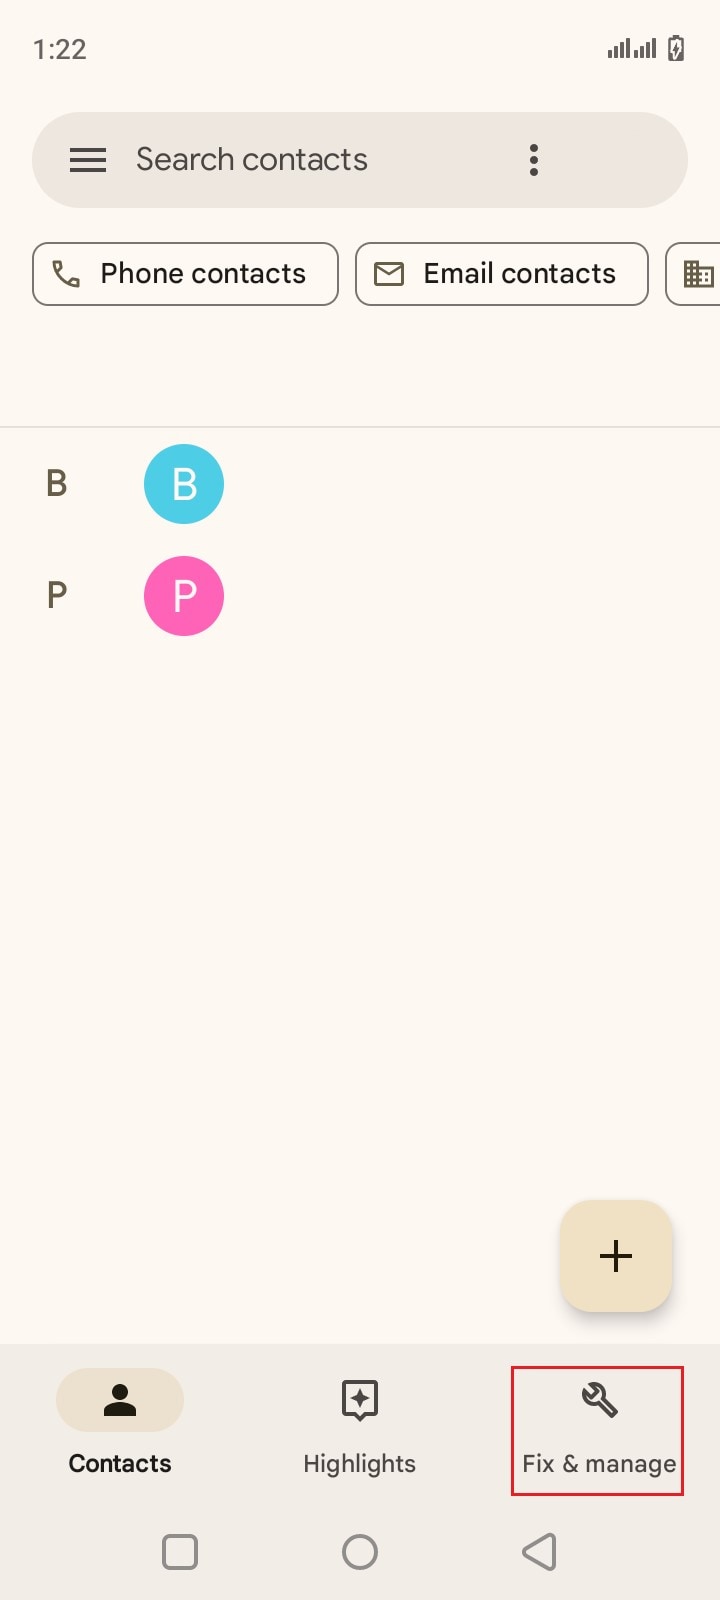
- Step 1: On your Motorola Moto E13 smartphone, go to the Contacts app.
- Step 2: Click Fix & Manage.
- Step 3: Click Export to File.
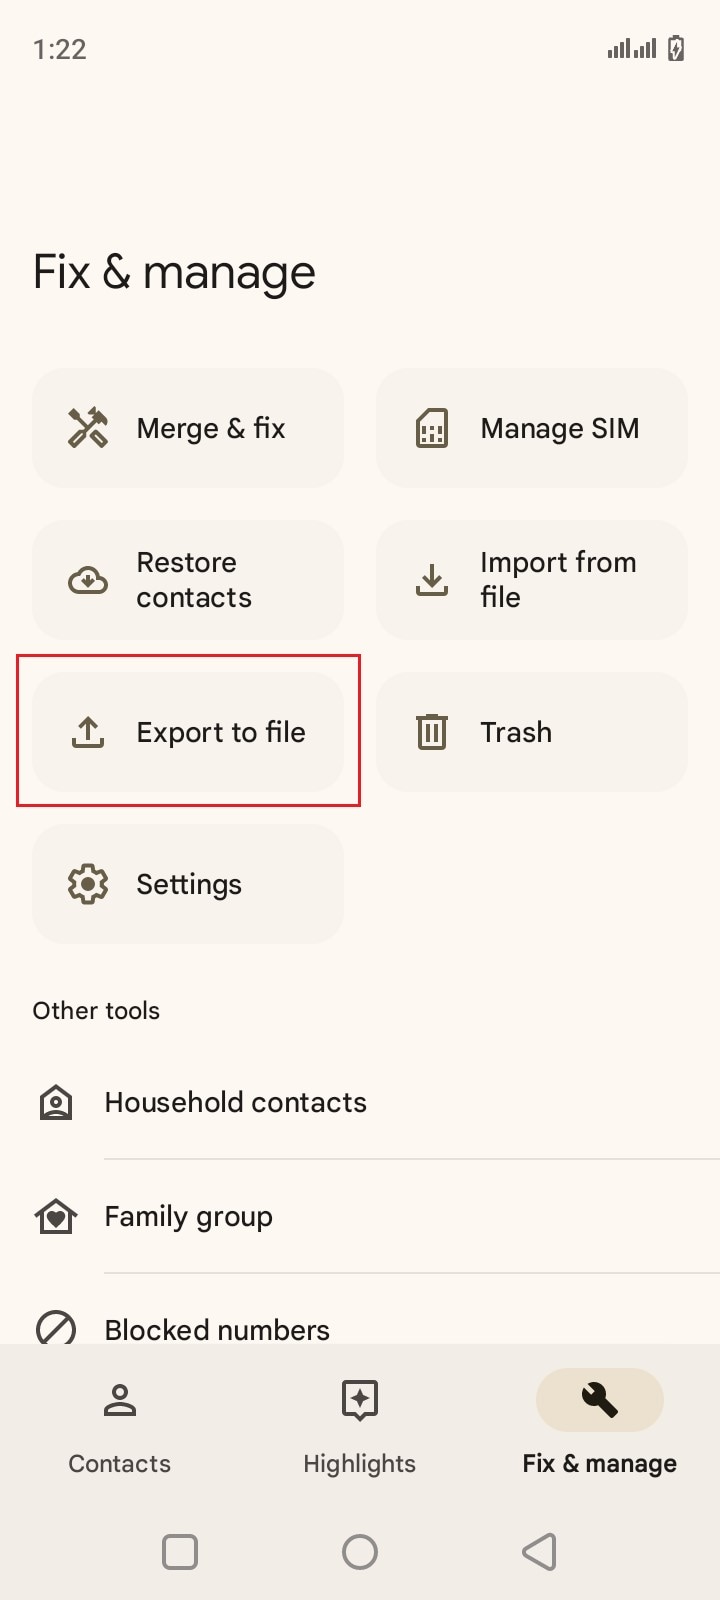
- Step 4: Choose the specific account that contains the contact list you want to export.
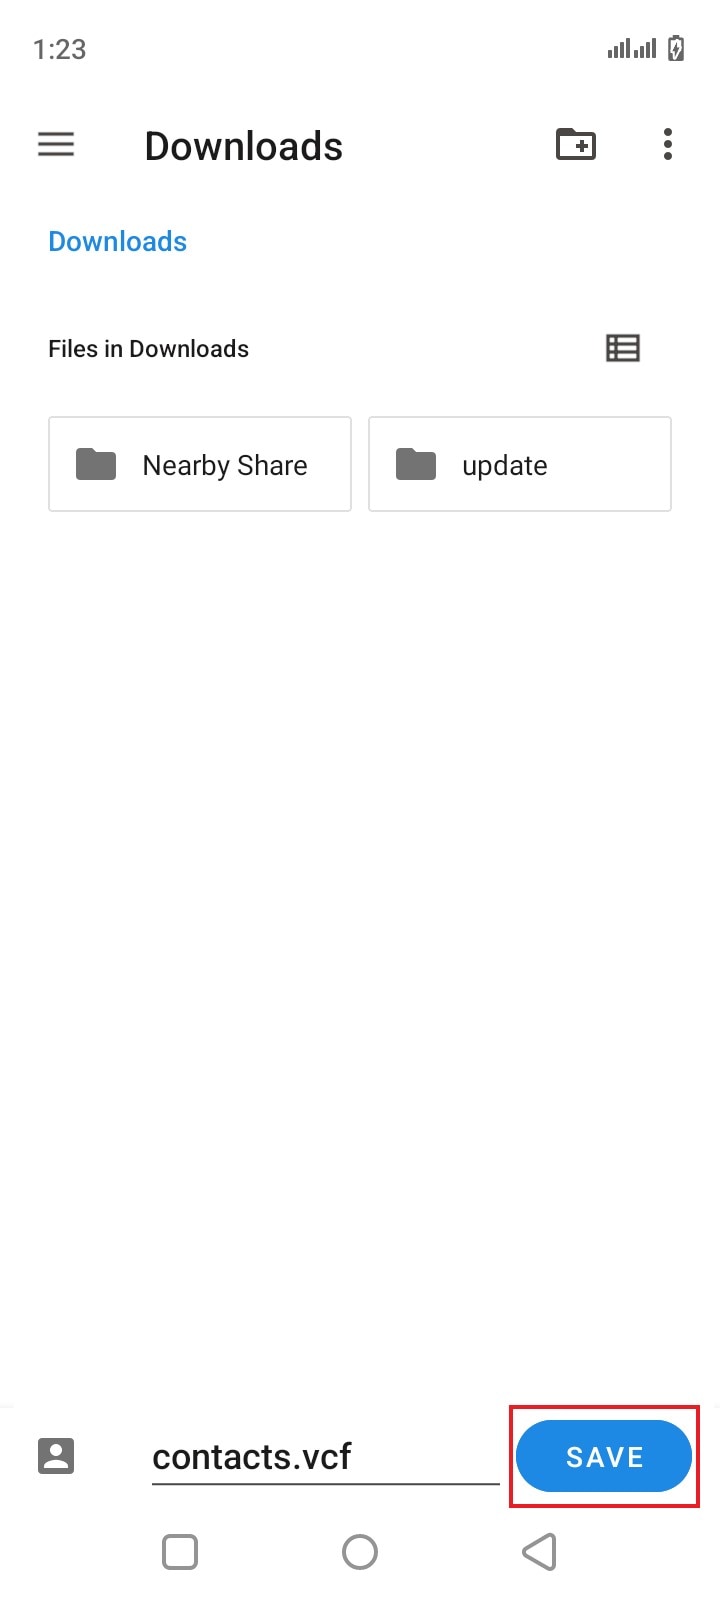
- Step 5: Then, click Save.

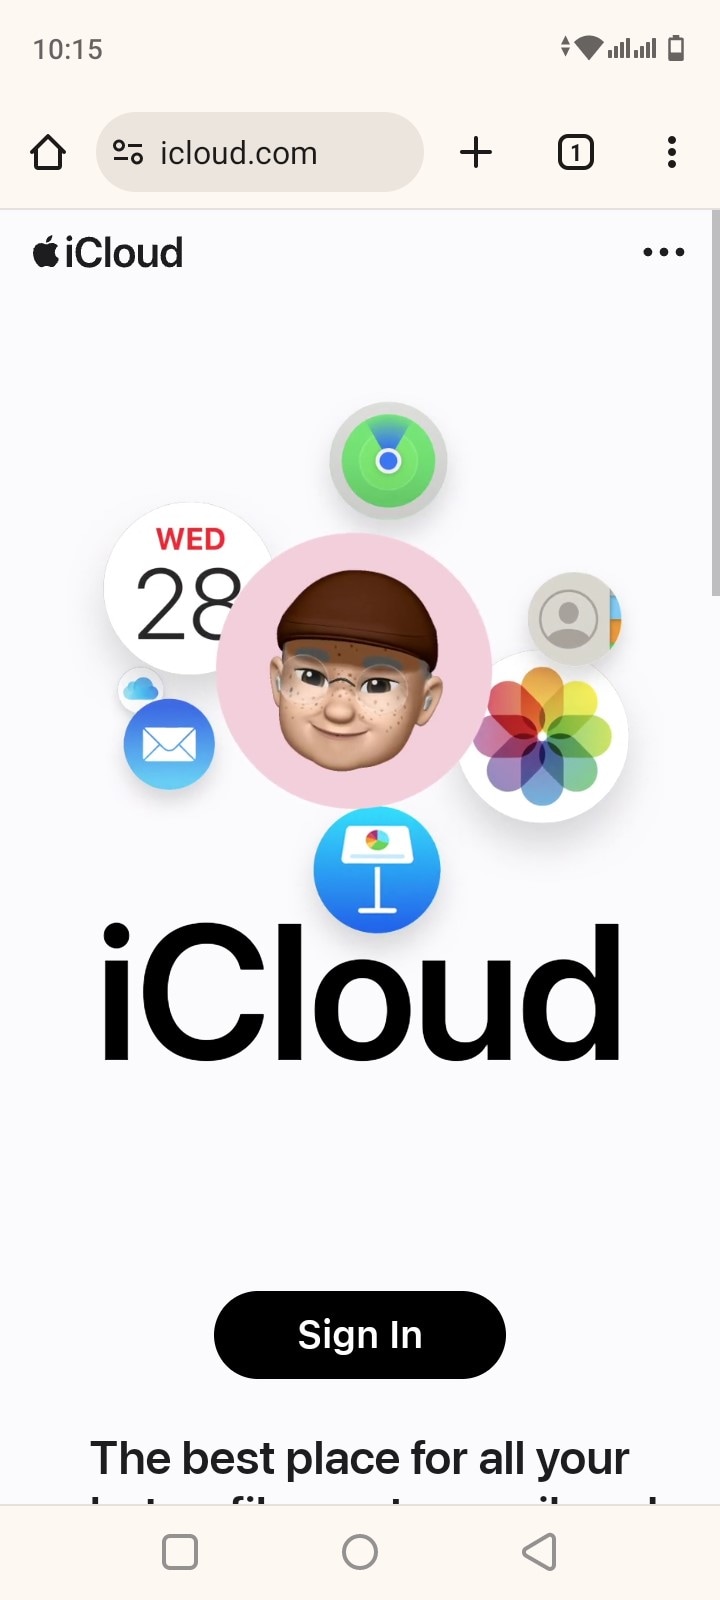
- Step 6: Launch the Browser app on your Motorola Moto E13 smartphone.
- Step 7: Visit icloud.com and then log in to the iCloud account you’re currently using on your iPhone 15. From there, import the VCF file.
- Step 8: Once the contact list has been imported successfully, check the Contact app on your iPhone and then find the newly uploaded contacts.
Method 2: Transfer photos from Motorola Moto E13 to iPhone 15 using Google Photos
Google Photos is not just a mere gallery application that allows users to view media files. It can also aid in the data migration between two devices since Google Photos stores the files online. Do you want to try it now? Here’s the guide on how to transfer data from Motorola Moto E13 to iPhone 15 using Google Photos.
- Step 1: Go to the Google Photos application on your Motorola Moto E13 smartphone.
- Step 2: Click your Profile icon at the top-right corner of your screen.
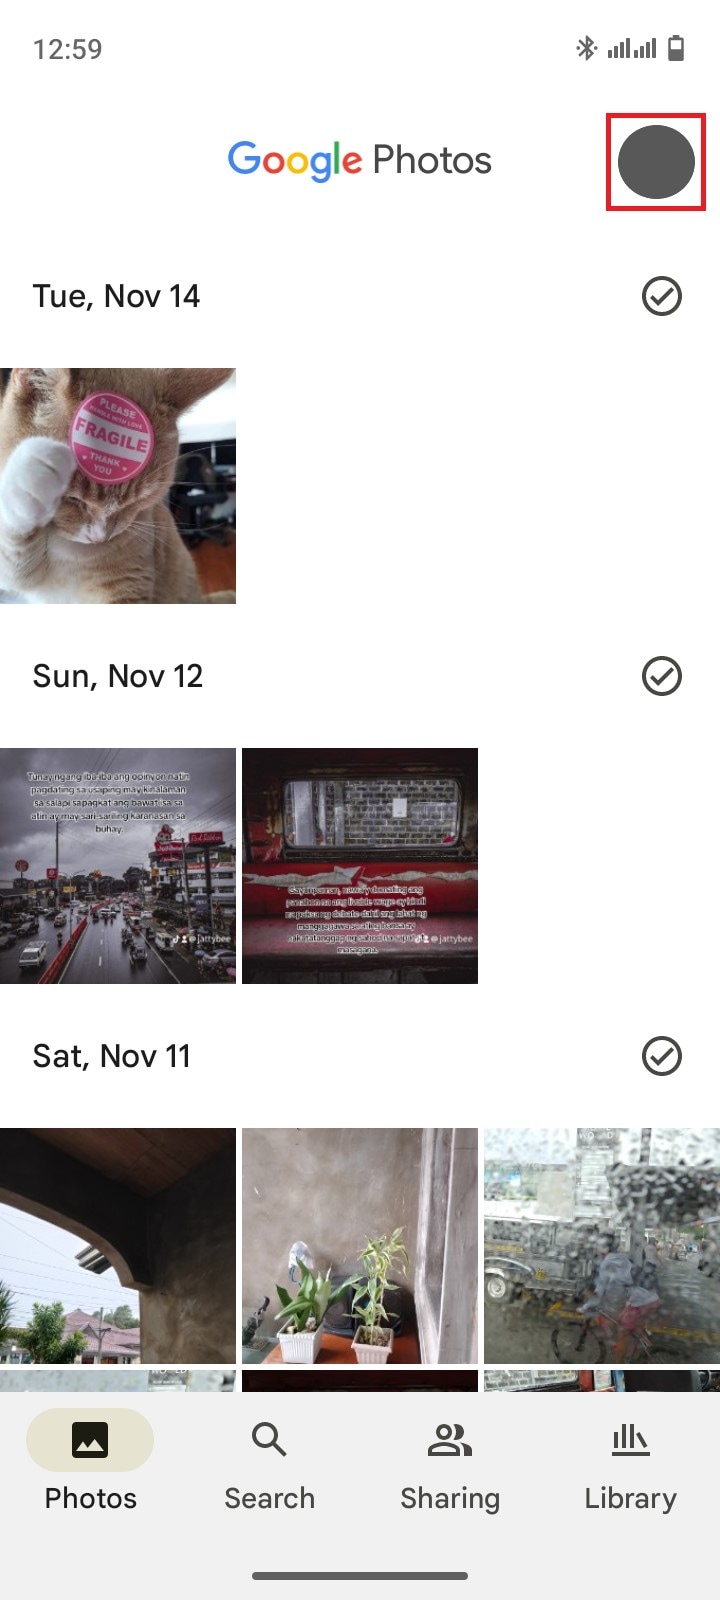
- Step 3: Click Back Up Now. At this point, Google Photos will back up your local photos to the Google servers.
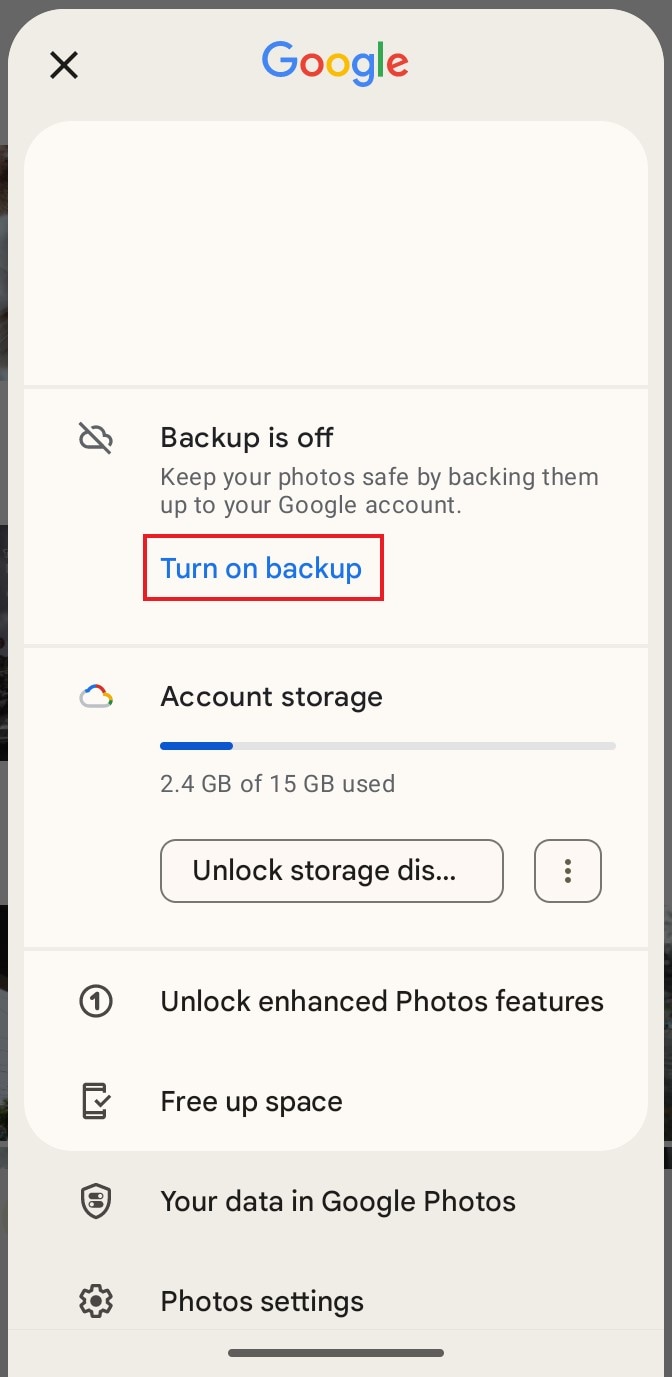
- Step 4: On your iPhone, download and install the Google Photos application. Log in to the same Gmail account you use to back up the photos on your Motorola Moto E13 device. From there, access the media files and save them to the local storage of your iPhone 15.
Method 3: Transfer emails and calendar details from Motorola Moto E13 to iPhone 15 using Gmail
Do you use Gmail to manage your emails and organize your calendar appointments? If so, you can easily transfer data from Motorola Moto E13 to iPhone 15 by simply syncing your Gmail account. Here’s a quick guide on how to do it.
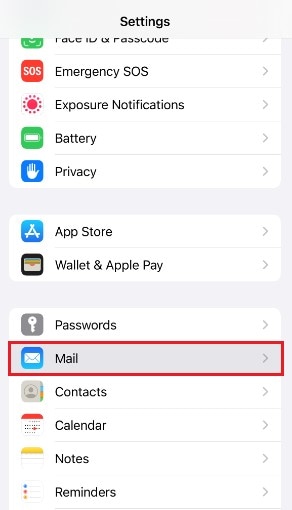
- Step 1: Go to the Settings app on your iPhone 15.
- Step 2: Click Mail.
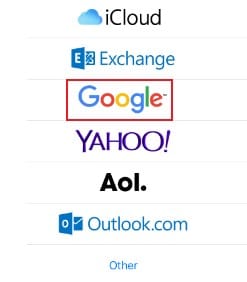
- Step 3: Click Accounts. Right after, click Add Account.
- Step 4: Select Google. From there, log in to your Gmail account.
- Step 5: Toggle on the radio button next to Mail and Calendar.
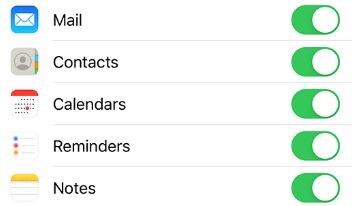
- Step 6: Check your Mail and Calendar applications. Find the Gmail data you’ve just synced.
Method 4: Transfer data from Motorola Moto E13 to iPhone 15 using Move to iOS
Move to iOS is a mobile application that automates data migration between Android to iOS devices. It’s very simple to navigate and easy to use. In fact, you can complete the entire process within a few minutes. Here’s a short guide on how to transfer data from Motorola Moto E13 to iPhone 15 using Move to iOS.
- Step 1: On your Motorola Moto E13, install the Move to iOS application from Google Playstore.
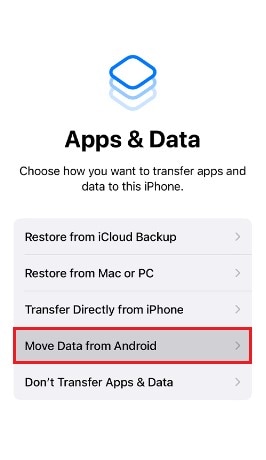
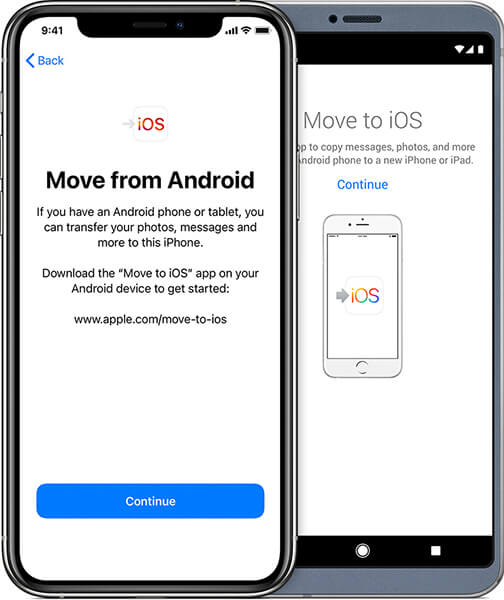
- Step 2: While the application is being downloaded on your Android smartphone, start setting up your new iPhone 15. On the App & Data screen, select Move Data From Android.
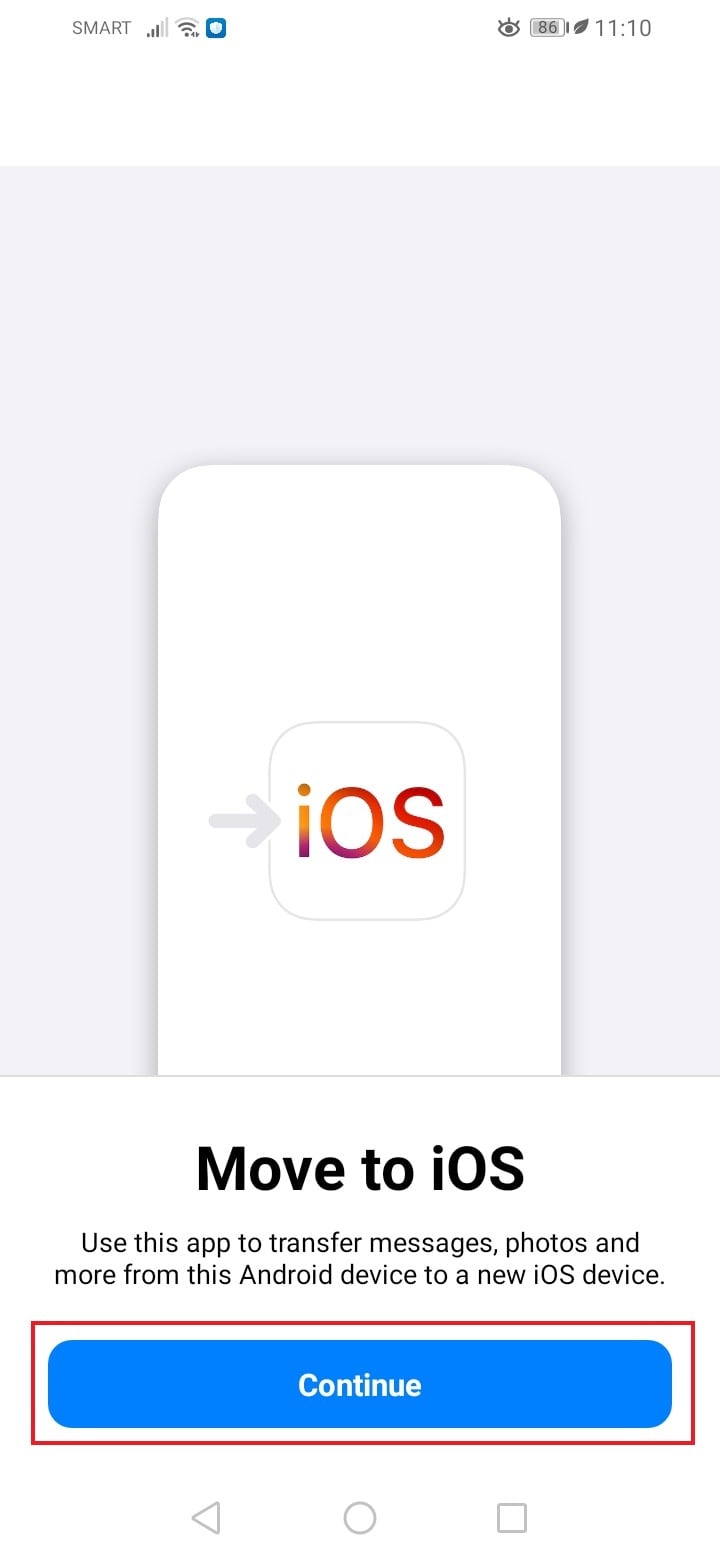
- Step 3: Get back to your Motorola Moto E13 smartphone and then launch the newly installed Move to iOS application.
- Step 4: Read Apple’s Terms and Conditions. Right after, click Agree to proceed.
- Step 5: Click Continue.

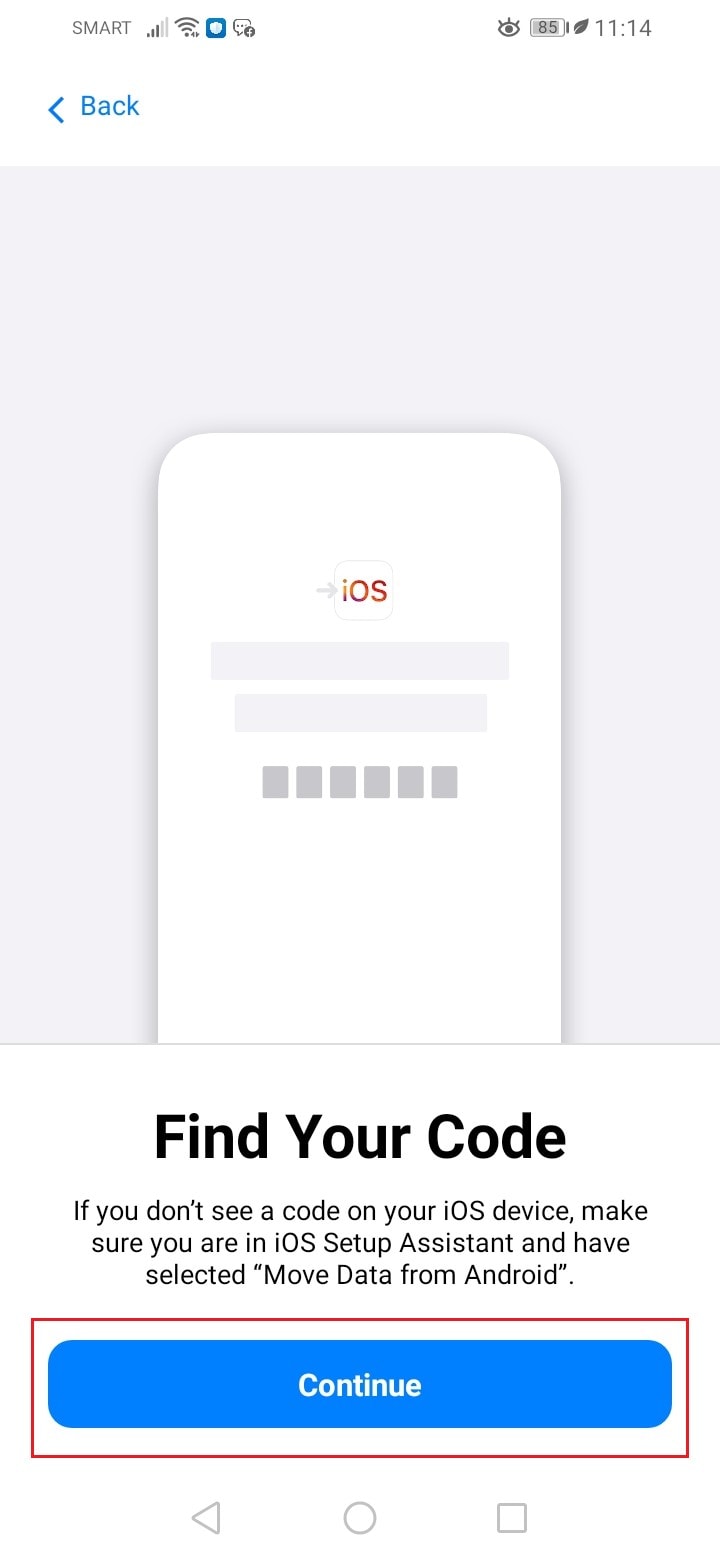
- Step 6: On the Find Your Code page, click Continue to connect your Motorola Moto E13 to your new iPhone 15.
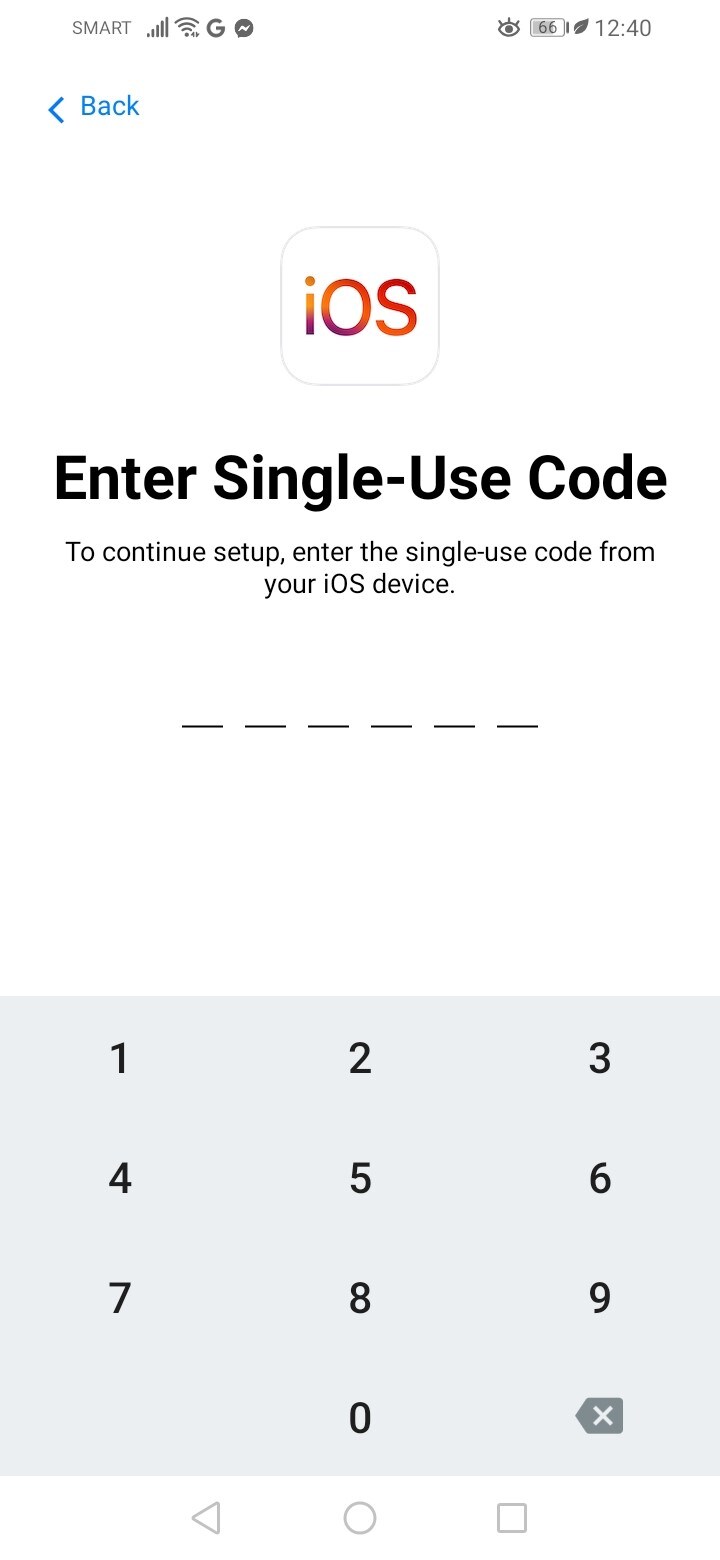
- Step 7: Find the unique code displayed on your iPhone 15 screen. Then, enter it into your Motorola Moto E13 smartphone.
- Step 8: Choose the files you want to transfer. After that, initiate the process. Wait until all the files have been transferred to your new iPhone 15.
Method 5: Transfer data from Motorola Moto E13 to iPhone 15 using Wondershare Dr.Fone.
There’s no denying that the first four methods are all effective in this regard. But if you wish to opt for a more convenient option, Wondershare Dr.Fone can absolutely help you with that. It has a powerful data migration feature that can help you transfer data from Motorola Moto E13 to iPhone 15. Here’s a short guide to get you started.
- Step 1: Download Wondershare Dr.Fone from its official website. Then, install it on your computer.
- Step 2: Launch the newly installed Wondershare Dr.Fone on your desktop. Once it fully loads up, connect your Motorola Moto E13 and iPhone 15 using a data cable.
- Step 3: Go to the left-side panel and then click Toolbox. Choose Phone Transfer among the provided options on the main dashboard.

- Step 4: Wondershare Dr.Fone will then ask you to nominate a Source and a Target from your two mobile devices. Set the Motorola Moto E13 as the former and the iPhone 15 as the latter. Alternatively, click the Flip button to modify the direction of the transfer based on your preference.

- Step 5: Select the specific categories of files you want to transfer. Right after, click Start Transfer to proceed.

- Step 6: Wait while Wondershare Dr.Fone is facilitating the transfer. If you wish to terminate the progress, simply click Cancel.

- Step 7: After completing the process, click OK to wrap it up. Check your files from their respective locations afterward.

How to Back Up Your Motorola Moto E13 Before the Transfer
Data migration by means of the five methods enumerated above is considered safe and secure. However, it doesn’t mean that implementing preventive measures against data loss is no longer necessary. Backing up your device before any major procedure is still highly recommended. That’s why don’t initiate the phone transfer without backing up your files first. Below is the guide on how to back up files using Wondershare Dr.Fone.
- Step 1: Launch the Wondershare Dr.Fone application on your computer. Then, connect your Motorola Moto E13 using a data cable.
- Step 2: Access the left-side panel and then click My Backup. On the main dashboard, click Back Up Now.


- Step 3: Follow the on-screen instructions for SMS backup. After that, click OK to proceed.

- Step 4: Wait while Wondershare Dr.Fone is backing up your files.

- Step 5: After completing the backup process, click View Backups or Open in Folder to check your files.

Conclusion
Data migration is the least of your concerns when switching to a new smartphone. Why so? The simplest explanation is that there are phone transfer methods to choose from. Big thanks to modern technology and digital advancements. Refer to the provided guide below if you need to transfer data from Motorola Moto E13 to iPhone 15. One of them can help you a lot, depending on your current circumstances. Do you want a more convenient option? The phone transfer feature of Wondershare Dr.Fone is what you’re looking for. Download the application for free and take advantage of its all-in mobile solution features.
[Solved] Move from Motorola Moto E13 to iOS not Working Problems
You might be wondering, what is the Move to iOS? If you are an android user and have decided to shift to the iPhone, you will need the Move to iOS tool. The app is developed to help transfer data from an android device to iOS devices. Google play store has the app, and it’s free.
To use the app, install it on your android device first. The transfer process requires following several simple steps to move to iOS. The app seems easy to use the tool, but newbies must learn about the Move to iOS guidelines to complete the process. With this tool, you will transfer various android data such as camera photos, contacts, message history, mail accounts, calendars, and videos.
Move to iOS app works on android version 4.0 or higher. You can transfer data to any iPhone in a relatively straightforward process. Also, beware that the Move to iOS will work only when setting up a new iPhone or iPad.
Besides knowing what the content that Moves to iOS tool can transfer, you might be wondering how long the process can take. Depending on the content you want to transfer, the process generally takes around 10 – 30 minutes. However, other factors can determine the time the app will take to move content to iOS. They include the speed of the network, patency of the transmission process, and Wi-Fi stability.
Part 1: Move to iOS not working problem lists
Users can learn to use the Move to iOS app quickly. However, they will occasionally experience problems while using this tool. If the app runs into errors, you will encounter some problems.
- Move to iOS no code.
These steps will help you get the Move to iOS code;
When setting up your iPhone, tap on the move data from the android option. Then, launch the Move to ios app on your android device and tap continue. You will see the find you code screen; tap on the .next’ button to continue.
Tap on the continue button on your iOS device and wait for a ten-digit code to appear.
Once you receive the code on your iPhone, enter it on the android device and wait for the Motorola Moto E13 devices to connect. Select all the content you want to move and click Next.
Once the loading bar on the iOS device is done, tap on the ‘Done’ button on your android device. Proceed to set up your iOS device using the onscreen steps.
If you are not receiving any code on your iOS device, you can fix it by ensuring the Wi-Fi is always on throughout the process. You can also reboot your devices if the error is temporary.
- Move to iOS could not communicate correctly with the Motorola Moto E13 devices.
To avoid this Move to iOS error, ensure both devices run on updated operating systems, i.e., android 4.0 or later and iOS 9 or later. The phones must have enough power, and lastly, ensure that you turn off background apps to avoid notifications during the transfer process.
- Move to iOS stuck on preparing/transferring.
You are transferring your android data to iOS, but the process is stuck on the transferring page. The problem is related to Wi-Fi connections. Should the Wi-Fi disconnect for a few seconds, the transfer process stops. Other distractions on android such as calls, switching to sleep mode, or other background operations might also cause the Move to iOS error.
- Move to iOS takes forever/slow.
The length of time taken to transfer data from android to iOS depends on the size of the data and Wi-Fi connection. To speed up the transfer, check your Wi-Fi connection, delete unnecessary data from the android device, or restart the transfer if it takes too long.
- Move to iOS Wi-Fi disconnect.
Wi-Fi drops will obviously interfere with the transfer process. To avoid this error, you can reset your router and the network and turn off smart switching and airplane mode.
- Move to iOS interrupted
If the Move to iOS process is interrupted, you can fix it by restarting the phone, check your network connections on both devices, turn off the smart network swath on android and turn on the airplane mode.
- Move to iOS, not connecting devices.
The circumstances can be frustrating as the transfer process will not be completed successfully. But what is the solution to all these problems? We will discuss the solutions to move to iOS not working in the later sections of this article.
While the Move to iOS app can be easy to use, you need to know a couple of things before transferring.
- Ensure the android and iOS device can connect to Wi-Fi
- Ensure the Motorola Moto E13 devices have enough power to complete the process/ plug the Motorola Moto E13 devices into power
- The iOS device should run on iOS 9.0 or higher
- The android device should run on android 4.0 or higher
- Check the capacity of the transferred content, whether it will fit the new iOS device.
- Update chrome on android to the latest version to transfer bookmarks
Part 2: 9 Tips about moving to iOS not working problems
Even though Move to iOS is a useful tool for android users willing to transfer content to the iOS device, there are several instances where it fails to work correctly. The app will show a message indicating the type of error you are experiencing during the transfer process.
Most of the ‘move to iOS’ problems are related to Wi-Fi connection issues, android and iOS versions, space requirements, connection optimizers, and application issues. Nevertheless, you will need to find a solution to these problems to transfer your data successfully from android to iOS devices. This section will discuss possible solutions to the errors that occasionally appear when moving android data to iOS devices.
Tip 1: Restart both your devices
Restarting your devices is the essential thing to do when troubleshooting the Move to iOS problems. It is a great way o eliminate minor issues during data transfer from android to iOS devices. The process can resolve the Move to iOS stuck on connecting to iPhone issues. A simple restart will eliminate the bugs and any cached error in the Motorola Moto E13 devices.
Tip 2: Clear all running apps
It is recommended to avoid using the android device o run applications when using the Move to iOS app. Since the app runs in the foreground, you should ensure all other apps in the android are disabled before starting the data transfer process. Notifications and incoming calls are likely to interfere with the process; therefore, users must ensure such distraction is not happening by disabling such apps.
Tip 3: Make sure the Wi-Fi connection is turned on
Wi-Fi connectivity is a significant factor in ensuring data transfer is successful. Since Move to iOS relies on Wi-Fi, you should ensure it Is turned on and is stable. The iPhone usually creates a private network for the android device to connect. Please turn on the Wi-Fi connection on your android to make it ready to connect to the iPhone’s private network. This will make it possible to send the Move to iOS code to initiate the data transfer process.
Tip 4: Plug both devices to power
You should ensure that both the android and iOS devices have sufficient power to run through the entire data transfer process. If you doubt the power consumption, keep the Motorola Moto E13 devices connected to power before you start moving your content from android to iOS device.
Tip 5: Set your phone into airplane mode
When you transfer android data to iOS using the Move to iOS tool, apple recommends that you turn off your mobile data. Some android devices can switch from Wi-Fi to mobile data when the connection tends to drop on either side using the smart switch feature. This can interfere with the transfer process. Similarly, it could be useful if incoming calls were prevented to avoid interfering with the data transfer process. All mediums of connectivity are disabled except for the connection between the android and iOS devices through the iPhones Wi-Fi network.
The best way to ensure these distractions are not happening is to turn on airplane mode on the android device.
Tip 6: Check the storage requirement
Before you begin transferring android data to iOS devices, check the size of all content including the external micro SD card, to determine whether it fits into the new iOS device. If the content is larger than the destination storage, you will obviously encounter an error during the transfer process. You need to delete the content you don’t need to transfer from your android device before getting started.
Tip 7: Disable the connection optimizer
Android devices with connection optimizers will switch between different connections for better connectivity. Since the Move to iOS app utilizes the iPhones private network, the connection optimizer might start using mobile data or switch to another Wi-Fi connection when the current connection drops. The circumstance can break the connection between the android ad iOS device hence interfering with the data transfer process. Be sure to turn off the feature from settings before running the Move to iOS app.
Tip 8: Check the compatibility of your devices
You need to check whether your android device meets the minimum requirements to be compatible with the Move to iOS app, much like other apps found on the App Store and Google play store. Generally, the app runs on Android 4.0 and above while transferring data to iOS 9.0 or later devices.

Tip 9: Turn off battery optimization
Turning off the battery optimization on both your Android and iOS device is a requirement when using the Move to iOS tool. The app is designed to run in the foreground, and the android user should not have other applications running. However, the phone might automatically minimize the Move to iOS app when it switches to battery optimization mode. Therefore you should ensure the feature is closed from the settings of your android device.
Part 3: [Alternative] Move to iOS not working solved without a PC
An alternative solution to Move to iOS not working problem is to use Dr. Fone – Phone Manager (iOS) . The software can transfer all types of data from android to iOS devices quickly. Here, you will select the type of data you need and begin moving in a single click.
Most importantly, the programs transfer data at a very high speed compared to other alternatives. You can also use the software to transfer social apps and retain the important history of apps like WhatsApp, Wechat, Viber, Line, or Kik.
Dr.Fone - Phone Manager (iOS)
Move/Transfer Android data from Computer to iPod/iPhone/iPad without iTunes
- Transfer, manage, export/import your music, photos, videos, contacts, SMS, Apps, etc.
- Back up your music, photos, videos, contacts, SMS, Apps, etc., to the computer and restore them easily.
- Transfer music, photos, videos, contacts, messages, etc., from one smartphone to another.
- Transfer media files between iOS devices and iTunes.
- Fully compatible with iOS 7 to iOS 15 and iPod.
3981454 people have downloaded it
Here is how to transfer data from iOS to android device without a PC
You need to login to your iCloud account on android to download data, or you can use the iOS-to-android adapter to connect your iPhone to android to transfer data directly.
Use the following simple steps.
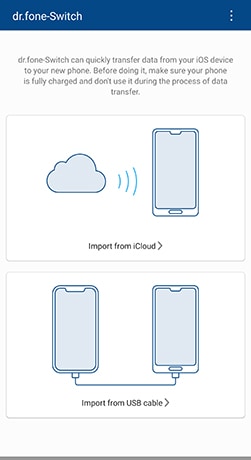
Install Dr. Fone- Phone Transfer app on your android device and click on the ‘Import From iCloud’ option.
Use your apple passcode to log in to the iCloud account. You will be required to enter a verification code if prompted to two-factor authentication.
Select from the list of data detected from iCloud and tap on start importing.
Wait for the data transfer process to complete.
To transfer content from your iPhone to Android device directly, open Dr. Fone – Phone Transfer on android and tap ‘import from a USB cable.’ Use the iOS-to-android cable to connect your iOS and Android devices.
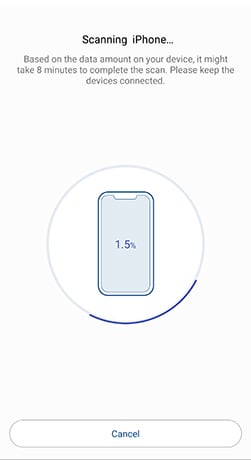
Dr. Fone – Phone Transfer will begin to scan data on your iPhone. The time will depend on the content on the iPhone.
Tap on ‘start importing’ once all data has been detected.
Part 4: [Alternative] Move to iOS not working solved with a PC
The following steps will help you transfer data from android to an iOS device using a PC.
- Open the Dr. Fone program on your computer and click ‘phone transfer’ from the modules displayed.
- Connect your iOS and Android devices to the computer. You can always use the ‘flip’ option to change the source and destination devices.

- Select the types of data you want to transfer, then click on the ‘start transfer’ option to continue. Be careful not to disconnect the Motorola Moto E13 devices until the process is complete.

- If you want to clear the destination phone’s data before transferring data, ensure you check the ‘clear data before copy’ box.
- All the data you selected will be transferred successfully in a few minutes.
Conclusion
Transferring data from android to iOS device has been made easier with the Move to iOS app. However, you need to consider the requirements for the data transfer process to complete successfully. You can also apply Dr. Fone – Phone Transfer as your recommended alternatives to transfer android data to the iOS device in the simplest way.

How to Transfer Content from android to iPhone Directly
Since Motorola Moto E13 is embracing Android as its operating system, transitioning from an iPhone to a Motorola Moto E13, or vice versa, can pose challenges due to the differing operating systems. But it doesn’t mean impossible!
If you’re switching to an iPhone and need to transfer all your data, this article has you covered. We will look at ways to facilitate smooth Motorola Moto E13 to iPhone transfer while ensuring your valuable information transfers across these devices with no problem.
Part 1. How to Transfer Content from Motorola Moto E13 to iPhone Directly
You must be familiar with Motorola Moto E13 Migrate if you are a Motorola Moto E13 user. It is a solution for seamless data transfer used in Motorola Moto E13 devices. With this app, you can transfer data from your Motorola Moto E13 device to others, such as iPhones.
However, most of the latest Motorola Moto E13 models are now unable to run Motorola Moto E13 Migrate since it’s a pretty outdated app. It has been retired by the company since 2015. Users are seeking alternative methods for data transfer as a result. In this section, we explore more effective solutions to transfer content directly from Motorola Moto E13 to iPhone besides Motorola Moto E13 Migrate.
Solution 1. Using ShareIt App
When Motorola Moto E13 Migrate is not an option, ShareIt can be a versatile alternative for Motorola Moto E13 to iPhone transfer. ShareIt is a popular cross-platform file-sharing application known for its simplicity and efficiency. To use it, you’ll need to download the ShareIt app on both your Motorola Moto E13 and iPhone.
If you have downloaded and installed it, you can continue with the steps below:
- Step 1: Connect your Motorola Moto E13 and iPhone devices
Since ShareIt operates by creating a hotspot network among devices, it’s necessary to have both devices connected to the same Wi-Fi network. Make sure to keep both devices close to each other, too.
- Step 2: Select the files to transfer
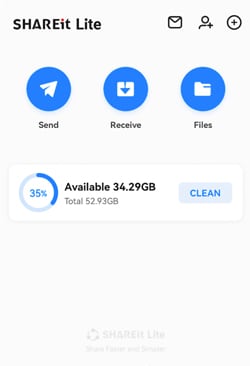
On your Motorola Moto E13 device, click the “Send” button. After a new window appears displaying all the categorized files on your device, choose the specific files you want to transfer.
- Step 3: Look for the Motorola Moto E13 device to transfer
After selecting the files, press “Send” and provide the necessary permissions for GPS and Bluetooth. Once permissions are granted, the Motorola Moto E13 device will initiate a search for nearby devices.
- Step 4: Transfer the files to the iPhone.
On your iPhone, open the ShareIt app and click “Receive.” This action opens all the necessary ports to receive shared files. When your Motorola Moto E13 phone detects your iPhone, tap on the iPhone’s avatar to proceed with the transfer.
Solution 2. Move Contents from Motorola Moto E13 to iPhone via Apps & Data
Another good alternative of Motorola Moto E13 to iPhone transfer app is Move to iOS. This Move to iOS app is designed by Apple specifically for users moving from Android devices to iPhones. You can download it from the Google Play Store. Then, you can transfer the data by accessing Apps & Data on the iPhone.
However, if you have been using your iPhone for a while, you must reset your iPhone first to proceed with this method. It can be done by going to Settings > General > Reset > Erase all content and settings. After resetting, your iPhone will be going back to the initial setup.
For more details, follow the instructions below:
Step 1: Setup your iPhone
Power up your new iPhone and progress through the initial setup until you get into the “Apps & Data” screen. Select the option that reads “Move Data from Android.”
Step 2: Agree to Terms and Conditions
Open Move to iOS on your Motorola Moto E13 phone. Review the terms and conditions and press “Agree” to proceed.
Step 3: Enter the Code
On your Motorola Moto E13, a screen will appear to request a 6-10-digit code. This code will be generated on your iPhone. Enter the displayed code on your Motorola Moto E13 device to make a secure connection between the two devices.
Step 4: Select Content to Transfer
Next, choose the types of content you wish to transfer. Tap “Continue” to initiate the transfer process. Remember to keep your devices close to each other and connected to power until the transfer process is completed for quicker transfer.
Step 5: Transfer complete.
Once the transfer is complete, you will be prompted to finish setting up your iPhone. Follow the instructions to complete the setup process.
Part 2. How To Make iPhone to Motorola Moto E13 Data Transfer Using Easy Software
One significant reason why data transfer from iPhone to Motorola Moto E13 is tricky is due to privacy concerns. Apple really prioritizes their user privacy. It implements strict security measures to prevent any breaches. While this is beneficial for users, it can also complicate data transfer.
Another contributing factor is the structure of the files. Android boasts a file system that is more straightforward, unlike iOS. As a solution, third-party software like Wondershare Dr.Fone offers tools like Phone Transfer to simplify the process. With Dr. Fone’s Phone Transfer, you can transfer any data from Motorola Moto E13 to iPhone or iPhone to Motorola Moto E13.
How to make iPhone to Motorola Moto E13 data transfer with Dr.Fone:
- Step 1: Open Dr.Fone’s Phone Transfer tool
Make a connection between your iPhone and your Motorola Moto E13 phone through USB cable on your computer. Launch Wondershare Dr.Fone on your computer and navigate to Toolbox > Phone Transfer.
- Step 2: Specify the source and destination devices
After connecting them, the platform will identify the connected devices and load their data onto the platform. Choose the Source and Destination devices to set the transfer path. Use the Flip button if necessary to alter the transfer direction.
- Step 3: Choose the data type for the transfer
Proceed to select the types of data you wish to transfer. Checkmark the category and click the Start Transfer button. If you want to remove existing data from the destination device, you can select “Clear data before copy.”

- Step 4: Disable iCloud syncing
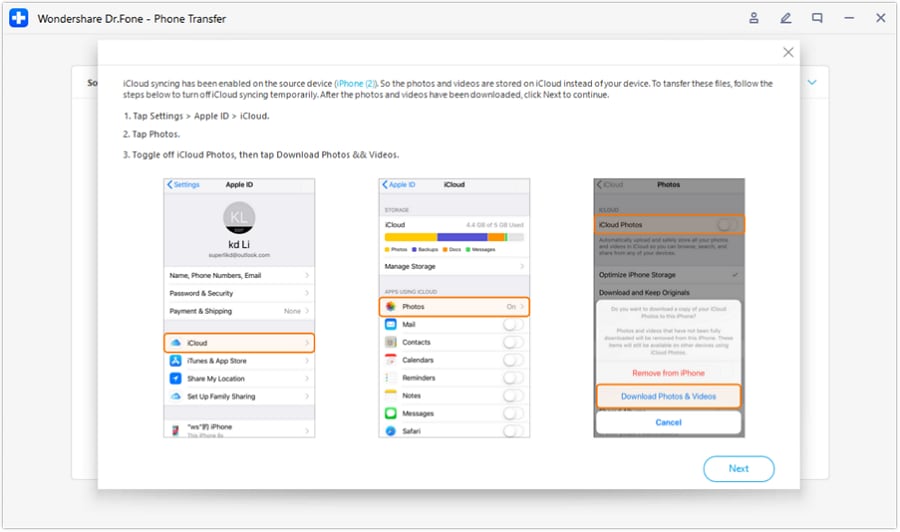
Now, Dr. Fone’s Phone Transfer tool should prompt a specific operation on the window. Follow the instructions to turn off iCloud syncing. Open your iPhone Settings and tap on your device’s name. Go to iCloud > Photos to disable the toggle for iCloud Photos.
- Step 5: Monitor data transfer progress
The progress of the data transfer will be displayed in a pop-up window. Once completed, click OK to conclude the process.
Part 3. How to Do Motorola Moto E13 to iPhone Data Transfer Using Dropbox/Google Drive
Another method for Motorola Moto E13 to iPhone transfer is using Cloud services like Dropbox or Google Drive. Both Dropbox and Google Drive serve as virtual storage spaces accessible from any device with an internet connection. Users can upload and store their files to the cloud, making them available for download on other devices.
Either Google Drive or Dropbox follows similar steps for data transfer. The difference between them is in the amount of free storage each service provides. Notably, Google Drive provides 15GB of free storage, while Dropbox offers 2GB.
Follow these steps on how to do a Motorola Moto E13 to iPhone transfer via cloud storage services.
- Step 1: Install and set up Dropbox/Google Drive:
Begin by installing the Dropbox or Google Drive app on both your Motorola Moto E13 and iPhone. Create accounts if you don’t have them already.
- Step 2: Upload the files from Motorola Moto E13
Open the cloud storage app on your Motorola Moto E13 device and upload the data you want to transfer. This can include photos, videos, documents, and more. Then, wait for the upload to complete. Make sure that all files are successfully uploaded before proceeding.
- Step 3: Sign in to the cloud storage on your iPhone
On your iPhone, open Dropbox or Google Drive and sign in with the same account. Find the transferred files in the cloud storage.
- Step 4: Download to iPhone:
Select the files you want to transfer and download them to your iPhone. Once the download is complete, organize the transferred files on your iPhone as needed.
Conclusion
Transitioning from a Motorola Moto E13 device to an iPhone, or vice versa, may present challenges due to the difference in operating systems. However, with the right tools and methods, the iPhone to Motorola Moto E13 data transfer can be done seamlessly and efficiently.
Even though Motorola Moto E13 Migrate is no longer in the game, apps like ShareIt and Move to iOS can be alternatives for a direct transfer. If things get a bit trickier when transferring from iPhone to Motorola Moto E13 due to Apple’s privacy measures, third-party software like Wondershare Dr.Fone’s Phone Transfer is there to simplify it all.
And for those who prefer the cloud, Dropbox and Google Drive also offer a solution. So, no matter your preference, there’s a solution to ensure your data transfer moves smoothly.
- Title: 5 Techniques to Transfer Data from Motorola Moto E13 to iPhone 15/14/13/12 | Dr.fone
- Author: Nova
- Created at : 2024-08-20 17:18:46
- Updated at : 2024-08-21 17:18:46
- Link: https://blog-min.techidaily.com/5-techniques-to-transfer-data-from-motorola-moto-e13-to-iphone-15141312-drfone-by-drfone-transfer-from-android-transfer-from-android/
- License: This work is licensed under CC BY-NC-SA 4.0.