
Clearing Past Data From Your Windows 10 Clipboard: A Comprehensive Tutorial

Clearing Past Data From Your Windows 10 Clipboard: A Comprehensive Tutorial
Quick Links
- What Gets Stored in Clipboard History?
- How to Clear Clipboard History in Windows 10
- Another Way to Clear All Clipboard Data
- How to Disable Clipboard History in Windows 10
Key Takeaways
- Clipboard history in Windows 10 stores the 25 most recent items you’ve copied, including text, HTML, and images.
- To clear Clipboard history, press Windows+V, click the ellipses beside an item, and select “Clear All.”
- To disable Clipboard history, go to Windows Settings > System > Clipboard and toggle the switch to “Off.”
If you have Clipboard history enabled in Windows 10, the feature keeps a record of items you have recently copied to the Clipboard while using copy and paste. Here’s how to clear your Clipboard history—or disable it if you prefer.
What Gets Stored in Clipboard History?
Clipboard history, first introduced in Windows 10’s October 2018 Update , stores a list of the 25 most recent items that you’ve copied to the Clipboard. These items can include text, HTML, and images smaller than 4 MB in size. Unless an item is pinned to the Clipboard, the Clipboard history list gets erased every time you restart your device.
How to Clear Clipboard History in Windows 10
Unlike other potentially privacy-invasive features in Windows 10 , the Clipboard history feature only works if it has been enabled from Settings > System > Clipboard.
When Clipboard history is enabled, pressing Windows+V will bring up a small window that lists the most recent items you have copied to the Clipboard.
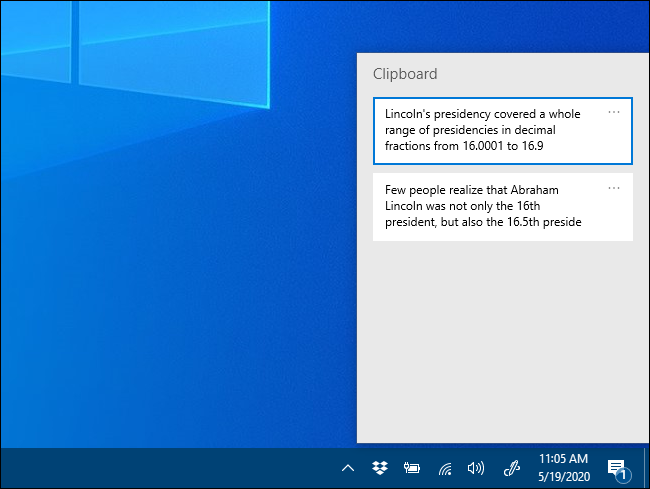
To remove individual items from Clipboard history, call up the list with Windows+V and then click the three dots (ellipses) beside the item you’d like to delete.
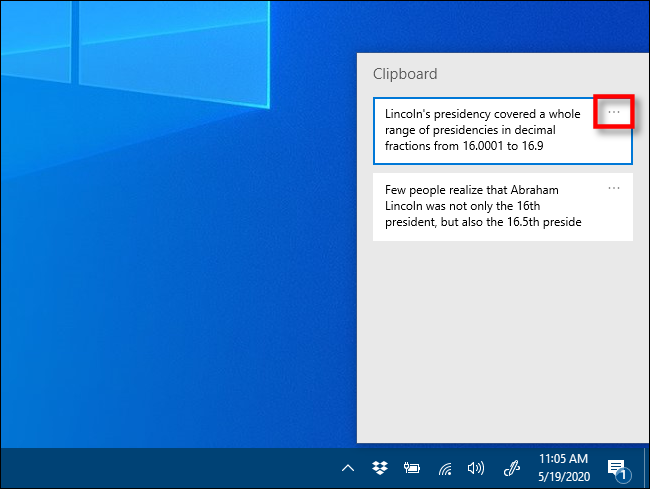
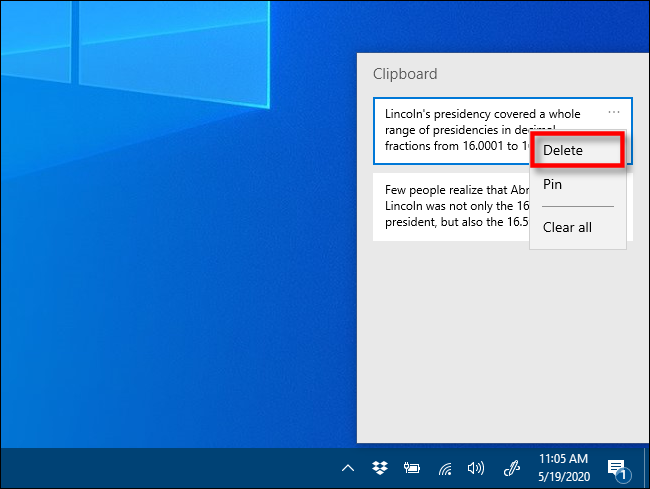
A small menu will pop up. Click “Delete” and the item will be removed from the list.
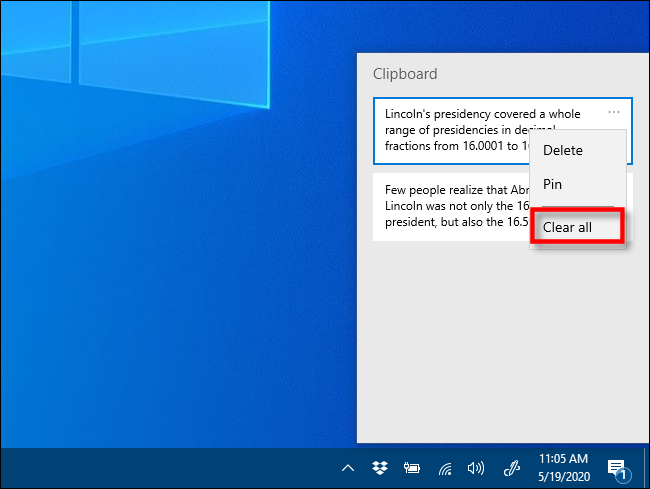
Any remaining items on the list after you click “Clear All” are pinned in place. If you’d like to remove a pinned item, click the ellipses beside it and select “Unpin.” Then you can either delete it or try “Clear All” from the ellipses menu again.
Note that with Clipboard history enabled, new items will continue to appear in the Clipboard history list every time you copy something to the Clipboard. If you would like to prevent Windows from storing your Clipboard history, you will need to disable the feature in Windows Settings.
Another Way to Clear All Clipboard Data
You can also clear your clipboard data in Windows Settings. Navigate to Settings > System > Clipboard and locate the “Clear Clipboard Data” section. Click on the “Clear” button, and the clipboard will be erased.
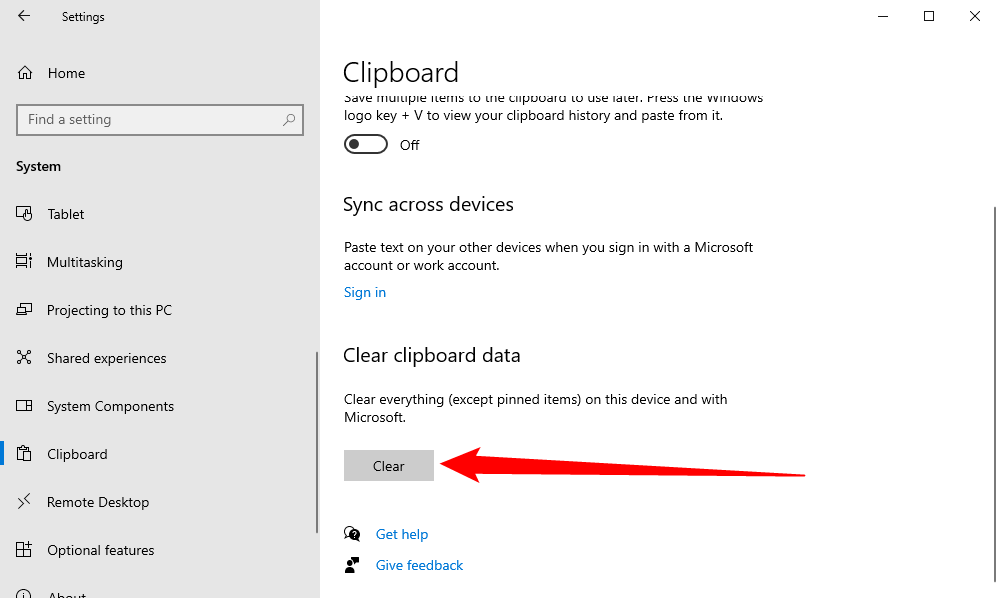
This is equivalent to pushing the “Clear All” button in the Clipboard history window, but it also works with Clipboard history turned off.
How to Disable Clipboard History in Windows 10
First, click the “Start” button, and then click the “gear” icon on the left side of the Start menu to open the “Windows Settings” menu. You can also press Windows+i to get there.
In Windows Settings, click on “System.”
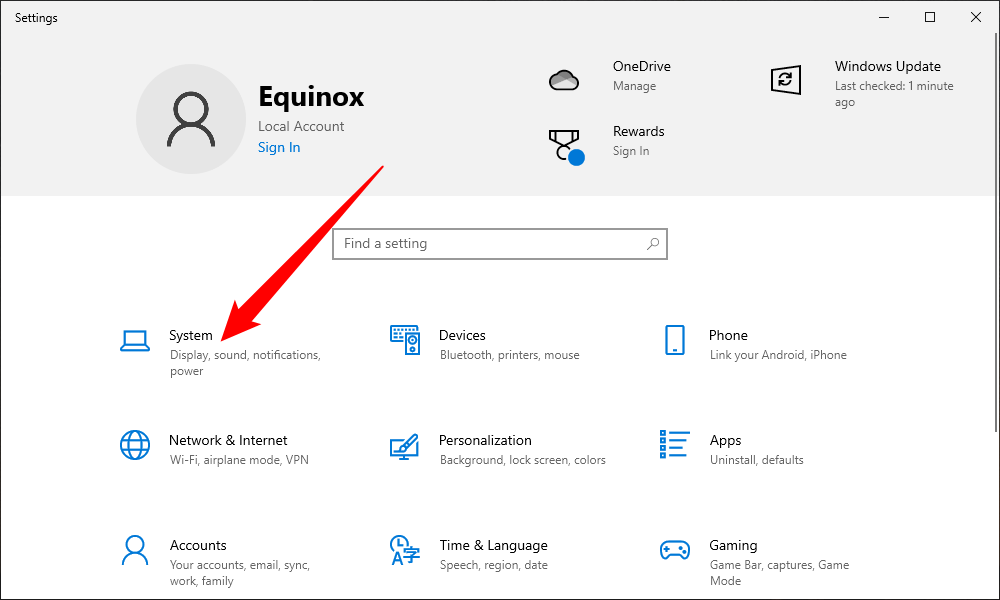
On the Settings sidebar, click on “Clipboard.” In Clipboard settings, locate the section called “Clipboard history” and toggle the switch to “Off.”

Once disabled, if you press Windows+V, you will see a small window alerting you that Windows 10 cannot show your Clipboard history because the feature is turned off.
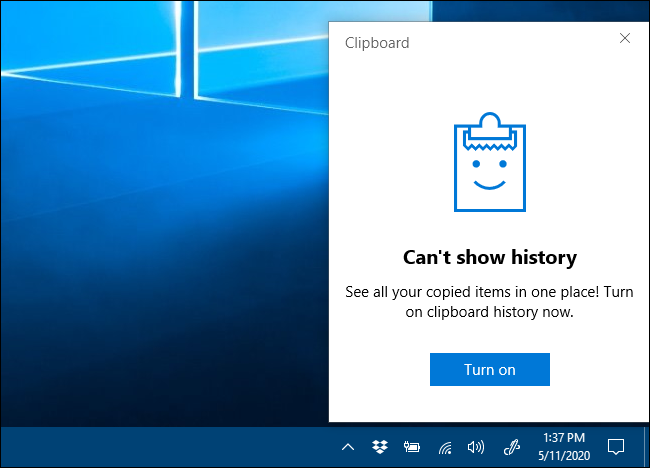
Now you’re free to copy and paste in privacy once again.
- Title: Clearing Past Data From Your Windows 10 Clipboard: A Comprehensive Tutorial
- Author: Nova
- Created at : 2024-08-30 01:10:08
- Updated at : 2024-08-31 01:10:08
- Link: https://blog-min.techidaily.com/clearing-past-data-from-your-windows-10-clipboard-a-comprehensive-tutorial/
- License: This work is licensed under CC BY-NC-SA 4.0.

 Forex Robotron Basic Package