
:max_bytes(150000):strip_icc():format(webp)/Horserace-56ca33a85f9b5879cc4bcc6e.jpg)
How to Fix Excel 2023 Run Time Error 1004 | Stellar
How to Fix Excel Run Time Error 1004
Summary: Run-time errors are windows-specific issues that occur while the program is running. This blog will teach you how to fix Excel run-time error 1004. In addition, you’ll learn about an Excel repair tool that can help fix the error 1004 if it occurs due to corruption in Excel files.

VBA (Microsoft Visual Basic for Application) is an internal programming language in Microsoft Excel. Sometimes, when users try to run VBA or generate a Macro in Excel, the Run-time error 1004 may occur. This error may occur due to the presence of more legend entries in the chart, file conflict, incorrect Macro name, and corrupt Excel files. In this blog, we have discussed the reasons and shared some solutions to resolve run-time error 1004.
Why This Error Occurs?
The run time error 1004 usually occurs when you run a VBA macro with the Legend Entries method to modify the legend entries in the MS Excel chart. It happens when the chart contains more legend entries than the available space, macro name conflicts, corrupt Excel files, or data-types mismatch in the VBA code.
Ways to Fix Excel Run-Time Error 1004?
Try the below workarounds to fix Excel run-time error 1004:
Create a Macro to Reduce Chart Legend Font Size
Sometimes, Excel throws the run-time error when you try to run VBA macro to change the legend entries in a Microsoft Excel chart. This error usually occurs when Microsoft Excel truncates the legend entries because of the more legend entries and less space availability. To fix this, try to create a macro that shrinks/minimize the font size of the Excel chart legend text before the VBA macro, and then restore the font size of the chart legend. Here is the macro code:
1 | VBCopy |
Uninstall Microsoft Work
You may encounter a run-time error 1004 in Excel version 2009 or older versions due to conflicts between Microsoft works and Microsoft Excel. This error usually occurs if your system has both Microsoft Office and Microsoft Works. Uninstalling one of them will fix the issue. Try the below steps to uninstall Microsoft Work:
- First, open the Task Manager using the shortcut CTRL + ALT + DEL altogether
- The Task Manager window is displayed.

- Click the Process tab, right-click on each program you want to close, and then click End Task.
- Stop all the running programs.
- Open the Run window and type appwiz.cpl to open the Programs and Feature window.

- Search for Microsoft Works and click Uninstall.
Try Deleting GWXL97.Xla File
The Add-ins files with .xla extension in MS-EXCEL is used to provide additional functionality to Excel spreadsheets. Sometimes, deleting the GWXL97.XLA file fixes the run-time error. Here are the steps to delete this file:
- Make sure you have an Admins rights, open the Windows Explorer
- Follow the Path C:\Programs Files\MSOffice\Office\XLSTART.
- Find and right-click on the GWXL97.XLA file
- Click Delete.
Change Trust Center Settings
Sometimes, run-time errors might arise because of incorrect security settings. The Trust Center settings help you find the Privacy and security settings for Microsoft Excel. Follow the below steps to change the Trust center settings:
- Open Microsoft Excel.
- Go to File > Options.
- The Excel options window is displayed.
- Choose Trust Center, and click Trust Center Settings.
- Tap on the Macro Settings tab, and select Trust access to the VBA project object model.

- Click OK.
Run Open and Repair Tool
The Runtime error also arises when MS Excel detects a corrupted worksheet. It automatically begins the File recovery mode and starts repairing it. However, if the Recovery mode fails to start, use the Open and Repair tool with the below steps:
- Click File > Open.
- Click the location and folder with a corrupted workbook.
- In the Open dialog box, choose the corrupted workbook.
- Click the arrow next to the Open tab, and go to the Open and Repair tab.
- Click Repair.
You can also opt for Stellar Repair for Excel if the Microsoft Excel’s built-in tool cannot fix the error.
Use Stellar Repair for Excel
Stellar Repair for Excel is a professional software for repairing damage. xls, .xlsx, .xltm, .xltx, and .xlsm files and recovering all its objects. Here are the steps to fix the error using this tool:
- First, download, install, and run Stellar Repair for Excel.
- Click the Browse tab on the interface window to choose the corrupted Excel file you need to repair.
- Click Scan. You will see the scan progress in the scanning window.
- Click OK.
- The tool can let you preview all the recoverable Excel file components including tables, pivot tables, charts, formulas, etc.
- Click Save to save the repaired file.
- A Save File dialog box will appear with the below two options:
- Default location
- New location
- Choose a suitable option.
- Click the Save option to repair the Excel file that you have chosen.
- Once the repair is complete, it will display a message “File repaired successfully.”
- Click OK.
Conclusion
Now you know the Excel run-time error 1004, its cause, and solutions. Follow the workarounds discussed in the blog to rectify the error quickly. However, Stellar Repair for Excel makes your task of removing run-time errors easy. It’s a powerful software to fix all the issues with Excel files. Also, it helps in extracting data from the damaged file and saves it to a new Excel workbook.
How to Repair Corrupt Excel Workbook?
Summary: Corruption in an Excel workbook could lead to data loss. This blog outlines the possible reasons behind corrupted workbook and describes how to repair the workbook manually and using an Excel repair tool.
Is your Excel behaving differently, for instance, stops responding or freezes? Or have you encountered a warning or an error message indicating corruption in the Excel workbook?
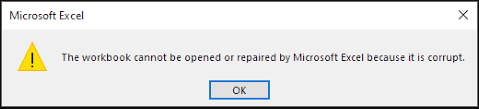
Figure 1 - Corruption Warning in Excel: The corrupt workbook cannot be opened or repaired
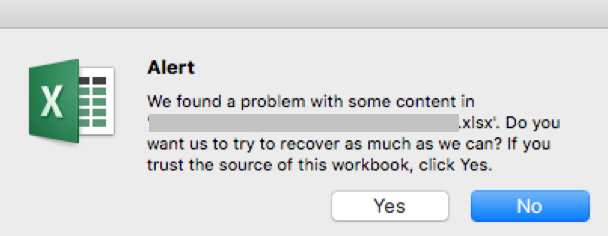
Figure 2 - Excel File Corruption Message
In any of these situations, you won?t be able to open your Excel workbook.
TIP! If you?re unable to open an Excel workbook, it does not necessarily mean that the workbook is corrupt. Try a few workarounds to resolve the issue, like disabling the ?Protected View Settings?, disabling add-ins, or moving the workbook to another drive.
You will need to repair the corrupted Excel workbook to make it usable. Before discussing the repair methods, let?s first look at the possible reasons behind file corruption.
To jump to methods to repair the workbook, click here .
Possible Reasons behind Corrupted Excel Workbook
- Large size of a workbook: A workbook containing lots of information or objects like images, shaded cells, or other visual representations is prone to corruption.
- Unexpected system shutdown or power loss: If you haven?t saved your Excel file, abrupt system shutdown or power failure can corrupt the data and render the file inaccessible.
- Bad sectors on storage media: Accumulation of bad sectors on storage media on which Excel files are saved is another reason that may lead to Excel file corruption.
Other common reasons causing Excel file corruption are virus attack, network errors, etc.
Methods to Repair Corrupted Excel Workbook
Note: Repairing the corrupt workbook may result in data loss. And so, it?s recommended to back up the workbook before attempting to repair the file.
Method 1 ? Repair the Excel Workbook Manually
Use the Excel ?Open and Repair? feature to repair your corrupt workbook manually. Here?s how:
Step 1: In Excel, click the File tab and then click Open.
Step 2: Select the corrupt Excel file, click the arrow button next to the Open button and then select Open and Repair.
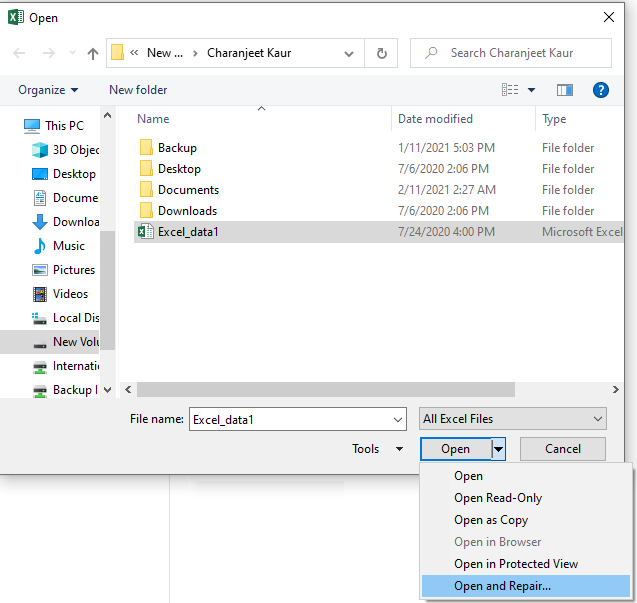
Figure 3 - Excel Open and Repair Feature
Step 3: In Microsoft Excel dialog box that opens, click Repair to begin repairing your corrupt workbook.

Figure 4 - Repair the Microsoft Excel File
Note: If the Excel repair process fails, repeat Steps 1 till 3 and click the ?Extract Data? button. This will help you extract values and formulas from the corrupted workbook.
Performing these steps will repair your Excel file. If the issue persists, skip to the next method.
Method 2 ? Use Excel File Repair Software
If the above method failed to fix corruption in the workbook, use Excel file repair software to repair your workbook quickly. This Excel repair tool is purpose-built to help users repair large-sized Excel files (.xlsx and .xls) in just a few clicks. Also, it helps recover all the data from the corrupted workbook while preserving the cell formatting and worksheet properties.
Steps to Repair Corrupt Excel File Using the Software
Step 1: Download, install, and open Stellar Repair for Excel software.
Free Download for windows ](https://tools.techidaily.com/stellardata-recovery/repaire-for-excel/ )
Step 2: Click Browse to select your corrupted .xlsx or .xls file. If you are not aware of the file location, click Search to locate and select the file.

Figure 5 - Select Corrupt Excel Workbook
Step 3: Once the file is selected, click Repair.
Step 4: A preview of recoverable workbook data gets displayed.
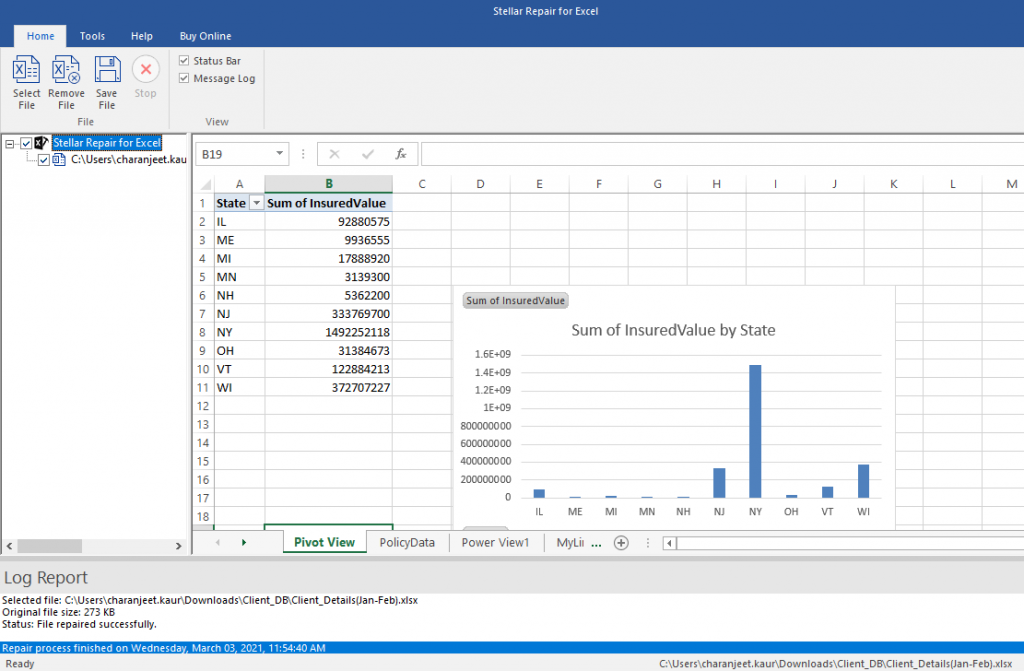
Figure 6 - Preview of Recoverable Excel Workbook Data
Note: You will need to activate the licensed version of Stellar Repair for Excel software for saving the repaired file. Once activated, proceed with the steps below to save the repaired file.
Step 5: Click Save File on the File menu. This will open a Save File dialog box with options to save the repaired .xlsx/.xls file at default or new location. After choosing the appropriate option, click OK.
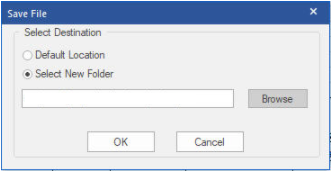
Figure 7 - Save Repaired Excel File
The repaired file will get saved at the selected location.
Key Features of Stellar Repair for Excel Software
- Repairs severely corrupt Excel file and recovers pivots, pivot tables, conditional formatting rules, chart, chart sheets, etc.
- Can repair multiple Excel files in a batch simultaneously
- Can handle all types of Excel file corruption errors, like ?Excel found unreadable content in filename.xls?, ?Excel cannot open the file filename.xlsx?, etc.
- Supports repairing corrupt workbooks of Excel 2019, 2016, 2013, 2007, 2003, and lower versions.
End Note
If your Excel workbook has turned corrupt, try using the methods discussed in this blog to repair the workbook. Once it is repaired, you must follow preventive measures to avoid your Excel file from getting corrupt. Some of these measures are as follows:
Reduce the size of your workbook by:
- Removing unused data
- Saving images at lower resolutions
- Avoid saving pivot table cache
Turn on the ?AutoRecover? and ?AutoSave? features in Excel
How to Fix Excel File Couldn’t Open in Protected View
Summary: This blog discusses about the Excel error ‘The file couldn’t open in Protected View’ and workarounds to fix the error. If you cannot access the Excel file data, using an Excel file repair tool can help you quickly restore the data to its original state.
Protected View is a feature in Microsoft Excel that opens a file in read-only mode while disabling the editing functions. An Excel file opens in Protected View if the file is from an unsafe location. For example, the file may be opened from an insecure Internet location or downloaded as an Outlook attachment from suspicious senders. In that case, your Excel application won’t let you open the file to protect it against malware or virus attacks.
However, the Protected View feature sometimes prevents an Excel file from opening even if it is from a safe location. Also, opening an Excel file may return an error message ‘file couldn’t open in protected view’.

You may be able to resolve the issue by closing all the open Excel files, closing the Excel application, and then re-opening the problematic file. But this process can take a significant amount of time as you need to close and re-open the Excel application and the file continuously.
How to Fix the Excel File Couldn’t Open in Protected View Error?
Here are some workarounds to fix the error:
Workaround 1 – Disable the Protected View Settings
Note: Before disabling the protected view settings, ensure you have a reliable antivirus software installed on your computer to safeguard files against malware or virus attacks.
- Open the Excel file throwing the error, go to File and click the Options tab.
- From the Options dialog box, go to Trust Center and click on Trust Center Settings.
- From the Trust Center Settings dialog box, select the Protected View tab.
- Uncheck the appropriate option under the Protected View section, and then click OK to apply the changes. For instance, uncheck the “Enable Protected View for Outlook attachments” option if the file is a downloaded Outlook attachment.

- Click OK again.
Now try opening the problematic Excel file. If it still doesn’t open, try the following workaround.
Workaround 2 – Repair the Office Installation
Sometimes, corruption in the Office installation may cause Excel to return the ‘file could not open in protected view’ error. So, try repairing your Office installation and check if it solves the problem.
- Open the Control Panel and click the Uninstall a program option under Programs.
- Click Uninstall a program under the Programs tab.
- Right-click the Microsoft Office program you have installed and click the Change button.
- Select the Repair option and click Continue.

Once the repair operation is complete, check if you can open the Excel file without any issue.
Workaround 3 – Install Latest MS Office Updates
Several Excel users have reported about experiencing issues (such as the Protected View issue) on opening an Office document like Excel, Word, or others – after upgrading Windows to a newer version. This problem may occur due to incompatibility between the Office app and the updated Windows version. You can try to fix the problem by upgrading the Office app, and here’s how:
- Click on the File tab in the Excel file that throws an error.
- Click the Account tab at the left-hand bottom of the screen.
- From Office Updates, expand Update Options, and then click Update Now.

After installing the updates, restart your PC and open the Excel file. If this doesn’t work, use the following workaround.
Workaround 4 – Convert the File and Rename It
Some Excel users resolved the ‘Protected view’ issue by renaming their Excel files. But before that, ensure that the file you are trying to open is saved with .xlsx format. If the file type is .xls, you need to convert it to .xlsx format and then rename it. Before converting the file, save a copy of the original file in the desired location.
If the file type is .xlsx, copy the problematic file. Next, open a blank Excel document and paste the copied file. The file will appear as an icon, double-click on it. If it opens without any error, save it with a different name. Hopefully, reaming the Excel file may help resolve the problem.
Conclusion
There is no fixed solution to resolve the Excel error ‘The file could not open in Protected View’. However, the workarounds discussed in the blog have helped users resolve the ‘Protected View’ issue. Make sure to use the workarounds in the same order as explained in the blog.
If you’re having an issue loading the Excel file data due to the ‘Protected View’ error, consider restoring the data using an Excel file repair tool .

How to repair ‘recovered’ Excel file that won’t open
Summary: You may unable to open the Excel file after file recovery. When you try to open the file you may prompt up with error messages. This blog will discuss those errors and their solutions. Besides this, it also mentions Stellar Repair for Excel to repair and recover the severely corrupted Excel file with no data loss.
Consider a scenario: A Windows 10 user accidentally deletes a folder containing multiple Excel (XLSX) files created in Excel 2013. The worst part was all the deleted files were important, and he did not have a backup, which would help him in restoring the data. Nonetheless, he was able to recover those data using a professional data recovery software. Next, he tried opening each of the recovered Excel files one by one. In doing so, his happiness turned into disappointment. And the reason was, some of the recovered Excel files failed to open prompting error messages, of course, due to corruption. In this scenario, all he needed was to repair ‘recovered’ Excel files that did not open. Know how to fix damaged Excel files that were recovered after deletion in this blog!
Before delving into the Excel file repair methods, acquaint yourself with the probable causes leading to damaged or corrupt Excel files. Although not essential, it shall be an added advantage in helping you to prevent Excel file corruption issues in the future.
The standard Excel file(s) Corruption Causes
- Power Outage – A power outage due to which a system closes suddenly or unexpectedly is a common cause of damaged Excel files.
- Forced System Shutdown – Shutting down the system forcibly without closing MS Excel files is another common cause of corrupt Excel files.
- PC Virus or Bug – Computer viruses or bugs may affect one or more data file if owners do not protect their PCs with powerful updated antivirus. Same is the case with malware attacks. The chances are that your computer is infected with one of these and has affected a few Excel files.
- Issues with Storage Devices – Damaged or corrupted Excel files can also be the outcome of hard drive issues in the data storage systems. Logical hard drive damage is one of the most significant issues.
The damaged Excel files may prompt up with error messages. These may be:
- ‘Excel unable to read file’
- ‘Filename is not valid’
- ‘This file is not in a recognizable format’
- ‘abc.xls file cannot be accessed. The file may be read-only’
- ‘Excel found unreadable content in (filename)’, ‘The file is corrupt and cannot be opened’
- ‘Microsoft Excel has encountered a problem and needs to close’
There exist multiple methods to repair Excel files which got damaged after recovery, and are as follows: XML method,
- Open Excel files with HTML
- Inbuilt ‘Open and Repair’ feature/tool in Excel
- Repair damaged Excel file from TMP file by using Excel AutoRecover and AutoBackup features
- Recover data by configuring ‘calculation option’ as manual
- Moving/copying or transferring data to a different location
- Stellar Repair for Excel software
Taking Stellar software versus other methods, the former is a software solution that repairs damaged (XLS and XLSX) file quickly in major three steps: Select->Repair->Save, whereas others fall into the category of manual processes and consume both time and resources. Among the manual processes ‘Open and Repair’ method is the least time and resource consuming, which you can try quickly by following the below steps:
Open and Repair method
- Click MS Excel tab and then the Open tab
- Select the damaged Excel file for repairing purpose
- Click the arrow present beside the Open Next, click Open and Repair tab
- Click either of the following:
- Repair tab (recovers maximum data)
- Extract Data tab (Recovers values and formulas if the repair process fails in recovering the complete data.)
Note – Use ‘Extract Data’ if ‘Repair’ is not successful.
If the Manual method is not competent enough to repair recovered Excel files that don’t open then opt for a software-based solution of deploying Stellar Repair for Excel software.
Software with 100% integrity and precision
Conclusion
As an automated software, Stellar Repair for Excel is easy-to-use. You do not need technical know-how and skill set, as required to execute the manual processes. On analyzing all these methods, it is suggested to use Stellar Repair for Excel having a user-friendly GUI to repair Excel files that became damaged after recovery, or if the recovered Excel file(s) that you once deleted accidentally has become corrupt now. Above all, it is an excellent software with multiple features and advantages. Use it to address all your MS Excel issues or if any recovered Excel file is corrupt.
Solved - The File is Corrupted and Cannot be Opened - Excel
Summary: Unable to open Excel file due to the error ‘The file is corrupted and cannot be opened’? Read this blog to find more details about the error, possible reasons behind it, and solutions to fix the error. In addition, the blog mentions about Stellar Repair for Excel software that can help fix the Excel error in a few clicks. Download the software now and see free preview of the file.
About the Error
Microsoft Excel is a widely used spreadsheet application that comes bundled with MS Office. Users tend to update the application with new security patches and features. Sometimes these updates can cause problems, and result in “The file is corrupted and cannot be opened” error.

Figure 1 – Excel File Corrupted Error Message
Other Possible Reasons behind ‘The File is Corrupt and Cannot Be Opened’ Excel Error
- Opening an older Excel version file in a newer version of Excel. For instance, opening Excel 2013, 2010, or earlier versions in Excel 2016.
- When attempting to open a Microsoft Office (Excel) email attachment in Microsoft Outlook 2010, MS Office 2010 reports a problem with the file preventing it from opening.
How to Fix the ‘Excel File is Corrupt and Cannot Be Opened’ Error?
Here are a few possible solutions that you can try to fix the ‘Excel file is corrupt and cannot be opened’ issue and open your Excel file.
Solution 1: Changing Component Services Settings
Solution 2: Changing the Protected View Settings
Solution 3: Repair Excel Files using Excel Repair Software
Solution 1: Changing Component Services Settings
[Caution] Changing Component Services settings requires making changes to the registry, and any mistake can harm your computer.
Follow these steps to change ‘Component Services’ settings:
Click ‘Start’ or ‘Win+R’ and type ‘dcomcnfg’ and press ‘Enter’.
In the navigation pane, expand the ‘Component Services’, and then expand ‘Computers’.

Figure 2 – Component Services Settings
- Next, right-click on ‘My Computer’, and then click ‘Properties’.
When the ‘My Computer Properties’ dialog box appears, click on the ‘Default Properties’ tab and then set the following values:
- Default Authentication Level: Connect
- Default Impersonation Level: Identify

Figure 3 – Illustrates My Computer Properties
- Click ‘OK’ to change ‘Default Properties’
Solution 2: Changing the Protected View Settings
[Caution] Disabling the ‘Protected View’ can put your system at high risk. Viruses attached to the Excel files can attack and infect your system. Be careful before using this option.
Excel 2010 file cannot open due to the ‘Protected View’ setting in Microsoft Outlook 2010. And so, changing the setting may help fix the error. For this, perform these steps:
- Open MS Excel 2010, go to the ‘File’ menu and click ‘Options’.

Figure 4 – Options
- When the ‘Excel Options’ window opens, click on ‘Trust Center’ and then on ‘Trust Center Settings’.

Figure 5 – Open Trust Center Settings
- Next, choose ‘Protected View’ and uncheck all the options including ‘Enable Protected View for Outlook attachments’ if you use Outlook for email.

Figure 6 – Uncheck Protected View Settings
- Click ‘OK’. Restart the application and try opening the Excel file again.
If none of the above solutions works for you, your Excel file is likely severely corrupt. To repair corrupt Excel files, you need to use advanced options like Stellar Repair for Excel tool. It repairs corrupt and damaged Excel files and helps in retrieving lost data.
Solution 3: Use Excel File Repair Tool
Considering the risks associated with the above solutions, it’s better to use an Excel repair tool to repair single or multiple corrupt Excel files at once. The process is simple, and even a novice can use the Excel file repair tool to repair Excel files with the help of the following steps:
- Download Stellar Repair for Excel and install it.

- Launch the tool. In the tool’s main interface, click ‘Browse’ to select the file. If you don’t know the file location use the ‘Search’ option.

Figure 7 – Illustrates Selecting Corrupt Excel File in Stellar Repair for Excel
- Select the file, and then click on Repair.

Figure 8 – Illustrates Initiating Excel File Repair in Stellar Repair for Excel
- The software scans and lists the Excel file in the left pane. Click on the file to preview its recoverable objects in the right pane.

Figure 9 – Illustrates Preview of Recoverable Excel File Objects
- Save the repaired file at either the default location or a user-specified location.

Figure 10 – Illustrates Saving Repaired Excel File in Stellar Repair for Excel
- Click ‘OK’ to save the repaired Excel file. After the repair process is completed, browse to the location and open it with MS Excel 2010 or any other version.

Figure 11 – Illustrates Saving Complete Message in Stellar Repair for Excel
You will be able to access your Excel file from the selected location.
Conclusion
You can use the first two possible solutions to fix the “The file is corrupted and cannot be opened” error. If you can access the file, save its data and restore the default settings. However, if the file is corrupt and the data retrieved using the first two solutions is inconsistent or incomplete, use Stellar Repair for Excel. This tool can help you recover Tables, Charts, Chart Sheets, cell comments, Images, and Formulas while preserving the worksheet properties and cell formatting. You can also preview the file and verify the data inside the file before saving it.
[Fixed]: Freeze Panes not Working in Excel
Summary: This blog discusses the “freeze panes not working” issue in Excel. It mentions the possible reasons behind the issue and offers workarounds and methods to fix it. If the issue is associated with corruption in the Excel file, you can use the specialized Excel repair tool mentioned in the blog to repair the affected file.
The freeze panes feature in Excel is used to freeze the row/column headings to keep them visible while scrolling the worksheet. It is a useful feature when you’re working on a large worksheet containing data that exceeds the rows and columns on the screen. Sometimes, you notice that the ‘Excel freeze panes feature is not working’. There could be numerous factors that can trigger this issue. Let’s know the reasons for the freeze pane not working issue in Excel and how to resolve this issue.
Why can’t I freeze panes in excel?
Several factors may contribute to the Excel freeze panes not working issue in Excel. A few of them are:
- The cell editing mode is enabled in the workbook in which you are trying to use the Freeze Panes feature.
- The Excel file is corrupted.
- The worksheet is protected.
- Advanced Options are disabled in Excel Settings.
- The Excel application is not up-to-date.
- You might be trying to lock rows in the middle of the worksheet.
- Your Excel workbook is not in normal file preview mode.
- Wrong/incorrect positioning of the frozen panes.
How to fix ‘Freeze Panes not Working’ in Excel?
The freeze panes option is available in the View bar. Sometimes, you’re unable to see the View option. It usually occurs if you are using the Excel Started version. Check and try to open the file in the advanced Excel version, which supports all the features. If you are using the advanced Excel version, then try the below workarounds to fix the freeze panes not working issue in Excel.
Workaround 1: Exit the Cell Editing Mode
If your Excel file is switched from normal file view mode to cell editing mode, you can encounter the freeze panes not working issue. In cell editing mode, certain features in Excel, such as the freeze panes, are temporarily disabled to prevent any conflicts. You can disable cell editing mode by pressing the ESC or Enter key. Now locate the View tab and check whether the freeze pane feature is working. If not, then try the next workaround.
Workaround 2: Change the Page Layout View
The Excel freeze panes not working issue can also occur if your workbook is opened in Page Layout view. The Page Layout view doesn’t support freeze panes. If you select page layout, the freeze panes option gets disabled.

To enable the freeze pane option, go to View and click the Page Break Preview tab.

Workaround 3: Check and Remove Options under the Data Tab
Sometimes, you can experience the “freeze panes not working” issue if Sorting, Data Filter, Group, and Subtotal options are enabled in Excel workbook. Such options, when enabled, can lead to unexpected problems with the freeze panes’ functionality. You can check and remove these features from your workbook. To do so, follow these steps:
- Open the Excel file in which you are getting the issue.
- Navigate to the Data tab.
- Check and remove the below features (if enabled):
- Sort
- Filter
- Group
- Subtotal

Workaround 4: Check and Unprotect Worksheet
The freeze panes feature may stop working if your worksheet is protected. You can try to disable the worksheet protection option. Here are the steps:
- In the Excel file, go to the Review tab.
- Click Unprotect Sheet.

After unprotecting the sheet, check whether the “freeze panes not working” issue is resolved. If not, follow the next workaround.
Workaround 5: Use Correct Cell Positioning
The freeze pane is not working issue in Excel can also occur when you use incorrect cell positioning to apply the freeze panes feature. Several users have reported facing this issue when trying to lock multiple rows with the wrong cell selection. So, use correct cell positioning to freeze the rows. For example, if you are trying to lock two rows in an Excel worksheet, then you need to click on 3rd row’s column.

What if the above Workarounds Fail to Fix the Freeze Panes not Working Issue?
If none of the above workarounds works, then there are chances that the workbook is damaged or corrupt. In such a case, you can try the below methods to repair the corrupt Excel workbook.
Run Open and Repair Utility
In case of corruption in the Excel file, you can use the Open and Repair tool in Excel to repair the file. To use this utility, follow these steps:
- In the Excel application, navigate to File and then click Open.
- Click Browse to select the workbook in which you are facing the issue.
- The Open dialog box is displayed. Click on the affected file.
- Click the arrow next to the Open option and then click Open and Repair.

- Click on the Repair option to recover as much data as possible.
- You can see a completion message once the repair process is complete. Click Close.
Use a Professional Excel Repair Tool
If the Open and Repair tool doesn’t work to resolve complex file-related issues and your Excel file is severely corrupted, you can opt for a reliable third-party Excel repair tool, such as Stellar Repair for Excel. This tool can help you repair the Excel file and recover all the data with complete integrity. You can try the software’s demo version to scan the affected file and preview the recoverable data. The software is compatible with all MS Excel versions and Windows operating systems, including Windows 11.
Closure
The “freeze panes not working” issue in Excel can occur due to several reasons, like protected worksheet, incompatible Excel version, and incorrect cell position. Try the workarounds shared in the blog to fix the issue. If the Excel file is corrupt, you can use Stellar Repair for Excel to fix the corruption issues in the file. This tool can quickly repair the Excel file and recover all the data from the file with 100% integrity.
Data Disappears in Excel - How to get it back
Summary: You may face the issue of ‘Excel spreadsheet data disappeared’ after changing Excel file properties and formatting rows and columns. This blog discusses the possible reasons for data disappearance and the solutions to fix the issue. Also, it mentions an Excel file repair tool to retrieve the data from the file. Sometimes, while editing or formatting a cell in an Excel spreadsheet, the data may go missing or disappear. Let’s discuss in detail the reasons that may cause the ‘Excel data disappeared’ issue along with the solutions.
Probable Reasons for Data Disappearing in MS Excel and Solutions Thereof
Reason 1 – Unsaved Data
While entering data in an Excel spreadsheet, it is important to save the data at frequent intervals. Doing so prevents any unsaved data from disappearing if you lose power or accidentally click ‘No’ when prompted to save the file. Unfortunately, such a situation is quite common as users often close the file without saving the recently made changes to a spreadsheet.
Solution – Use the ‘AutoSave’ Feature
With the AutoSave feature enabled in Excel, data won’t be lost in the event of power failure or abruptly closing the Excel program. By default, Excel automatically saves the information in a spreadsheet after every 10 minutes. You can reduce the limit to a few seconds to reduce the chances of Excel file data lost after being saved.

Reason 2 – Changing Excel Format
You can save an Excel file in various formats, like spreadsheet, text, webpage, and more. However, at times, saving the spreadsheet in a different format may lead to missing data. For example, when you save a workbook to a text file format, all formulas and calculations applied to the data will be lost.
Solution – Adjust a Spreadsheet for the Changed Format
If you’re changing the format of a spreadsheet, make space for the rows and columns. Also, remove all calculations before saving the file.
Note: If the sheet is shared on multiple computers, then save the file in compatibility mode.
Reason 3 – Merging Cells
You can combine two or more cells data to make one large cell. This technique is primarily used to fit the text of a title in a sheet. If there is data in two or more cells, then only the data in the top-left cell is displayed and the data in all other cells is deleted. If the other merged cells have been populated with data after merging, the data is not featured and it does not appear even after remerging the cells.
Solution – Merge Cells inside One Column
To merge cells without data loss, combine all the cells you want to merge within a column and do the following:
- Select the cells to be combined.
- Ensure that column width is wide enough to fit the contents of a cell.
- In the spreadsheet, under the Editing group, click ‘Fill,’ and then click ‘Justify.’

- Under Alignment, click on the ‘Merge & Center’ option to center align the text. Or, click on ‘Merge Cells’.
Note: This solution works for text only. You cannot use it to merge formulas or any numerical values. If you need to combine two or more cells with formula into a single cell, try using the Excel CONCAT function .
Reason 4 – Cell Formatting
Cells and text in the cells can be displayed in different colors to make the spreadsheet simple to create and infer. You may experience data loss when you try to modify the data or change the color or size of the data. Though the information may exist, the data may show an error due to the following reasons:
- White-colored text will not show in a white-colored cell
- Large font-sized data may not appear in small-sized cell
- Calculations may show (#VALUE) error after cell-formatting
Solution – Check and Clear Formatting
Make sure to use dark-colored text on a white-colored cell. Also, resize the cell to fit the text size. Check if numbers in a cell are entered as text. If so, you need to apply a number format to the text-formatted numbers. Read more about it, from here .
What Else You Can Do to Resolve the ‘Excel Data Disappeared’ Issue?
If you can’t recover the missing Excel file data, try to repair or extract the data from the file using the built-in Excel repair tool. Follow the below steps to use the tool:
- Open MS Excel, click File > Open > Computer > Browse.
- On the ‘Open’ window, select the file you want to repair and then click on the Open dropdown.
- Select Open and Repair.

Use the ‘Repair’ option to repair the file and recover as much data as you can from the repaired file. If this doesn’t work, use the ‘Extract’ option to recover the data.
If you fail to retrieve the disappeared data from that file using the above-listed steps, opt for an Excel repair tool , like Stellar Repair for Excel. This software has a proven track record of repairing corrupt or damaged Excel files and recover all the data.
The software helps:
- Fix all corruption errors. It helps in getting back the data which has disappeared.
- Repair a single as well as multiple Excel files.
- Recover all components of XLS/XLSX files – tables, chart sheet, cell comment, image and more.
- Preserve the worksheet properties and cell formatting.
- Support the latest Excel 2019 and earlier versions.
The Excel repair software repairs the Excel file in these simple steps:
- Launch and open the software.
- Select the corrupt Excel file by using the ‘Browse’ option. If the file location is not available, then find the Excel file using the ‘Search’ option.
- Click ‘Repair’ to scan the corrupt file.

- Once the repair process is complete, verify the components of Excel file and check if the available preview shows complete data that disappeared from Excel.
- Save file at default location or preferred location.
The Excel file with all the restored data will be saved at the selected location.
Conclusion
It is better to repair the affected Excel file than suffer the loss when data or text disappears in Excel. A professional software ensures that users get back all the data in the form of a new Excel file. Stellar Repair for Excel software repairs the corrupt file without modifying the original content and file format. The software’s easy-to-use user interface lets you perform the functions without formal software training and technical expertise.
Also read:
- How to Recover Data from Broken iPhone 6 Screen | Stellar
- How to recover deleted photos from Android Gallery after format on Samsung Galaxy A25 5G
- How to Repair corrupt MP4 and MOV files of Magic 6 Lite using Video Repair Utility on Windows?
- How to restore wiped music on Oppo A58 4G
- How to Restore Deleted Infinix GT 10 Pro Pictures An Easy Method Explained.
- How to Reset iPhone 7 to Factory Settings? | Dr.fone
- How to recover old videos from your Vivo Y28 5G
- How to rescue lost call logs from Y27 4G
- How to get back lost photos from Sony Xperia 5 V.
- How To Repair iPhone SE (2022) iOS? | Dr.fone
- How To Restore Missing Photos Files from Samsung Galaxy M14 5G.
- How to play HEVC H.265 video on Galaxy S24+?
- How to retrieve lost files from HTC U23?
- How to repair corrupted PDF v1.0 file when manual method fails | Stellar
- How to identify malfunctioning drivers with Windows Device Manager in Windows 11 & 10
- How to Sign JPG document with Digital Signature - (Tutorial)
- In 2024, Unlock Your Apple iPhone 15 Pro in Minutes with ICCID Code Everything You Need to Know
- New In 2024, Top 5 Quandale Dingle Voice Generators
- Honor Play 7T Not Connecting to Wi-Fi? 12 Quick Ways to Fix | Dr.fone
- Your Complete Guide To Reset Realme Narzo 60x 5G | Dr.fone
- Complete Tutorial to Use GPS Joystick to Fake GPS Location On Vivo Y100t | Dr.fone
- Complete Review & Guide to Techeligible FRP Bypass and More For Poco F5 Pro 5G
- How to Unlock Realme 11 5G Phone Password Without Factory Reset?
- How to Transfer Videos from Nokia C12 Plus to iPad | Dr.fone
- 9 Best Free Android Monitoring Apps to Monitor Phone Remotely For your Vivo Y28 5G | Dr.fone
- How to Change/Fake Your Vivo Y100A Location on Viber | Dr.fone
- In 2024, 5 Ways to Transfer Music from Vivo V30 Lite 5G to Other Android Devices Easily | Dr.fone
- Guide to Mirror Your Infinix Note 30 VIP Racing Edition to Other Android devices | Dr.fone
- New Free Sound Effects for FCP A Beginners Guide to Elevating Your Video Editing Game
- Updated In 2024, Best MP4 Video Tag Editors for Windows and Mac
- Title: How to Fix Excel 2023 Run Time Error 1004 | Stellar
- Author: Nova
- Created at : 2024-05-19 18:32:11
- Updated at : 2024-05-20 18:32:11
- Link: https://blog-min.techidaily.com/how-to-fix-excel-2023-run-time-error-1004-stellar-by-stellar-guide/
- License: This work is licensed under CC BY-NC-SA 4.0.
