
:max_bytes(150000):strip_icc():format(webp)/001_the-best-disney-plus-movies-right-now-4846938-6783e356feb74fb7a09b84953620c5ed.jpg)
How to Fix Excel Run Time Error 1004 | Stellar
How to Fix Excel Run Time Error 1004
Summary: Run-time errors are windows-specific issues that occur while the program is running. This blog will teach you how to fix Excel run-time error 1004. In addition, you’ll learn about an Excel repair tool that can help fix the error 1004 if it occurs due to corruption in Excel files.

VBA (Microsoft Visual Basic for Application) is an internal programming language in Microsoft Excel. Sometimes, when users try to run VBA or generate a Macro in Excel, the Run-time error 1004 may occur. This error may occur due to the presence of more legend entries in the chart, file conflict, incorrect Macro name, and corrupt Excel files. In this blog, we have discussed the reasons and shared some solutions to resolve run-time error 1004.
Why This Error Occurs?
The run time error 1004 usually occurs when you run a VBA macro with the Legend Entries method to modify the legend entries in the MS Excel chart. It happens when the chart contains more legend entries than the available space, macro name conflicts, corrupt Excel files, or data-types mismatch in the VBA code.
Ways to Fix Excel Run-Time Error 1004?
Try the below workarounds to fix Excel run-time error 1004:
Create a Macro to Reduce Chart Legend Font Size
Sometimes, Excel throws the run-time error when you try to run VBA macro to change the legend entries in a Microsoft Excel chart. This error usually occurs when Microsoft Excel truncates the legend entries because of the more legend entries and less space availability. To fix this, try to create a macro that shrinks/minimize the font size of the Excel chart legend text before the VBA macro, and then restore the font size of the chart legend. Here is the macro code:
1 | VBCopy |
Uninstall Microsoft Work
You may encounter a run-time error 1004 in Excel version 2009 or older versions due to conflicts between Microsoft works and Microsoft Excel. This error usually occurs if your system has both Microsoft Office and Microsoft Works. Uninstalling one of them will fix the issue. Try the below steps to uninstall Microsoft Work:
- First, open the Task Manager using the shortcut CTRL + ALT + DEL altogether
- The Task Manager window is displayed.

- Click the Process tab, right-click on each program you want to close, and then click End Task.
- Stop all the running programs.
- Open the Run window and type appwiz.cpl to open the Programs and Feature window.

- Search for Microsoft Works and click Uninstall.
Try Deleting GWXL97.Xla File
The Add-ins files with .xla extension in MS-EXCEL is used to provide additional functionality to Excel spreadsheets. Sometimes, deleting the GWXL97.XLA file fixes the run-time error. Here are the steps to delete this file:
- Make sure you have an Admins rights, open the Windows Explorer
- Follow the Path C:\Programs Files\MSOffice\Office\XLSTART.
- Find and right-click on the GWXL97.XLA file
- Click Delete.
Change Trust Center Settings
Sometimes, run-time errors might arise because of incorrect security settings. The Trust Center settings help you find the Privacy and security settings for Microsoft Excel. Follow the below steps to change the Trust center settings:
- Open Microsoft Excel.
- Go to File > Options.
- The Excel options window is displayed.
- Choose Trust Center, and click Trust Center Settings.
- Tap on the Macro Settings tab, and select Trust access to the VBA project object model.

- Click OK.
Run Open and Repair Tool
The Runtime error also arises when MS Excel detects a corrupted worksheet. It automatically begins the File recovery mode and starts repairing it. However, if the Recovery mode fails to start, use the Open and Repair tool with the below steps:
- Click File > Open.
- Click the location and folder with a corrupted workbook.
- In the Open dialog box, choose the corrupted workbook.
- Click the arrow next to the Open tab, and go to the Open and Repair tab.
- Click Repair.
You can also opt for Stellar Repair for Excel if the Microsoft Excel’s built-in tool cannot fix the error.
Use Stellar Repair for Excel
Stellar Repair for Excel is a professional software for repairing damage. xls, .xlsx, .xltm, .xltx, and .xlsm files and recovering all its objects. Here are the steps to fix the error using this tool:
- First, download, install, and run Stellar Repair for Excel.
- Click the Browse tab on the interface window to choose the corrupted Excel file you need to repair.
- Click Scan. You will see the scan progress in the scanning window.
- Click OK.
- The tool can let you preview all the recoverable Excel file components including tables, pivot tables, charts, formulas, etc.
- Click Save to save the repaired file.
- A Save File dialog box will appear with the below two options:
- Default location
- New location
- Choose a suitable option.
- Click the Save option to repair the Excel file that you have chosen.
- Once the repair is complete, it will display a message “File repaired successfully.”
- Click OK.
Conclusion
Now you know the Excel run-time error 1004, its cause, and solutions. Follow the workarounds discussed in the blog to rectify the error quickly. However, Stellar Repair for Excel makes your task of removing run-time errors easy. It’s a powerful software to fix all the issues with Excel files. Also, it helps in extracting data from the damaged file and saves it to a new Excel workbook.
[Fix] Excel formula not showing result
Summary: Is your Excel spreadsheet showing text of a formula you’ve entered and not its result? This blog explains the possible reasons behind such an issue. Also, it describes solutions to fix the ‘Excel formula not showing result’ error. You can try Stellar Repair for Excel software to recover engineering and shared formulas.
Sometimes, when you type a formula in a cell of worksheet and press Enter, instead of showing the calculated result, it returns the formula as text. For instance, Excel cell shows:

But you should get the result as:

Why Does Excel Show or Display the Formula Not the Result?
Following are the possible reasons that may lead to the ‘Excel showing formula not result’ issue:
- You accidentally enabled “Show Formulas” in Excel.
- The cell format in a spreadsheet is set to text.
- ‘Automatic calculation’ feature in Excel is set to manual.
- Excel thinks your formula is text (Syntax are not followed).
- You type numbers in a cell with unnecessary formatting.
How to Fix ‘Excel Showing Formula Not Result’ Issue?
Solution 1 – Disable Show Formulas
If only the formula shows in Excel not result, check if you have accidentally or intentionally enabled ‘show formula’ feature of Excel. Instead of applying calculations and then showing results, this feature displays the actual text written by you.
You can use the ‘Show Formulas’ feature to quickly view all formulas, but if you are not aware of this feature, and enabled it accidentally, it can be a headache. To disable this mode, go to ‘Formulas’ and click on ‘Show formula enabled.’ If it’s previously enabled, it will be disabled by just clicking on it.

Solution 2 – Cell Format Set to Text
Another possible reason that only formula shows in Excel not result could be that the cell format is set to text. This means that anything written in any format in that cell will be treated as regular text. If so, change the format to General or any other. To get Excel to recognize the change in the format, you may need to enter cell edit mode by clicking into the formula bar or just press F2.

Solution 3 – Change Calculation Options from ‘Manual’ to ‘Automatic’
There is an “automatic calculation” feature in Excel, which tells Excel to do calculations automatically or manually. If ‘Excel formula is not showing results’, it may be because the automatic calculations feature is set to manual. This issue is not easily detected because it results in calculating formula in one cell but if you copy it to some other cell, it will retain the first calculation and will not recalculate on the base of the new location. To fix this, follow these steps:
- In Excel, click on the ‘File’ tab on the top left corner of the screen.
- In the window that opens, click on ‘Options’ from the left menu bar.
- From ‘Excel Options’ dialog box, select ‘Formulas’ from the left side menu and then change the ‘Calculation options’ to ‘Automatic’ if it’s currently set as ‘Manual’.

- Click on ‘OK’. This will redirect you to your sheet.
Solution 4 – Type Formula in the Right Format
There is a proper way to tell Excel that your text is a formula. If you don’t write the formula in a particular format, Excel considers it as simple text and hence no calculations are performed according to it. For this reason, keep the following in mind when typing a formula:
Equal sign: Every formula in Excel should start with an equal sign (=). If you miss it, Excel will mistake your formula as regular text.
Space before equal sign: You are not supposed to enter any space before equal sign. Maybe a single space will be hard for us to detect, but it breaks the rule of writing formulas for Excel.
Formula wrapped in quotes: You need to make sure that your formula is not wrapped in quotes. People usually make this mistake of writing a formula in quotes, but in Excel, quotes are used to signify text. So your formula won’t be evaluated. But you can add quotes inside formula if required, for example: =SUMIFS(F5:F9,G5:G9,”>30″).
Match all parentheses in a formula: Arguments of Excel functions are entered in parenthesis. In complex cases, you may need to enter more sets of parenthesis. If those parentheses are not paired/closed properly, Excel may not be able to evaluate the entered formula.
Nesting limit: If you are nesting two or more Excel functions into each other, for example using nested IF loop, remember the following rules:
- Excel 2019, 2016, 2013, 2010, and 2007 versions only allow to use up to 64 nested functions.
- Excel 2003 and lower versions only allow up to 7 nested functions.
Solution 5 – Enter Numbers without any Formatting
When you use a number in the formula, make sure you don’t enter any decimal separator or currency sign, e.g. $, etc. In an Excel formula, a comma is used to separate arguments of a function and a dollar sign makes an absolute cell reference. Most of these special characters have built-in functions so avoid using them unnecessarily.
What to Do If the Manual Solutions Don’t Work?
If you’ve tried out the manual solutions mentioned above but still unable to resolve the ‘Excel formula not showing result’ issue, you can try repairing your Excel file with the help of an automated Excel repair software , such as Stellar Repair for Excel.
This reliable and competent software scans and repairs Excel files (.XLSX and .XLS). It also helps recover all the file components, like formulas, cell formatting, etc. Armed with an interactive GUI, this software is extremely easy to work with, and its advanced algorithms allow it to fend off Excel errors with ease.

Conclusion
This blog outlined the possible reasons that may cause ‘Excel not showing formula results’ issue. Check out these reasons and implement the manual fixes, depending on what resulted in the problem in the first place. If none of these fixes help resolve the issue, corruption in the Excel file might be preventing the formulas from showing the actual results. In that case, using Stellar Repair for Excel tool might help.
How to fix Microsoft Excel not responding error and save your data
Summary: This guide helps you resolve Excel not responding and frequent Excel freeze issues in Excel on Windows 10. It mentions some effective solutions to repair Excel and resolve Excel is not responding problem. These solutions will also help you fix Excel crashing problem while working on the spreadsheet.
Similar to any other program, you may experience problems with Microsoft Excel while opening or working on a document. Sometimes, it may not start at all or freeze and display an error message such as ‘Excel is not responding’. When it happens, you may want to wait for the program to respond.

‘Microsoft Excel is not responding’ problem
Tip: If you are experiencing Excel not responding problem with a particular Excel file, it’s quite possible that the file is corrupt or partially damaged. And thus, leading to an Excel freeze or crash problem. Use Stellar Repair for Excel software to quickly repair and restore Excel (.xls/.xlsx) file in its original, intact form. You can download the free trial version of the software from the below link.
But if Excel doesn’t respond after a while and remains stuck, you need to force close the program from “Task Manager”. Now, this could be disastrous if happens while you are working on an important Excel document that took you hours to prepare. Force closing Excel due to such error can damage the Excel document and it may fail to open next time.
Why Excel is Not Responding?
Excel may stop responding, freeze, or crash suddenly due to several reasons. It can happen while saving a spreadsheet or opening an Excel document. It may also occur while editing or inserting images, graphs, etc. But usually, it occurs when the system crashes or shuts down abruptly while you are working on a document. Here’s an instance,
Suppose, you worked overnight on a critical document which is to be presented at a meeting the next day. This Excel spreadsheet includes critical graphs and charts, and much more. When you are about to save it, there is a power failure, and your system shuts down without warning. When the power is up, you restarted the system to check your Excel. To your dismay, a message pops up – “Excel Crashed” or “Microsoft Excel not responding”.
This could be frustrating. However, there is no need to despair as there are solutions to not just overcome this error but other corresponding issues such as Excel freezing, hanging, crashing, etc. Below is an infographic that quickly briefs all the possible solutions to fix Excel not responding error.
Solutions to Fix ‘Microsoft Excel is not responding’ Error
Follow the solutions discussed below in the given order to fix Excel freezing and hanging issues.
Solution 1: Open Excel in Safe Mode
If Excel is not working as intended and frequently stops responding, you may try to start Excel in Safe Mode. It is a common DIY way to fix ‘Excel is not responding’ problem.
In Safe Mode, Excel starts with only essential services, bypasses certain functionalities and doesn’t load the add-ins, which might be the reason behind the error in MS Excel . To open and troubleshoot Excel in Safe Mode:
- Press Windows + R keys, type excel.exe /safe and press ‘Enter’ or click ‘OK’

MS Excel in Safe Mode
Open the Excel file and check if it still crashes. If not, the problem could be a faulty add-in or formatting and styling error.
Proceed to the next solution to check and fix the problem.
Solution 2: Check for Faulty and Unwanted Add-ins
In Microsoft Excel, there are two types of add-ins:
- COM add-ins
- Other Add-ins Installed as XLAM, XLA, or XLL File
Both types of add-ins can cause the freezing problem in Excel . Follow the steps below to disable unwanted and faulty add-ins:
- In Excel , click File and go to Options to open ‘Excel Options’ window
- Click Add-ins button to view and manage ‘Microsoft Office Add-ins’
- Uncheck required add-ins to disable them
- At this stage, you can also click the ‘Remove’ button to remove any unwanted add-ins

Disable COM Add-Ins
- Now enable an add-in and check the Excel performance. Observe Excel for not responding error or freezing problem
If Excel doesn’t freeze, enable subsequent add-in and then again use Excel to observe it. Repeat the steps until you find the faulty plugin, which is causing the problem.
Then remove it from Excel add-ins to resolve the problem.
Solution 3: Install the latest Windows and Office Updates
This problem may also occur if Windows and MS Office are not updated. Therefore, install the latest updates for both Microsoft Windows and Microsoft Office.
You can set the installation and update option to ‘Automatic mode’ in Windows. This will download and install critical updates for MS Office, which might fix the Excel performance issue. The steps to enable automatic updates are as follows:
- Go to Settings> Update & Security> Windows Update

Enable Automatic Windows updates
- Click Advanced options and enable all the toggle switches to automatically download and install updates for Windows and other Microsoft products

Update Microsoft Products
After update, restart Excel and check if the problem is resolved.
NOTE: From now on, MS Excel will also get the latest update consistently, without the need for manual intervention.
Solution 4: Check and Disable Anti-virus
Antivirus is important for device safety. However, if your antivirus conflicts with MS Office apps such as Excel, it could lead to Excel freezing and not responding errors.
To check if the problem is due to anti-virus, disable it and reopen the Excel document. Check if Excel performs well or if it still hangs.

Example of Antivirus conflict with Microsoft Excel
If the problem is resolved, contact your antivirus software provider for help to keep antivirus running without affecting the system and other programs such as MS Excel.
Solution 5: Change the ‘Default Printer’
Although it may seem irrelevant, changing the default printer is another easy and effective solution to overcome the error. Reason being, Excel communicates with the printer to find supported margins when we open an Excel sheet.
If Excel doesn’t find the supported margin, it may stop responding or crash. The steps to change the default printer are as follows:
- Open Control Panel on your Windows system
- Click Printer and Devices
- Right-click Microsoft XPS Document Writer to set it to the default printer

Change in Default Printer Setting
Reopen the Excel document to check whether the error occurs or not.
Solution 6: Repair Microsoft Office
A corrupt or damaged Microsoft Office can also cause the ‘Excel is not responding’ problem. You can resolve this by repairing the Microsoft Office files. The steps are as follows:
- Close all running MS Office programs
- Go to Control Panel on your Windows system
- Click Programs and then Programs and Features
- Select Microsoft Office and in the Microsoft Office window, click ‘Change’
- Then select the ‘Repair’ option and click ‘Continue’

Repair MS Office
This may take a while. After the repair is done, check your Excel program and file for the error.
Solution 7: Remove and Reinstall Microsoft Office
Sometimes, repairing MS Office may not work. In such a case, removing and reinstalling Microsoft Office can resolve the ‘Excel is not responding’ problem. To do so, follow these steps:
- Close all running MS Office programs
- Go to Control Panel on your Windows system
- Click Programs and then Programs and Features
- Right-click on Microsoft Office and choose Uninstall

Uninstall MS Office
Then run the MS Office installation setup to re-install MS Office on your system.
Solution 8: Repair Microsoft Excel (XLS/XLSX) file
In several situations, a corrupt or partially damaged Excel (XLS/XLSX) file is the cause of this error. In such a case, you can download and install Stellar Repair for Excel to repair the corrupt or damaged Excel file. By repairing the Excel file, you can resolve the Excel freezing error quickly without applying much efforts.

The steps to use the software for Excel file repair are as follows:
- Download, install and launch the Excel file repair software
- Browse and select the corrupt Excel file

- Click ‘Repair’ to start repairing the damaged Excel file
- After file repair, it provides a preview. Check your file

- Then click the ‘Save File’ option in the main menu
- You can either choose default location or browse a new folder location to save the repaired Excel file

- After repair, open the file in Excel and continue with your work

And keep Stellar Repair for Excel installed on your system. You never know when you might need this handy tool.
You may also refer to Microsoft support for more details on Excel not responding, hangs, freezes or stops working issues.
Conclusion
Now that the methods for fixing the ‘Excel is not responding’ error are before you, try all these and see which one works for you. If the cause of this error is a damaged or corrupt Excel file, only repairing the XLS/XLSX file can resolve the issue.
For this purpose, it’s recommended to use a reliable software such as Stellar Repair for Excel as it offers an easy-to-use interface, thereby making Excel file repair process a seamless experience.
The software recovers table, chart, chart sheet, cell comment, number, text, shared formulas, image, formula, sort and filter, and other objects. It also preserves worksheet properties, layout, and cell formatting. It can repair multiple XLS/XLSX files simultaneously and fix all Excel file corruption errors.
All these features extend the software capabilities beyond just fixing the ‘Excel not responding’ error.
Quick Fixes to Repair Microsoft Excel 2013/2016 Content related error
Summary: The blog outlines some quick tips to fix ‘We found a problem with some content’ error in Microsoft Excel 2013/2016. It explains manual procedure to resolve the error and also suggests an automated tool to perform the repair process to retrieve all possible data from a corrupt workbook.
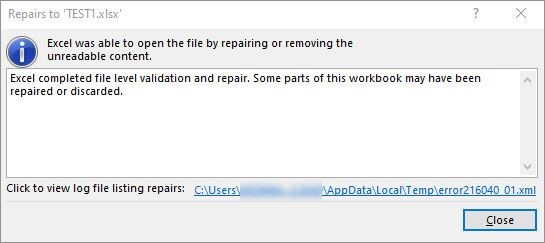
Sometimes, when opening an MS Excel file, you may receive an error message that reads:
“**We found a problem with some content in ‘filename.xlsx’. Do you want us to try to recover as much as we can? If you trust the source of this workbook, click Yes.**“

Figure 1 – Excel ‘found a problem with some content’ Error Message
What Causes ‘We Found a Problem with Some Content’ Error?
There is no clear answer as to what results in the Excel error – ‘**We found a problem with some content in <filename.xlsx>**’. However, based on some user experiences, it appears that the error occurs due to corruption in an Excel workbook. It may turn corrupt when:
- You try opening the Excel file saved on a network-shared drive.
- A string is added in a cell in Excel, instead of a numeric value.
- Text values in formulas exceed 255 characters.
How to Resolve ‘We Found a Problem with Some Content’ Error?
Follow these tips to fix the Excel error:
IMPORTANT! Before you follow the tips to resolve the Excel error, keep these points in mind: Make sure you have closed all of the opened Excel workbooks. Try restoring Excel file data from the most recent backup copy. If you don’t have a backup copy, make a copy of the corrupt Excel file and perform repair and recovery procedures on that backup copy.
Tip #1: Repair Corrupt Excel File
File Recovery mode is a native Excel recovery utility that automatically opens whenever any inconsistencies are found in the worksheet. If Microsoft doesn’t detect any issue or fails to open the File Recovery mode, you can start it manually to recover the corrupt Excel file. To do so, follow the steps below:
- Click on the File menu, and then select Open.
- In the Open dialog box, navigate to the folder location where the corrupt Excel file is saved.
- Select the corrupt file, and then click on arrow sign available next to Open button to select Open and Repair option.

Figure 2 – Open and Repair Feature in Excel
- Next, click Repair to recover maximum possible data.
- If the repair is not able to recover the data from the workbook, select Extract Data to extract all possible formulas and values from the workbook.
If repairing the corrupt Excel file doesn’t work, you can try an Excel file repair tool to fix corruption errors. You can also try to recover data from the corrupt file manually by following the next tips.
Read this: What to do when Open and Repair doesn’t work?
Tip #2: Set Calculation Option to Manual
To make the file accessible, try setting the calculation option in Excel from automatic to manual. As a result, the workbook will not be recalculated and may open in Excel. For this, perform the following:
- Click File, and then click New.
- Under New, click the Blank workbook option.
- When a blank workbook opens, click File > Options.
- Under the Formulas category, pick Manual in the Calculation options section, and then click OK.

Figure 3 – Select Manual in Calculation options
- Now, again click on the File menu and then click Open.
- Navigate to the corrupt workbook, and double-click it.
When the workbook opens, check if it contains all the data. If not, proceed to the next tip.
Tip #3: Copy Excel Workbook Contents to a New Workbook
Several users have reported that they were able to fix ‘We found a problem with some content in
- Open the Excel workbook in ‘read-only’ mode, and copy all its contents.
- Create a blank new workbook and paste the copied contents from the corrupt file to the new file.
Tip #4: Use External References to Link to the Damaged Workbook
Use external references to link to the corrupted workbook. By implementing this fix, data contents can be retrieved. However, it is not feasible to recover formulas or calculated values using this solution.
Follow the steps below:
- In Excel 2013/2016, click File > Open.
- Navigate to the folder where the corrupt file is saved.
- Right click the file, select Copy, and then click on Cancel.
- Again, click on File and then New.
- Under New option, click on Blank workbook.
- In the cell A1 of new workbook, type =File Name!A1 (where File Name indicates the name of the damaged workbook being copied in Step 3).
- If Update Values dialog box appears, click the corrupt workbook, and choose OK.
- If Select Sheet dialog box appears, click the appropriate sheet, and then click OK.
- Select cell A1.
- Next, click Home, and then click Copy (or, press Ctrl +C).
- Starting in cell A1, select area approximately the same size as that of the cell range that contains data in the damaged workbook.
- Next, click Home and select Paste (or click Ctrl + V).
- Keep the range of cells selected, click Home and then Copy.
- Finally, click on Home, click on the arrow associated with Paste and under Paste Values click on Values.
This will remove the link to the corrupt workbook and will retrieve data. But, keep in mind, the recovered data will no longer contain formulas or calculated values.
Alternative Solution – Stellar Repair for Excel
If the above manual methods fail to fix the ‘We found a problem with some content in Excel error’, try using the Stellar Repair for Excel software to resolve this error. The software helps repair and recover corrupt Excel files in just a few clicks. It can be used on a Windows 10/8/7/Vista/XP/NT machine to repair a corrupted workbook and recover every single bit of data from all the versions of the Excel workbook.

Read this: How to repair corrupt Excel file using Stellar Repair for Excel?
Conclusion
In this blog, we discussed some possible reasons behind Microsoft Excel 2013/2016 ‘We found a problem with some content’ error. The error may occur when an Excel file becomes corrupt. You may try repairing the corrupted Excel file manually by using the built-in ‘Open and Repair’ feature. Or, try the manual workarounds to extract data from the corrupt file discussed in this post. If the manual solutions don’t work for you, using Stellar Repair for Excel can come in handy in repairing the corrupt Excel (.xls/.xlsx) file and recovering the complete file data.
How to repair ‘recovered’ Excel file that won’t open
Summary: You may unable to open the Excel file after file recovery. When you try to open the file you may prompt up with error messages. This blog will discuss those errors and their solutions. Besides this, it also mentions Stellar Repair for Excel to repair and recover the severely corrupted Excel file with no data loss.
Consider a scenario: A Windows 10 user accidentally deletes a folder containing multiple Excel (XLSX) files created in Excel 2013. The worst part was all the deleted files were important, and he did not have a backup, which would help him in restoring the data. Nonetheless, he was able to recover those data using a professional data recovery software. Next, he tried opening each of the recovered Excel files one by one. In doing so, his happiness turned into disappointment. And the reason was, some of the recovered Excel files failed to open prompting error messages, of course, due to corruption. In this scenario, all he needed was to repair ‘recovered’ Excel files that did not open. Know how to fix damaged Excel files that were recovered after deletion in this blog!
Before delving into the Excel file repair methods, acquaint yourself with the probable causes leading to damaged or corrupt Excel files. Although not essential, it shall be an added advantage in helping you to prevent Excel file corruption issues in the future.
The standard Excel file(s) Corruption Causes
- Power Outage – A power outage due to which a system closes suddenly or unexpectedly is a common cause of damaged Excel files.
- Forced System Shutdown – Shutting down the system forcibly without closing MS Excel files is another common cause of corrupt Excel files.
- PC Virus or Bug – Computer viruses or bugs may affect one or more data file if owners do not protect their PCs with powerful updated antivirus. Same is the case with malware attacks. The chances are that your computer is infected with one of these and has affected a few Excel files.
- Issues with Storage Devices – Damaged or corrupted Excel files can also be the outcome of hard drive issues in the data storage systems. Logical hard drive damage is one of the most significant issues.
The damaged Excel files may prompt up with error messages. These may be:
- ‘Excel unable to read file’
- ‘Filename is not valid’
- ‘This file is not in a recognizable format’
- ‘abc.xls file cannot be accessed. The file may be read-only’
- ‘Excel found unreadable content in (filename)’, ‘The file is corrupt and cannot be opened’
- ‘Microsoft Excel has encountered a problem and needs to close’
There exist multiple methods to repair Excel files which got damaged after recovery, and are as follows: XML method,
- Open Excel files with HTML
- Inbuilt ‘Open and Repair’ feature/tool in Excel
- Repair damaged Excel file from TMP file by using Excel AutoRecover and AutoBackup features
- Recover data by configuring ‘calculation option’ as manual
- Moving/copying or transferring data to a different location
- Stellar Repair for Excel software
Taking Stellar software versus other methods, the former is a software solution that repairs damaged (XLS and XLSX) file quickly in major three steps: Select->Repair->Save, whereas others fall into the category of manual processes and consume both time and resources. Among the manual processes ‘Open and Repair’ method is the least time and resource consuming, which you can try quickly by following the below steps:
Open and Repair method
- Click MS Excel tab and then the Open tab
- Select the damaged Excel file for repairing purpose
- Click the arrow present beside the Open Next, click Open and Repair tab
- Click either of the following:
- Repair tab (recovers maximum data)
- Extract Data tab (Recovers values and formulas if the repair process fails in recovering the complete data.)
Note – Use ‘Extract Data’ if ‘Repair’ is not successful.
If the Manual method is not competent enough to repair recovered Excel files that don’t open then opt for a software-based solution of deploying Stellar Repair for Excel software.
Software with 100% integrity and precision

Conclusion
As an automated software, Stellar Repair for Excel is easy-to-use. You do not need technical know-how and skill set, as required to execute the manual processes. On analyzing all these methods, it is suggested to use Stellar Repair for Excel having a user-friendly GUI to repair Excel files that became damaged after recovery, or if the recovered Excel file(s) that you once deleted accidentally has become corrupt now. Above all, it is an excellent software with multiple features and advantages. Use it to address all your MS Excel issues or if any recovered Excel file is corrupt.
Resolve Compile Error in Hidden Module in Excel: Causes & Solutions
The hidden module in Excel refers to a container with VBA codes, custom queries, and complex macros. The compile error in a hidden (protected) module in the Excel worksheet usually occurs when doing different activities on a macro-enabled sheet, such as merging .xls files. The error can result in macros execution failure. You need to quickly resolve this compile error to restore full functionality of the VBA code. Below, we’ll be discussing the solutions to fix this Excel error. But before that, let’s see why this error occurs.
You may encounter the Compile error in hidden module due to one of the following reasons:
- The code in the workbook is not compatible with the Excel application.
- Manual queries created in a previous version are no longer compatible with your current version of Excel.
- Missing references.
- Invalid .exe files (control information cache files) are automatically created with ActiveX control insertion in Excel file.
- Protected module is corrupted.
- The workbook with hidden module is damaged or corrupted.
- Incompatible add-ins.
- Incompatible Excel file version.
- The module is protected or password-protected.
- Missing or corrupted mscomctl.ocx file.
Excel can throw the compile error while compiling the code that exists in the protected module. So, first check the error and identify the hidden module that is creating the issue. You can unprotect the module. Also, ensure that you have permission to access the VBA code in the module. If the error still exists, follow the below troubleshooting methods.
Method 1: Re-register ActiveX Control Files or mscomctl.ocx Files
You can get the compile error in the Excel file, containing the VBA code related to ActiveX controls or OCX files. The ActiveX control files and OCX files (mscomctl.ocx files) are the components of Microsoft’s standard controls library. The compile error in the hidden module can occur if these files are missing. In this case, you can use the Regsvr32 tool to re-register the OCX files. The Regsvr32 is a command-line utility to register and unregister OLE controls in the Windows registry.
Method 2: Delete .exd Files
The .exd files are temporary files created by Excel when inserting ActiveX controls objects. These temporary files can lead to a compile error if they are corrupted. So, if this issue has occurred, particularly in the Excel file containing ActiveX controls, then deleting .exd files might fix the issue. To delete the .exd file, follow the below steps:
- First, open the Run window by pressing the Windows+R keys.
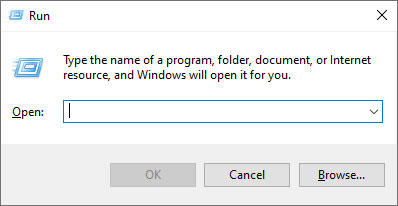
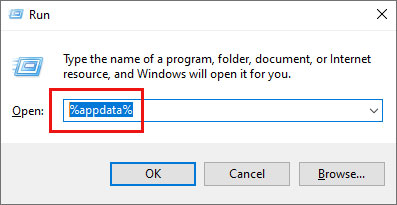
- In the Run window, type %appdata%.
- In the Roaming window, click on the Microsoft option.
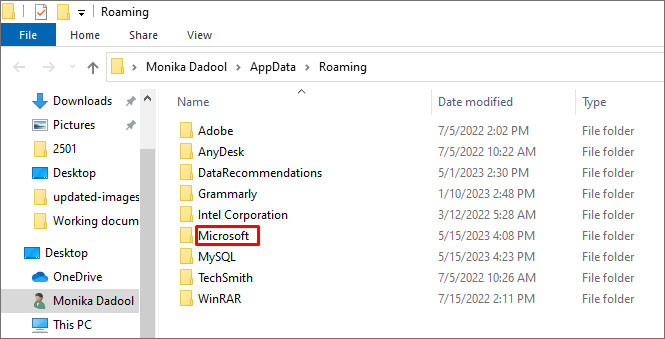
- Under Microsoft, you will see a list of folders. Search and click on Forms.
- Right-click on a file with .exd extension and select Delete.
- Once you delete the .exd files, restart your Excel application.
Method 3: Rollback the Office Updates
MS Office updates or upgrades may also cause the compile error in hidden module in Excel. If the error has occurred after downloading the recent Microsoft Office updates, try reverting to the previous version or uninstalling the recent updates to fix the issue.
Method 4: Unselect Missing References
The compile error in hidden module determine path in Excel can also occur if your file contains a reference to object library/type library, which is labelled as Missing. You can locate, check, and uncheck the references marked as ‘Missing’ to fix the issue. Here are the steps:
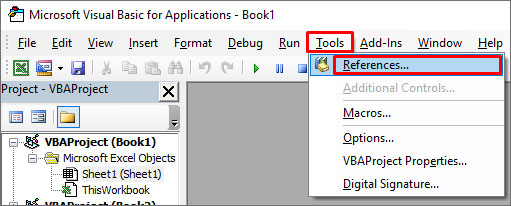
- Open your Excel and press Alt + F11 keys.
- The Visual Basic Editor is displayed.

- Go to the Tools option and then click References.
- In the References-VBAProject window, under Available References, search and unselect the references starting as “Missing”.
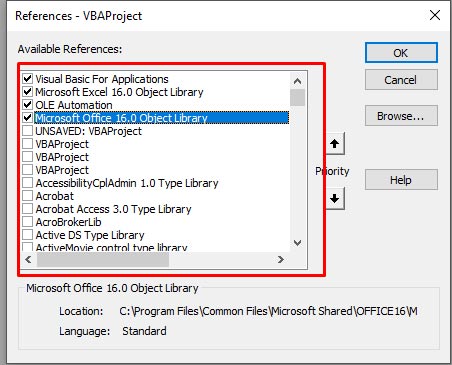
- Click OK.
Method 5: Check the Code in Module
The compile error in hidden module can occur if there are issues in the code within the module. The problems include incorrect or missing syntaxes, missing parameters/references, or the code contains incompatible functions or a wrong name of the object. You can check and fix these issues in the code by opening the VBA editor.
Method 6: Check and Remove Add-ins
In Excel, the compile error in macro-enabled files can also occur due to incompatible add-ins. You can check and disable the add-ins in Excel using the below steps:
- First, open the Run window and type excel /safe and then click OK. The Excel application will open in safe mode.
- Now try to open the affected Excel file. If it opens without the error, then check and remove the latest installed Excel add-ins.
- Navigate to the File option and then select Options.
- In the Excel Options window, click Add-ins.
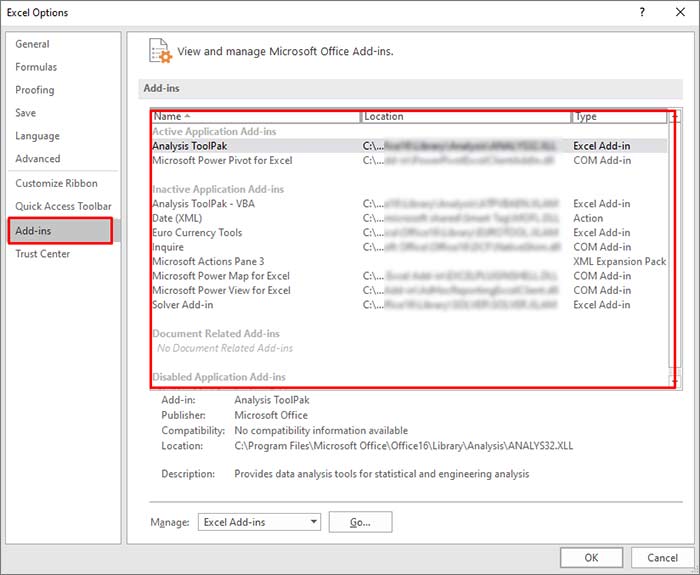
- Under Add-ins, search and select the latest add-ins, and then click on Go.
- In the Add-ins window, uncheck the add-ins and then click OK.

- Restart Excel and then check if the error is fixed or not.
Method 7: Repair the Corrupt Excel File
Corruption in the Excel file can affect the macros in the hidden module, which may result in the compile error. In such a case, you can try repairing the Excel file using Microsoft’s inbuilt utility -Open and Repair. To use this tool, follow these steps:
- Open your Excel application.
- Click the File tab and then click Open.
- Click Browse to select the affected workbook.
- The Open dialog box will appear. Click on the corrupted file.
- Click the arrow next to the Open button and then Open and Repair.
- You will see a dialog box with three buttons - Repair, Extract Data, and Cancel.

- Click on the Repair button to recover as much of the data as possible.
- After repair, a message is displayed. Click Close.
What if None of the Above Solutions Works?
If the above methods fail to get rid of the “compile error in hidden module” in Excel, then use an Excel repair tool such as Stellar Repair for Excel. This tool is specifically designed to repair the corrupted Excel file. It can recover all the components from corrupted Excel file (macros, queries, formulas, etc.) without changing their original formatting. The tool is compatible with all Excel versions and can be downloaded on a Windows system. You can download the free trial version of Stellar Repair for Excel to scan the corrupted Excel file and preview the data.
Closure
You can get the “compile error in hidden module” when Excel detects any issue while compiling the code in a protected module. It can occur when there is an issue with the macro-enabled Excel workbook or Excel add-ins. You can follow the above-mentioned methods to fix the issue. If the error occurs due to corruption in the database file, then you can try Stellar Repair for Excel . It can repair severely corrupted Excel files. It also helps recover all the Excel workbook’s components, including macros and queries. The tool has a simple and user-friendly interface.
How to Repair Corrupt Pivot Table of MS Excel File?
Summary: If you are not able to perform any action on the Pivot Table of MS Excel file, it indicates Excel Pivot Table corruption. In such a case, you must repair the corrupt Pivot Table of MS Excel file by using an Excel repair software or manual troubleshooting steps discussed in this post.
MS Excel is equipped with several brilliant features and functions which make working with large volumes of data easy. In addition to helping users save data into well-organized cells and tables, the application helps users draw inferences from the data. Pivot Table is one such Excel feature that helps users extract the gist from a large number of rowed data. But often, the Pivot table may get corrupted and lead to unexpected errors or data loss.
Corrupt Pivot Tables can stop users from reopening previously saved Excel workbooks, raising the serious issue of data inaccessibility. Resolving such issues is an uphill task unless one gets to the actual root cause of the problem.
However, with Stellar Repair for Excel software, you can repair the corrupt Pivot table of MS Excel file while keeping the Excel file data, formatting, layout, etc. intact.

Excel Pivot Tables & Associated Problems
Pivot Tables in Microsoft Excel are created by applying an operation such as sorting, averaging, or summing to the data in certain tables. The results of the operation are saved as summarized data in other tables. Typically, working on the grouping of saved data, Pivot Tables are used in data processing and are found in data visualization programs, such as spreadsheets or business intelligence software.
Put simply, Pivot Tables in Excel allow you to extract the significance or the gist from a large, detailed data set by allowing you to slice-and-dice data, sort-and-filter data, or arrange it in any way you want.
Frequently Encountered Problems with Pivot Tables in MS Excel
Take a look at the most frequently encountered Pivot Table issues:
- You add new data into a pivot table but it doesn’t show up when you refresh
- Pivot Table contains Blanks instead of Zeros for fields that have no source data
- Automatic field names assigned by the Pivot Table can be inappropriate
- It doesn’t directly show the percentage of total
- Grouping one pivot table affects another
- Your number of formatting gets lost
- Refreshing a pivot table messes up column widths
- Field headings make no sense and add clutter
While some of the above problems seem minute and can easily be resolved using a few tweaks, bigger issues like unexpected Pivot Table error messages that an Excel throws can be troublesome.
Pivot Table Errors & Their Reasons
Excel users who have built new Pivot Tables in Excel often report the following errors when trying to reopen a previously saved workbook:
We found a problem with some content in

Naturally, users are prompted to click on ‘Yes’. But when they do, they get another error message saying:
Removed Part: /xl/pivotCache/pivotCacheDefinition1.xml part with XML error
(PivotTable cache) Load error. Line 2, column 0
Removed Feature: PivotTable report from /xl/pivotTables/pivotTable1.xml part (PivotTable view)
Such errors are indicative of the fact that the data within the Pivot Table still exists, but the table itself isn’t functioning anymore.
There could be two primary reasons behind such behavior:
- You’ve created the Pivot Table in an older version of Excel but are trying to open-refresh-save it through a newer Excel version
- The Pivot Table itself is corrupted
How to Repair the Pivot Table Quickly?
To solve the errors associated with Pivot Tables, you need to repair them. But Microsoft doesn’t offer any inbuilt technique or option to repair Pivot Tables. Thus, to fix the issue, you either need some sort of workaround or an Excel file repair software .
Methods to Fix Corrupt Pivot Table in MS Excel
Though there aren’t many options to fix the Pivot Table, you can follow these workarounds to try and repair a corrupt Pivot Table of MS Excel. However, before following these steps, create a backup copy of your Excel file.
Method 1: Open MS Excel in Safe Mode
First, try opening the Excel file in safe mode and then check if you can access the Pivot Table. If you can, save all its contents to a new Pivot Table in the latest version of Excel so that this problem doesn’t arise anymore.
Method 2: Use Pivot Table Options
If, however, above method doesn’t work, follow the below-mentioned steps:
- Right-click on the Pivot Table and click on Pivot Table Options
- On the Display tab, clear the checkbox labeled “Show Properties in ToolTips”
- Save the file (.xls, .xlsx) with the new settings intact
Method 3: Make Changes to Pivot Table
If the above method or steps didn’t work,
- Try opening the Pivot Table Options window by right-clicking on the Pivot Table within your Excel file
- Select Pivot Table Options from the pop-up menu and make appropriate changes to the options given there
- Then check if the issues go away
Method 4: Check and Set Data Source
If the problem in the Pivot table is related to data refresh,
- Go to Analyze > Change Data Source
- Check if the data source is set properly
- Also, try reselecting the data source and check if the refresh option is working properly
If not, resorting to Stellar Repair for Excel software might be your only hope.
Excel Pivot Table Repair by Using Excel Repair Software
When corruption strikes an Excel Pivot Table and no manual trick work, Stellar Repair for Excel is the best solution. This easy-to-use Excel Repair software repairs even the most severely corrupted Excel (XLS/XLSX) files to restore all data, properties, formatting, and preferences. It enables users to extract their saved data into new blank Excel files.
If you have this utility by your side, you don’t need to think twice about any Excel error.

What customer says about the Excel Repair Software?


Conclusion
Excel Pivot Table corruption may occur due to any unexpected errors or reasons. This can lead to inaccurate observation in data analysis and also cause data loss if not fixed quickly. However, you can prevent data loss due to problems caused by Pivot Table corruption by keeping a backup of all your critical Excel files and fix the Pivot Table corruption by using proper tools, such as Excel file repair software, that can help you get over any Excel corruption and errors quickly.
Also read:
- 2 Ways to Transfer Text Messages from Honor X50i+ to iPhone 15/14/13/12/11/X/8/ | Dr.fone
- How to Restore Deleted Motorola Moto G14 Photos An Easy Method Explained.
- How To Transfer Data From iPhone 12 Pro To Other iPhone 15 Pro devices? | Dr.fone
- How To Restore Missing Pictures Files from Honor 90 Pro.
- How To Transfer Data From iPhone 12 Pro Max To Other iPhone devices? | Dr.fone
- How to Poco M6 Pro 5G Get Deleted Phone Number Back with Ease and Safety
- How to recover deleted photos from Android Gallery after format on Oppo Reno 10 Pro 5G
- How to Retrieve deleted photos on Xiaomi
- How to repair corrupted PDF v1.2 file when manual method fails
- How To Transfer Data From iPhone 12 Pro To Other iPhone 12 devices? | Dr.fone
- How to Retrieve deleted photos on Realme Narzo 60 Pro 5G
- How to identify missing or malfunctioning drivers with Windows Device Manager in Windows 11
- How to Recover Deleted Notes from iPhone SE (2022)? | Stellar
- How to remove Google Pixel 8 Pro PIN
- How to Repair corrupt MP4 and AVI files of Nokia 106 4G (2023) with Video Repair Utility on Windows?
- How to Downgrade iPhone SE (2022) to an Older iOS Version? | Dr.fone
- How to restore wiped call history on Realme 10T 5G?
- How to retrieve erased videos from Oppo
- How to retrieve erased videos from Honor X8b
- How to Retrieve deleted photos on Samsung Galaxy M34 5G
- How to retrieve erased call logs from Asus ROG Phone 7 Ultimate?
- How to retrieve erased music from Itel A60
- How to recover deleted contacts from Honor 100.
- How to restore wiped music on Y27 5G
- How to recover deleted photos from Android Gallery without backup on Honor
- How to Recover Lost Data from iPhone 6 After iOS Update? | Stellar
- How to recover lost data from Asus ROG Phone 8 Pro?
- How to get back lost photos from Samsung .
- In 2024, Android to Apple How To Transfer Photos From Realme 12 Pro+ 5G to iPad Easily | Dr.fone
- In 2024, Best Pokemons for PVP Matches in Pokemon Go For Poco X5 Pro | Dr.fone
- The Ultimate Guide to Bypassing iCloud Activation Lock from iPhone 7
- How To Delete iCloud Account Remove Your Apple ID Permanently From Apple iPhone 14 Pro
- How to use Pokemon Go Joystick on Oppo A2? | Dr.fone
- Complete Tutorial to Use GPS Joystick to Fake GPS Location On Samsung Galaxy A25 5G | Dr.fone
- How to Change your Motorola G24 Power Location on Twitter | Dr.fone
- Pattern Locks Are Unsafe Secure Your Motorola Moto G04 Phone Now with These Tips
- How to Transfer Data After Switching From Vivo X Fold 2 to Latest Samsung | Dr.fone
- How to Unlock Apple ID Activation Lock On Apple iPhone 8 Plus?
- In 2024, What Pokémon Evolve with A Dawn Stone For Poco M6 5G? | Dr.fone
- How to Transfer Photos from Poco C51 to New Android? | Dr.fone
- In 2024, The Best iSpoofer Alternative to Try On Xiaomi Redmi Note 12T Pro | Dr.fone
- Can You Unlock iPhone 15 Pro Max After Forgetting the Passcode?
- Fix Cant Take Screenshot Due to Security Policy on Lava Storm 5G | Dr.fone
- In 2024, Best Anti Tracker Software For Lava Blaze 2 Pro | Dr.fone
- How to Fix It HTC U23 Wont Turn On | Dr.fone
- In 2024, A Quick Guide to Infinix Hot 40 FRP Bypass Instantly
- How to Stop Google Chrome from Tracking Your Location On Motorola Defy 2? | Dr.fone
- Edit and Send Fake Location on Telegram For your Xiaomi Redmi Note 12 Pro 5G in 3 Ways | Dr.fone
- 9 Mind-Blowing Tricks to Hatch Eggs in Pokemon Go Without Walking On Vivo V27e | Dr.fone
- Guide to Mirror Your Asus ROG Phone 8 to Other Android devices | Dr.fone
- In 2024, How To Activate and Use Life360 Ghost Mode On Motorola Razr 40 Ultra | Dr.fone
- In 2024, Best Pokemons for PVP Matches in Pokemon Go For Sony Xperia 10 V | Dr.fone
- Title: How to Fix Excel Run Time Error 1004 | Stellar
- Author: Nova
- Created at : 2024-05-19 18:32:11
- Updated at : 2024-05-20 18:32:11
- Link: https://blog-min.techidaily.com/how-to-fix-excel-run-time-error-1004-stellar-by-stellar-guide/
- License: This work is licensed under CC BY-NC-SA 4.0.
