
How To Recover Data From Lost or Stolen iPhone 8 In Easy Steps | Stellar
How To Recover Data From Lost or Stolen iPhone In Easy Steps
Summary: Lost your iPhone and now worried about your precious data on it? This post shares how efficiently Stellar Data Recovery for iPhone can recover lost data from a lost or stolen iPhone using iCloud Backup.
When we lose our phone, then the only thing we worry about is the valuable data stored on it. To recover all our critical data (contacts, messages, photos, videos, voice memo, etc.) all we need to do is restore them either from iTunes or iCloud backup. What if due to some unknown reasons, we are unable to access the backup? Well, in such cases we can still recover our files from the backup via Stellar Data Recovery for iPhone software.
Apple is known for its flagship features and, one of them being able to automatically backup the iPhone data. ICloud and iTunes automatically back up iPhone data and updates it whenever you sync it to your Mac. The advantage of these backup systems is that you can recover your data when your iOS device is lost or stolen.
Speaking of which, a friend of mine lost his iPhone and was looking for ways to restore his critical data. As he had saved the information by backing it up, all he had to do was transfer the information to the new iOS device. However, as luck would have it, he was unable to access the backup files either.
To get rid of the deadlock, he decided to look for a third-party application which can recover iPhone data, and after some analysis, he opted for iPhone Data Recovery Software by Stellar.
Stellar Data Recovery for iPhone (Ultimate Solution to Recover iPhone Data)
If your backup is accessible, you can recover data from the backup files. If you cannot access the backup files, then you need a third-party iPhone Data Recovery Software to recover data from your lost or stolen iPhone.
Stellar Data Recovery for iPhone provides you with 2 options to recover iPhone data i.e. either from iTunes backup files or iCloud backup files. It is easy to use and deploys a robust scanning algorithm so as to recover as much data as possible.
Irrespective of how you lost your iPhone data, you can get back your data in two Recovery modes namely:
- from iTunes Backup
- from iCloud Backup
Let’s look at each —

Recovery Mode 1: iTunes Backup Files
You can recover iPhone data if you have synchronised your iPhone with iTunes earlier. To recover data from iTunes Backup files, follow these steps:
i. Run Stellar Data Recovery for iPhone and select “Recover from iTunes Backup” tab

Figure 1 illustrates the main screen of the software
ii. The software displays the list of all iTunes backup files. Select the required backup file to recover

Figure 2 illustrates the entire list of the backup files
iii. From the Tree view, select the supported file categories which will list all the items under that category head.
iv. Preview the selected backup files and save the files

Figure 3 represents the preview of the files
**Note: You can preview the existing and deleted files. Moreover, type the keyword or filename in the search box to search for a particular file.
v. Click the Save button to recover the file.
Recovery Mode 2: iCloud Backup files
You can restore your iPhone data from iCloud Backup files as well. Follow the steps given below:
i. Install and Run Stellar Data Recovery for iPhone and select “Recover from iCloud Backup” tab.

Figure 5 represents the home screen of the software
ii. Next, enter the Apple ID and Password and sign in to iCloud.

Figure 6 illustrates the credential page
iii. After entering the necessary credentials, the software displays the list of all the backup files. Select the required files and press the Scan button

Figure 7 Represents the list of all files
iv. Preview the selected files and press the Save button which you can save to the desired location.

Figure 8 illustrates the preview of the files
The Process is over!!
What does Stellar Data Recovery for iPhone offers?
- Supports latest iOS 17, 16 15, 14, 13, 12 and below
- Recovers data from iTunes/iCloud Backup files
- Supports multiple device connections
- Data recovery from encrypted iTunes Backup files
- Provides option to import files to iPhones
Concluding Note
Simplicity is one of the several major aspects that are frequently sought by users. On that note, the interface of Stellar Data Recovery for iPhone software is quite simple and intuitive, and users can quickly and accurately recover iPhone data. With that said, do make it necessary to regularly backup your iPhone data.
How to Recover Data from Broken iPhone Screen
Summary: Struggling to recover data after your iPhone’s screen broke? Stellar Data Recovery for iPhone can help restore data efficiently from an iPhone with a broken screen.
Your iPhone is the most cherished personal gadget as it has become more innovative and influential due to its many valuable features. Moreover, information such as notes, contacts, iMessage, calendar entries, text messages, WhatsApp/Kik messages, pictures, and videos are readily available, making it even more lovable. This is why we need to know how to recover data from broken iPhone screens.
These days, though there are plenty of best ways to back up your data, users often overlook the importance of Backup. It happened with _Jacky Jainco; w_hile taking a DSLR-like photo on his iPhone 14 Pro Max, he accidentally dropped his iPhone and, consequently, broke it.
The real problem was not the broken iPhone but to recover data from iPhone as it was not synced with iTunes and iCloud Backup. As a result, he couldn’t access his files, more importantly, his pictures.
You might have dropped your iPhone several times, and luckily, the excellent cover has saved it on all occasions. However, any drop could cause potential damage putting your data at stake; therefore, leverage iTunes or iCloud backup to recover data from the damaged iPhone screen.
Bringing Back Your Data From Backup
You can restore your files from either iTunes or iCloud Backup. In addition, replacement screens are available; you can have an appointment with the genius bar, get your damaged iPhone fixed, and then recover your data. Also, when backup files are inaccessible, turn to an iPhone data recovery software for an easy solution.
Sorting backup files is unmanageable as they tend to be large, running into GBs. Moreover, the process can be tedious, especially when you have to sort all files, even when you need to recover only a specific file. So it is when iPhone Data Recovery Software by Stellar is fruitful. The software lets you recover deleted files from encrypted iTunes backup files or recover data from an iPhone that would not turn on. Stellar Data Recovery for iPhone supports broken iPhone data recovery from series of iPhone 15, 14, 13, 12, 11, XR, XS, X, 8 Plus, 8, 7 Plus, 7, 6S Plus, 6S, 6 Plus, 6, 5S, 5C, 5, 4S, and 4.
You can recover a specific file without the pain of going through all backup files as the software lists all the files in an organized structure, thus, saving your precious time and effort.
Watch how to recover photos from a broken iPhone:
Recover your data from iTunes Backup
Here’s how to recover your iTunes backup using Stellar Data Recovery for iPhone.
1. Select the ‘Recover from iTunes Backup’ option.

2. List of your iTunes backup files appears. Select the relevant iTunes backup

3. In the middle pane, select the files you wish to recover and click the ‘Save’ button.

Recover your data from iCloud Backup
Another effective way to recover data from broken iPhones is through iCloud Backup. For any reason, let’s suppose you cannot access your iCloud backup files; then, using the ‘Recover from iCloud Backup’ feature, you can restore all your essential files. The simple steps are as follows:
- Click ‘Recover from iCloud Backup.’
- Sign in to your iCloud account to view the list of available backup files.
- In the left pane, click on the supported file list categories to view files under them.
- Select the files that you wish to restore and click ‘Save.’
Stellar Data Recovery for iPhone recovers the deleted photos, contacts, messages, etc., from the backup files and restores them to the device.
That’s Not All
Apart from recovering data from damaged iPhones, Stellar Data Recovery for iPhone facilitates the option to import the recovered files to your new or fixed iPhone.
To import your recovered files, follow these steps:
- First, connect your iPhone to the system, run the software, and click the ‘Import file to iPhone’ option.
- Click ‘Browse’ and select the files you wish to import to your iPhone.
- Click ‘OK’ to preview the selected files.
- Click ‘Transfer to iPhone’ to transfer recovered files to your iPhone.
To Sum Up
When your iPhone is damaged, try the basics, i.e., restart it; if that works, back up as much data as possible. You can also restore your files from iTunes or iCloud Backup if there are any. Else, make an appointment with the genius bar and get your iPhone fixed. They might also help you recover data from the damaged iPhone, which comes with an asterisk. Therefore, turn to Stellar Data Recovery and save time and energy for efficient recovery of your data.
7 Ways to Fix iTunes Error 9
Summary: The iTunes error 9 appears when iPhone update through iTunes gets failed. It’s annoying as the error doesn’t let you use your device further. Learn 7 quick methods to fix iTunes error 9 and update the device without any issue.
Trying to get the new iOS on your iPhone but facing iTunes Error 9?

The iTunes error 9 usually occurs while updating your iPhone via iTunes. The error annoyingly neither lets you update the iPhone nor do any activity on your device. Thus, it urgently requires a fix so that you can work on your iPhone and also update the device.
In this post, we will share with you 7 best possible ways to fix iTunes Error 9. But before that let’s know what is causing the iTunes error on trying to update your iPhone.

Why does iTunes Error 9 occur?
It is difficult to determine the exact reason of your iTunes Error 9. But it may be due to any of the reasons given below :
- USB port or cable is damaged
- You have jailbroken your iPhone
- Corrupt network settings
- Security software prevents access to Apple server
How to fix iTunes error 9?
Since it is usually, regarded as a hardware issue, you should begin with hardware-related workarounds and later move to other software troubleshooting methods.
Going by the order, try below methods to fix iTunes Error 9
- Check USB cable & port
- Restore iPhone with iTunes on another computer
- Force your device to restart
- Check Anti-Virus & Firewall on your computer
- Update iTunes to the latest version
- Use Recovery Mode to Fix iTunes Error 9
- Choose to update iPhone wirelessly
Solution 1: Check USB cable and port
Make sure your iPhone USB cable and port are properly connected and working fine. Do the below checks and fix:
- USB cable is not loosely connected to the computer
- You are using the USB cable that you got with your iPhone or another certified cable
- The USB port is not damaged. Try by shifting to another USB port

Solution 2: Restore iPhone with iTunes on another computer
iTunes error 9 is generally regarded as a hardware-related problem. Sometimes it is difficult to detect the issue. The easier way out is to restore iPhone using iTunes on another computer or laptop. If still the error persists, move on to the other workarounds.
Solution 3: Force restart your device
Apple suggests trying once force a restart of iPhone to fix iTunes error 9.
iPhone X, iPhone 8, & iPhone 8 Plus users: Press and quickly release the Volume Up button. Press and quickly release the Volume Down button. Then, press and hold the Side button until you see the Apple logo.
iPhone 7 & iPhone 7 Plus users: Press and hold both the Side and Volume Down buttons for at least 10 seconds, until you see the Apple logo.
Solution 4: Check Anti-Virus & Firewall on your computer
Antivirus or Firewalls in your computer may prevent iTunes to connect with Apple server. Check the security software settings, and tweak them if required to allow iTunes to access the network servers.
Solution 5: Update iTunes to the latest version
Updates usually bring in new features, fix existing bugs and make the application smarter. If the iTunes error 9 is due to outdated iTunes, installing the latest version may help to fix the error.
How to update iTunes to the latest version?
For Windows users: Launch iTunes on PC. On the menu bar, click Help > Check for Updates and follow the given instructions
For Mac users: Launch iTunes on Mac. On Menu bar go to iTunes > Check for Updates and follow the on-screen instructions.
After updating iTunes, reboot your computer and check if the iTunes error 9 is fixed.
Solution 6: Use Recovery Mode to fix iTunes Error 9

iPhone in Recovery Mode
All the above methods fail to fix iTunes error 9? As last resort choose Recovery Mode to restore iPhone in iTunes. Choosing this option means you will lose all your iPhone data. Thus, first take backup in iCloud or iTunes before applying this fix.
How to put your iPhone into Recovery Mode? (For iPhone 8, 8 Plus, & X users)
- Update your iTunes
- Press and release the Volume Up button and then the Volume Down button
- Press and hold the Side button till connect to iTunes screen appears
- Once the iPhone is in Recovery Mode, connect your computer with iPhone via USB cable. You will see the white Apple logo screen.
- When iTunes asks you to update or restore, click Update to reinstall iOS

Lost iPhone data after restoring iPhone in iTunes via Recovery Mode?
Losing iPhone data after update through Recovery mode is a panicky situation. It gets even more serious if you are unable to restore from iCloud or iTunes backup. In such situation, Stellar Data Recovery for iPhone comes as big relief**.** The software restores complete iPhone information from iPhone, iCloud and iTunes.
Stellar iPhone data recovery software quickly and safely restores all iPhone data including photos, videos, music, contacts, messages, Safari bookmarks, etc. It also recovers the lost WhatsApp, WeChat, Line, Viber, Tango, and Kik messages. The software is extremely easy to use. Simply launch it on your Mac or PC, connect your iPhone to the computer and follow the on-screen instructions.


Solution 7: Choose to update iPhone wirelessly

Select Software Update in Settings on iPhone
Alternatively update iPhone wirelessly, without using iTunes. Make sure you have a continuous Internet connection. Go to Settings > General > Software Update. If an update is available, tap on Download and Install.
Conclusion
Although iTunes Error 9 rarely occurs but is a frustrating situation as you are unable to do any other activity on your device.
You can sometimes easily fix the Error 9 by doing a simple check if your USB cable, port connection, and firewall settings are appropriate. Restarting the device and updating iTunes to the latest version can also resolve Error 9. As a last resort, update iOS in iTunes through Recovery Mode. Nevertheless, you can also choose to bypass iTunes and update your device wirelessly.
One of the above methods is surely going to help you out. Also do not forget to share with us in the comment box below, which of these methods helped you to fix iTunes Error 9.
How to Recover Deleted Videos from iPhone Without Backup?
Your iPhone 8 is supported by a strong and powerful operating system that makes your daily activities such as calling, emailing, messaging, web browsing, notes making, etc. easily possible. Also, capturing happy moments spent with family, friends, and your loved ones is another thing that you do with it. It is natural that the good times that you record becomes your favorite videos, which you love watching anytime you feel like.
However, at times in the event of making space in your iPhone 8, or due to any other reason, you accidentally delete the videos, and end up losing one, more, or all of them. The situation becomes grim when you realize that you haven’t taken a backup of your favorite videos. You really do not know what to do to recover your deleted videos from iPhone 13 without backup. It is then that you understand the importance of having a backup and regret not creating the same for your favorite videos.
You can come out from such a situation with the help of Stellar Data Recovery for iPhone. It is a comprehensive iPhone data recovery software tool through which you can recover deleted videos from iPhone 8 without a backup.
The videos you capture with your iPhone 8 gets stored in either the memory of the phone. However, once the videos are lost or accidentally deleted from there, you lose access to them. To recover deleted videos of iPhone 8 with Stellar Data Recovery for iPhone, you need to execute the following steps:
Step 1) Download and install the software on your system, the one on which you want to recover the deleted videos of your iPhone 8.
Step 2) Connect your iPhone 8 to your system.
Note – You can connect your iPhone 8 with multiple devices and the software will enlist all the connected devices. You can connect the iPhone 8 after or before the launch of the software.
Step 3) Next, launch the software that you installed.

Step 4) To recover deleted videos from your iPhone 8, click on the ‘Recover from iPhone’ option that comes up on the screen.
Step 5) The Stellar Data Recovery for iPhone software will scan the iPhone 8 to list all the recently deleted data including videos.
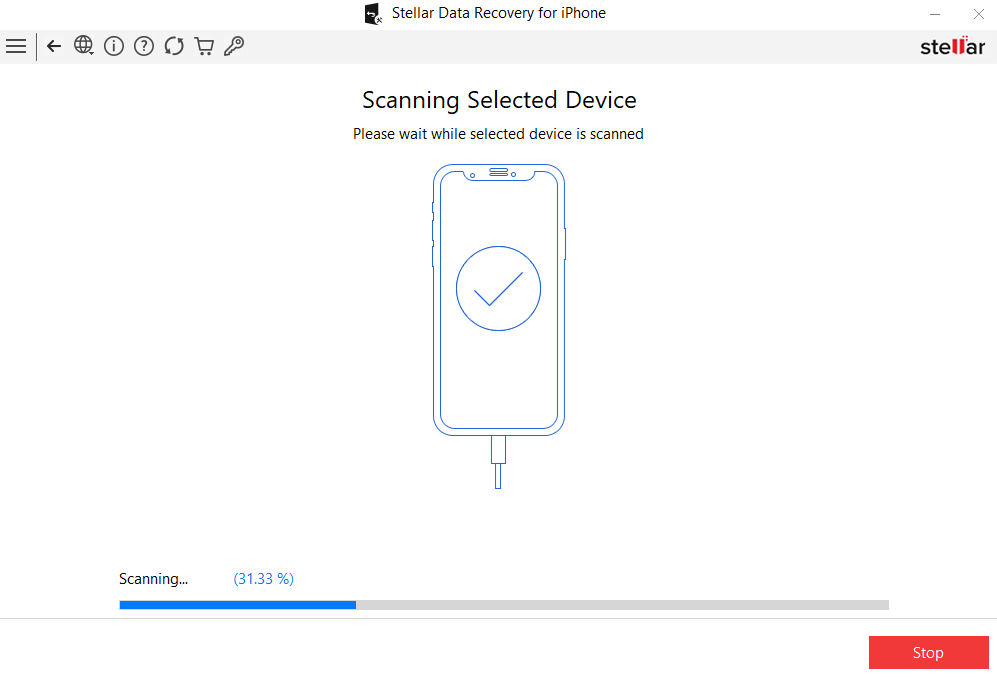
Step 6) All deleted videos will be listed in red, while the rest will be listed in black color as shown in the image placed below.
Step 7) After that, select the videos you want to recover by putting check marks in the boxes in front of them.
Step 8) Provide the address of the location where you would want the recovered videos to be saved.
Step 9) Click Save button to finally save the videos. With this, the ‘Save Files’ dialog appears as shown below:
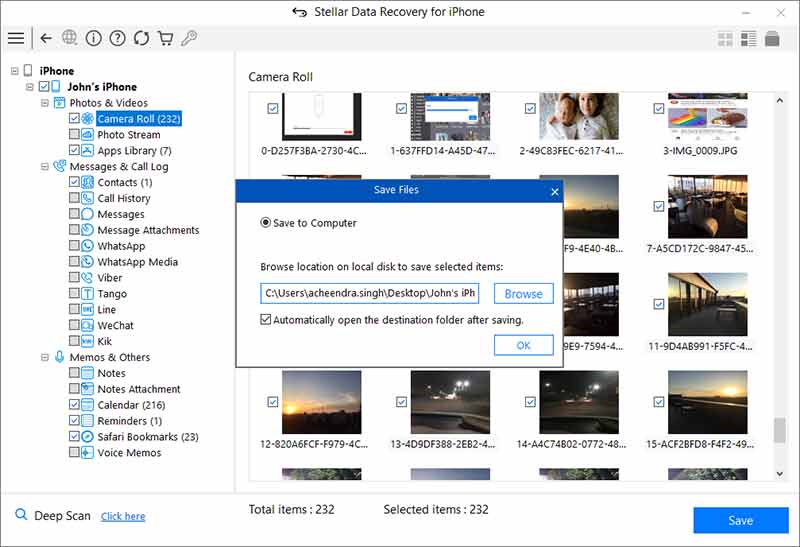
(i) Chose the option ‘Save to Computer’ if you want to save the recovered videos to your computer. Click Browse and select a destination for saving the recovered files and click OK.
(ii) Choose the option ‘Save to iPhone’ if you want to save the recovered files to your iPhone 8. From the drop-down menu, select the iPhone 8 to which you want to save the recovered videos.
Step 10) Finally, click on the OK tab to complete the recovery process of deleted videos from your iPhone 8.
- Title: How To Recover Data From Lost or Stolen iPhone 8 In Easy Steps | Stellar
- Author: Nova
- Created at : 2024-08-20 20:17:14
- Updated at : 2024-08-21 20:17:14
- Link: https://blog-min.techidaily.com/how-to-recover-data-from-lost-or-stolen-iphone-8-in-easy-steps-stellar-by-stellar-data-recovery-ios-iphone-data-recovery/
- License: This work is licensed under CC BY-NC-SA 4.0.