
How to Recover Deleted Screenshots on iPhone 15 Pro Max? | Stellar
How to Recover Deleted Screenshots on iPhone?
Summary: Accidentally deleted or lost screenshots from your iPhone? Don’t know how to recover deleted screen grabs? Learn five methods to recover deleted screenshots on iPhone. Also, know how Stellar Data Recovery for iPhone quickly restores deleted screenshots from your Apple device.


Screenshots are the fastest way to save anything you see on smartphones or systems. Many of you may have also captured screens of chats, video calls, online products, etc., on your iPhone. Since screenshots are saved in various image formats like JPG, PNG, GIF, etc., they can get deleted like any other file on your Apple device.
Hence, if you have lost or mistakenly deleted screenshots on your iPhone, this blog shares successful methods to recover deleted screenshots on your iPhone.
But first, you must know the locations on your iPhone where you can search for deleted or missing screenshots.

Where are screenshots saved?
There’s nothing unusual about searching screenshots on your iPhone. Sometimes, files may be saved at multiple locations, and you may not locate them at once or forget them. So first, check your iPhone thoroughly.
On the iPhone, screen grabs are saved in two different locations. One is the Photos app in a separate folder named ‘Screenshot,’ and the other is the Files app.
How to recover deleted screenshots on iPhone?
Here, we have shared five workable solutions to restore deleted screenshots on iPhone.
Method 1: Recover Deleted Screenshots on iPhone from Recently Deleted Album
It’s well known that the Recently Deleted Album on iPhone keeps the deleted photos and screenshots for up to 30 days. Hence, the natural first place to look for deleted screenshots on iPhone is here.

- Open the Photos app, tap the Recently Deleted album, locate the screenshots, and tap Recover to save it to the original Camera Roll location.

Method 2: Deleted Screenshot Recovery in iPhone from iTunes Backup
On macOS Mojave or earlier versions, restore permanently deleted screenshots from an iTunes backup. To recover deleted photos or screenshots , follow these steps:
- Open iTunes and connect your iPhone to your computer.
- Click the iPhone icon at the upper corner of the iTunes window.

- Click Summary in the left pane and select the Restore Backup option in the Backup section.

- Choose the most relevant backup of your iPhone and click Restore to start the process.

Method 3: Recover Permanently Deleted Screenshots using Finder
In macOS Catalina and newer versions, Finder syncs and manages the content on iPhones, iPad, and iPods.
Steps: How to recover permanently deleted screenshots on iPhone from Finder:
- Connect your iPhone to your Mac with macOS Catalina 10.15 or above.
- Open Finder on your Mac and select your iPhone from the location list.

- Go to the General tab and click Restore Backup.

- Select the backup date and click Restore to start the process.

Method 4: Recover Deleted Screenshots using Data Recovery Software
Get a professional Screenshot Recovery Software – Stellar Data Recovery for iPhone . It can recover deleted or lost screenshots of all formats, GIF, PNG, JPG, or TIFF, etc., from iPhone. In addition, the software supports recovery of screen captures taken through iPhone lost due to formatting, empty Recently Deleted folders, virus attacks, etc.
Step-by-step: How to find deleted screenshots on iPhone using data recovery software
Connect your iPhone to your system.
Download and launch the trial version of Stellar Data Recovery for iPhone.
Select Recover from iPhone in the What to Recover screen.

- Select Camera Roll and click Next. The scanning will start.

- A list of deleted screenshots appears. Preview the screenshots. The free version of the software allows the preview of files up to 20 MB. If you don’t see the required screenshots, toggle the Deep Scan option and scan again.

- Click Recover and Save the screenshots on your system or iPhone at the desired location.

Note – The trial software scans the media and shows a preview of all the recoverable screenshots. Once you can ascertain the effectiveness, save the recoverable files after activating the software.
Method 5: Recover Screenshots on iPhone using iCloud Backup
iCloud Backup stores and syncs files among Apple devices. Your screenshots and photos may be saved here in the cloud storage only if you have enabled iCloud Photos to backup all your iPhone photos. Here’s how to restore deleted screenshots from iCloud:
- Go to the iCloud Website and sign in with your Apple credentials.

- Once logged in, click on Photos and go to the Recently Deleted Album.


- Select the screenshots you wish to restore and click Recover.

Wrapping Up
Deleted screenshots recovery is easy. Backup is the best way to recover deleted screenshots from your iPhone. However, it would be best to first look for the deleted screenshots in your iCloud, iTunes, Finders, etc.
Besides, if you are lucky, you can get back the deleted screenshots from the Recently Deleted folder on your iPhone.
Nonetheless, robust and secure software is the right approach to recover screenshots for all complex data loss cases. For example, if the screenshots are permanently deleted from iPhone, use Stellar Data Recovery for iPhone. The software scans the iPhone or iPhone/ iCloud backup, displays the found screenshots, and allows a preview before saving.
FAQ
1. How to recover the permanently deleted screenshots from my iPhone?
Check the Recently Deleted album in your Photos app on your iPhone. Or use iCloud or iTunes backup to recover them. If screen grabs are not in the Recently Deleted album, use iPhone data recovery software like Stellar Data Recovery for iPhone to recover them.
2. Can you recover deleted screenshots on iPhone without any backup?
It is possible to recover permanently deleted iPhone screen grabs using professional iPhone data recovery software. We recommend Stellar Data Recovery for iPhone.
3. Where do deleted screenshots go on the iPhone?
When you delete screenshots on an iPhone, it is moved to the “Recently Deleted” folder of your Photos app.
4. How to take long screenshots on iPhone?
To take a full screenshot of a website, take the screenshot and tap preview before it disappears—tap Full Page to save the screenshot as a PDF.
How to Recover Deleted Photos, Videos & Music Files from iPhone
Summary: Learn how to recover deleted photos, videos and music files from iPhone using the best recovery software —Stellar Data Recovery for iPhone.
There are zillions of tutorials one can find on how to take incredible photos with the A10 fusion chipped smartphone; however, few know how to recover deleted photos from iPhone. As a coin has two sides, through this post, we will explore the other untouched, unexplored side.
iPhone has been the epitome of perfection ever since it entered the smartphone realm. With stellar features and functionality, iPhone has become the highest selling property. There are some hidden iPhone camera features that users can utilize and take amazing photos and videos which leave a lasting impression.
Get Started Here!!!
Recovering deleted photos from iPhone is a straightforward process and do not involve much complexity, provided the right steps are implemented in the right manner.
Without much ado, you can recover deleted iPhone photos or videos with these simple steps. Let’s delve into it in detail.
Solution 1:
Apple has made it easy to recover deleted iPhone photos. Here’s what you need to follow:
- Go to the Albums and access your photos.
- Scroll down and select ‘Recently Deleted’ folder.
- In this folder, you will find all the photos that have been deleted.
- Simply tap the photo you want to recover and press “Recover.”
- To permanently delete a photo, press “Delete”.
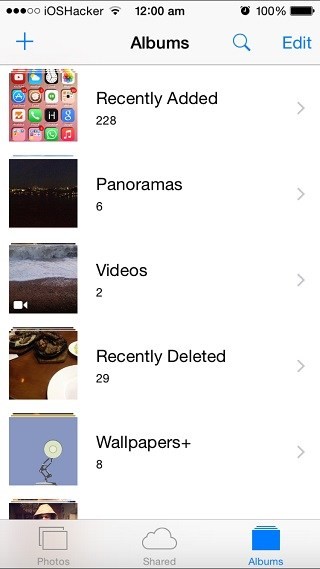
Figure 1 represents how to recover photos from Recently Deleted folder
**Important: _In the ‘Recently Deleted’ folder, you’ll find photos, video & music files that have been deleted within the last 30 days only. To recover them before that period, either you have to restore from iTunes or iCloud backups or use iPhone photo recovery software _.
Solution 2:
iCloud Photo Library to Your Rescue:
You can recover iPhone photos or videos through iCloud Photo Library. iCloud Photo Library securely stores your photos and videos on iCloud. It automatically saves all your photos and videos in iCloud so that you can access the library from any device.
Follow these steps to turn on the iCloud Photo Library:
- Go to settings < [your name] < iCloud < Photos, then turn on iCloud Photo Library (iOS 10.3 or later).
- In iOS 10.2 or earlier, go to Settings < iCloud < Photos.
**Important: Ensure that you’re signed in to iCloud with the same Apple ID as on all of your devices. Things can be complicated as iCloud Photo Library is synced with your different Apple devices which means there could be multiple copies and if a photo, video or music file is deleted from a device, it will not be available on the other devices as well. Deletion sync across all the devices.
Solution 3:
iTunes Backup is there to recover all your photos.
- Click File menu, select Devices < Restore from Backup.
Or
- Open the iOS device’s Summary tab. There are two ways to access this:
- Click the device button in the upper right corner.
- In iTunes tab, click the View menu and select Show Sidebar. Select your iOS device in iTunes under Devices.
- Click the Restore Backup button.
Solution 4:
Use Stellar Data Recovery for iPhone:
iPhone Data Recovery Software by Stellar is an ideal tool to recover lost data from your Apple devices. Utilizing its advanced algorithm, you can scan and recover data (photos, videos, calendar, notes, messages, call history, etc.) from your device. Furthermore, you can recover data from iCloud and iTunes backup as well.
- Connect your iPhone to your system and launch “Stellar Data Recovery for iPhone” software.
- Select “Recover from iPhone” and the software will scan your device for the contents.
- Click on any file to see its preview.
- Finally, click “Save” to save the recovered file to the preferred location.
The Final Word
Apple reflects perfection in its design and innovation; therefore, it constantly thrives to provide its consumers with the best platform. One such feature is that iOS can back up your photos on cloud services automatically so that you have access to them at any given time.
Moreover, there are iTunes backup, iCloud backup options available along with iPhone Data Recovery Software as well; but, it is advisable to backup your iPhone photos or videos timely and manually to avoid unnecessary issues.
How to Reset iPhone without Losing Data?
Summary: Sometimes, resetting an iPhone is essential to fix minor issues like iPhone crashing, freezing, or getting stuck at the Apple logo. But the iPhone reset process can delete important data and settings on your device. Read this post to learn smart ways to reset your iPhone without data loss. Moreover, you can also download this quick tool to reset your iPhone without losing data.

“Yesterday, my iPhone stopped working suddenly. I have been trying multiple ways to fix it since then; even tried the force reboot method. Should I simply reset my iPhone? How do I do it without losing my device data?”
Resetting an iPhone can sometimes become a necessity, whether due to sudden freezing up of your device, software glitches, or slow performance. Often, when your iPhone gets stuck on the Apple logo or suddenly crashes, you can reset your iPhone to fix this minor issue.
A factory reset is also necessary if you want to sell your iPhone and want to start fresh. When resetting your iPhone, it will become an empty slate with no pictures, contacts, videos, downloaded applications, playlists, or anything else. An iPhone reset restores your iPhone to its initial configuration and original factory settings.
However, be careful with this method as resetting your iPhone deletes all files & settings on the device. For those looking to reset iPhone without losing their precious data, this blog is the answer. Let’s read on to find some simple ways to do so while keeping our data intact.
How to reset your iPhone without Losing Data?
Before starting, it’s crucial to back up your iPhone data to avoid losing important files and folders. You can back up your iPhone using iCloud, iTunes, or Finder on Mac or PC.
Next, follow the step-by-step instructions on resetting an iPhone using iPhone Settings, iPhone erasure software, and iTunes.
Method 1: Reset iPhone Without Losing Data via Settings
To reset iPhone without losing data, you need to use the ‘Reset’ feature in your iPhone. This feature has different options on how you would like to reset- whether through the ‘Reset All Settings’ or the ‘Reset Network Settings’ option.
The Reset All Settings option will remove or reset privacy settings, keyword dictionary, location settings, etc., to default. At the same time, Reset Network Settings will remove previously used networks and VPN settings. Resetting the Network Settings will turn off the cellular data roaming and remove previously used Wi-Fi settings of your iPhone.
Moreover, no data or media is deleted from iPhone when choosing the Reset All Settings or Reset Network Settings option.
Steps to Reset iPhone Using the ‘Reset All Settings’ option
- On the iPhone, navigate to Settings > General.
- Tap on Transfer or Reset iPhone.
- Click Reset options.

- Next, click the Reset All Settings option.
- Then enter the iPhone passcode.
- Now, click Reset All Settings. This process will take a couple of minutes to reset the privacy settings, keyword dictionary, location settings to default, but will keep the rest of your data fully secure.

Method 2: Reset iPhone via Stellar Toolkit for iPhone Tool
Sometimes, the ‘Reset All Settings’ option doesn’t solve your iPhone issue. In such a case, try resetting the iPhone with the help of trusted software. Stellar Toolkit for iPhone is a secure and professional tool that can help you reset your iPhone to fix various iOS issues without losing data.
Also, you can also use Stellar Toolkit for iPhone to fix iOS related issues like- iPhone crashing, stuck at the Apple logo, etc.
This tool’s ‘Repair iPhone’ feature will first download the fresh copy of the iOS version present in your device from the official website. Then it will install the freshly downloaded iOS version on your iPhone after removing the existing one from your device. The software will reset your iPhone, making it seem new without removing or deleting your data.
Stellar Toolkit for iPhone is compatible with the latest iPhone 14, 13, 12, and below series and even all iPad versions, such as iPad Air, iPad Mini, and others.


Step-by-Step: How to reset iPhone with Stellar Toolkit for iPhone:
Step 1: Download Stellar Toolkit for iPhone on your Mac or Windows PC and connect your iPhone to the system using a USB cable.
Step 2: Select Repair iPhone module from the launch screen of the software.

Step 3: On the Repair iPhone screen, click the Next button.

Step 4: Click on the iPhone icon.
Step 5: Click the Download button to download the latest iOS or iPadOS version of the firmware file. If you have already downloaded the firmware before, select Import.

Step 6: After downloading the firmware file, click the Repair button to start repairing.


Step 7: Once you receive the message —The repairing process of the selected iOS device is completed, click OK.

Restart your iPhone to see if the iOS issues are resolved.
Method 3: Reset iPhone Without Losing Data via Recovery Mode
To reset your iPhone, you can use iTunes or Finder app. You need to use Mac or Windows PC to access the recovery mode of your iPhone and reset the device. This method will erase all your device data, so take a backup of your iPhone before proceeding.
Steps to reset iPhone via Recovery
- Open iTunes on your Mac or Windows system.
- Connect your iPhone to the computer and then put your iPhone into Recovery Mode .
- Once your device has entered the Recovery Mode, a message ‘you’re in Recovery Mode’ will pop up. Click OK.

- Click on your iPhone when it appears in iTunes, then click Summary.
- Now, select the “Restore iPhone” option on the right pane.
Parental Control Software
- Click Restore to confirm. It might take a while for your iPhone to reset; don’t disconnect your device from the computer until the reset process is completed.

- Once the restore process is complete, set up your iPhone as new or restore it from a backup.
Conclusion
You can factory reset your iPhone without fearing data loss by trying different methods mentioned in this blog. Reset All Settings/ Reset Network Settings feature of iPhone can reset your device; however, it may not always work. You can even use iTunes to reset your iPhone, but you will lose all your device data.
Or use the ‘Repair iPhone’ feature of Stellar Toolkit for iPhone software to permanently reset your iPhone without losing data. This tool can repair iOS issues like iPhone crashing, Black Screen of Death, and iPhone stuck at the Apple logo.
Download the free trial version to evaluate the features of the software.
FAQs
How to remotely erase iPhone data?
If your iPhone is lost or stolen, you can protect your iPhone data from misuse by remotely erasing its data using the iCloud website.
How to restore or set up your iPhone after reset?
Use an iCloud backup to restore your iPhone after a factory reset.
How to Delete All Photos from iPhone Beyond Scope of Recovery?
Summary: Learn how to delete all photos from your iPhone beyond the scope of recovery with this comprehensive guide. We’ve also mentioned an iPhone eraser software that securely erases your photos for good and safeguards your privacy.

Are you planning to sell or discard your iPhone? If yes, it’s important to ensure that your personal data, such as photos and videos, etc. is deleted and cannot be recovered even by a professional data recovery tool. To protect your privacy and prevent unauthorized access to your deleted iPhone photos, make sure your iPhone is wiped clean of all your previous photos before you sell, donate, or discard it.
In this blog, we will talk about different ways to delete photos from iPhones beyond the scope of recovery.
How to Delete All Photos from iPhone?
Before deleting all photos from the iPhone, it’s important to take a backup of all photos to avoid any accidental data loss situation. There are various ways to back up your iPhone photos:
1. iCloud
Use iCloud to back up all your photos automatically. To sync iCloud with Photos –
- Go to Settings > [your name] > iCloud > Photos, and turn on iCloud Photos.

Your photos will be backed up to iCloud automatically if your device has enough storage space and is connected to Wi-Fi.
2. iTunes:
You can even use iTunes to back up your iPhone photos. To do this,
- Connect your iPhone to your system.
- Launch iTunes and then select your device.
- Click Summary > “Back Up Now” to create a backup of all your data, including photos.

Once you have backed up all your photos, proceed forward with deleting them from your iPhone.

Method 1: Delete Images From Photos and Recently Deleted Folder
Photos app saves images shot from iPhone as well as those received on chats. You can delete all the photos from your iPhone via the Photos app. Here’s how to do it.
- Open the Photos app on your iPhone.
- Go to the Library tab, tap All Photos, and then tap Select.
- Select one or multiple photos you want to delete.
- Tap on the Trash icon and then confirm to delete the photos.


When you delete a photo from the iPhone, it’s not deleted permanently. Instead, it is moved to the Recently Deleted folder, where the deleted photos stay for 30 days before being permanently deleted.
To permanently delete photos from the Recently Deleted folder, follow these steps:
- Open the Photos app > Albums.
- Scroll down, then tap on Recently Deleted.
- Next, tap Select and choose the photos that you want to delete permanently.
- Tap Delete and then confirm to delete the photos.

Remember, if iCloud sync is enabled, photos deleted from iPhone will be deleted on iCloud. That is why if you want to delete photos from your iPhone but not on iCloud, make sure iCloud sync is disabled for Photos.
Method 2: Factory Reset Your iPhone
Apple’s brilliant feature of the ‘Erase All Content and Settings’ option brings your device to default settings by erasing all your iPhone data, etc.
The factory reset will delete all the settings, photos, audio, videos, messages, notes, call history, search history, app history, passcodes, and any other data on your iPhone.
However, remember erasing your iPhone data with the ‘Erase All Content and Settings’ doesn’t delete your data permanently. It means that all your iPhone data including photos are still recoverable with the help of robust iPhone data recovery software .
Steps to Factory Reset iPhone
- Open Settings on your iPhone.
- Go to General and tap on Transfer or Reset iPhone.
- Click on the Erase All Content and Settings options.
- Click Continue and enter your iPhone passcode.
- Next, click Erase iPhone. This will fully wipe your device clean.

Note: Don’t forget to back up your iPhone data on iCloud or iTunes before initiating the factory reset. Because this backed-up data can be accessed on your computer or new iPhone.
Stellar Eraser for iPhone is the best way to delete permanently erase all photos as well as other data of the iPhone. The software erases all your photos, contacts, videos, chats, iMessage, browser search history, third-party apps data, and more from your iPhone.
The Stellar iPhone Eraser tool is the best way to clean or delete iPhone data. This tool deletes iPhone data permanently making it impossible to recover it from any software. It is the best data erasure tool for iOS devices before you exchange, sell, recycle, or give them away.
The software works with all iPhones and iPad versions, such as iPhone 14 to lower versions till iPhone 4 and supports iOS versions from iOS 6.0 to iOS 16.
![]()
Steps- How to Delete All Photos From iPhone via Stellar Eraser for iPhone
- Download and install Stellar Eraser for iPhone on your Windows and Mac systems.
- Launch the software and click on the Erase Data option.

- In the next Erase iPhone Data screen, click Next.

- Connect your iPhone to the system when prompted and click Erase.

- Click Yes to start the process of erasure.

- Click OK, once all the data is successfully erased.

All the data including photos and videos get permanently erased from iPhone beyond the scope of recovery.
Conclusion
Deleting all photos from your iPhone beyond the scope of recovery is crucial to protect your privacy and prevent unauthorized access to your personal data. By following the methods above, you can ensure that all your photos are deleted permanently from your iPhone. However, the best way to delete all photos from iPhone is by using Stellar Eraser for iPhone. The software will help you erase photos and other data from your iPhone so that it is impossible to recover it using any data recovery software.
![]()
FAQ
1. How to Delete Photos from iCloud?
To delete Photos from iCloud, follow these steps:
- Open Settings > tap on your Apple ID > iCloud.
- Then tap Manage Storage and select Photos.
- Next tap Disable and Delete. It will disable your photos from being saved on your iCloud account.
2. How to delete apps on iPhone permanently?
If you want to delete apps on your iPhone for managing the storage space then you directly remove it from Home Screen or delete it from App Library.
3. How to delete documents and data on iPhone?
Documents and Data folder may contain browsing history, cookies, cache, temporary files, database files and other information specific to the app. You can delete them easily by following this detailed guide .
- Title: How to Recover Deleted Screenshots on iPhone 15 Pro Max? | Stellar
- Author: Nova
- Created at : 2024-08-20 20:01:53
- Updated at : 2024-08-21 20:01:53
- Link: https://blog-min.techidaily.com/how-to-recover-deleted-screenshots-on-iphone-15-pro-max-stellar-by-stellar-data-recovery-ios-iphone-data-recovery/
- License: This work is licensed under CC BY-NC-SA 4.0.