
How to Recover Files after iPhone XR Factory Reset? | Stellar
How to Recover Files after iPhone Factory Reset?
If you detect anything anomalous on your iPhone, you may need to reset it to factory settings. However, after a factory reset, you will lose all the data stored in your device. You will not be able to access your contact list, call logs, or messages, be it your imessages, WhatsApp, etc. But, why restore your iPhone?
Sometimes, there are issues that cannot be handled and the only solution is to restore the device to factory settings. This is usually done when the device functions abnormally or the performance is extremely slow. If your iPhone is restored to factory settings, every single bit of personal information will be permanently deleted from the device, and this may prevent others from getting access to your personal information.
How to reset your iPhone to Factory Settings:
To reset your iPhone to factory settings, follow the steps below:
- Click Settings and then select General
- Select Reset and click on Erase all contents and settings. The interface will prompt you to key in your Apple ID and Passcode
- Enter your Apple ID and Passcode to proceed. With this, the procedure to factory reset iPhone is complete
Important!
Before resetting the iPhone device to factory settings, it would be a good practice to back up your device on your system. If you have not created a backup, you will not be able to restore the data back to your device, and all you will lose all your data. You can use iCloud or iTunes to back up your iPhone data. If anything anomalous occurs, all the data can be restored from the most recent backup files right from anywhere.
How to recover deleted data from your iPhone:
Even if you have not backed up your iPhone data, there’s still a solution. You can now retrieve all your erased data from your iPhone with Stellar Data Recovery for iPhone . The tool is powered by sophisticated recovery algorithms that help restore all the data components back to your iPhone after a factory reset.
The tool provides the option to recover data through multiple channels. Since we need to recover data that has been erased after a factory reset, we need to select ‘Recover from iPhone’ option from the main interface of the tool.
Follow the steps below to restore your deleted data:
- Connect your iPhone device to the system. The tool will then begin to analyze the device for detecting the previously existing files from the connected device. The tool will generate a preview for all the folders and incorporated contents within its panel.
- You can then select single or multiple files for recovery that you have lost while resetting your iPhone.
- The iPhone recovery tool will provide dual options to store data either on the hard drive on the computer or your connected iPhone device.
Not only the tool provides the benefit to recover data from iPhone device, but you will also be able to recover data from iTunes or iCloud backup files . Also, the iOS recovery tool can also be used to recover data from encrypted backup files. However, to utilize this feature, it is important to have a backup.
Important!
- Backup your data before performing any huge operation on the iPhone device such as restoring the device to factory settings.
- It is a good practice to store iPhone data on iCloud and perform a regular backup to prevent data loss.
- Saving iPhone data to iCloud offers an ease of accessing data contents from anywhere, even if the data is deleted from your device.
- In addition to online backups, it is beneficial to retain a replica of existing data on another device such as a system hard drive or external storage media.

Forgot iPhone Password? – Here are the Best Solutions
Summary: Can’t remember your iPhone password? This post brings the best solutions to fix forgotten password issue and restore your data from the locked iPhone.
Setting up a password on your iPhone is a great way to keep unauthorized access at bay but what if you forget the password? On a positive note, you can still access or restore your iPhone Data and this blog highlights some best solutions for forgotten iPhone password.
Password enabled iPhone ensures that no one can access it without your permission and is a great way to stop prying eyes from accessing your personal data. But what if you itself forget the password? Isn’t that a problematic situation? Obviously, as you cannot unlock your iPhone and access the data. Further, if you enter the wrong password six times, then a message is displayed stating that the iPhone has been disabled.
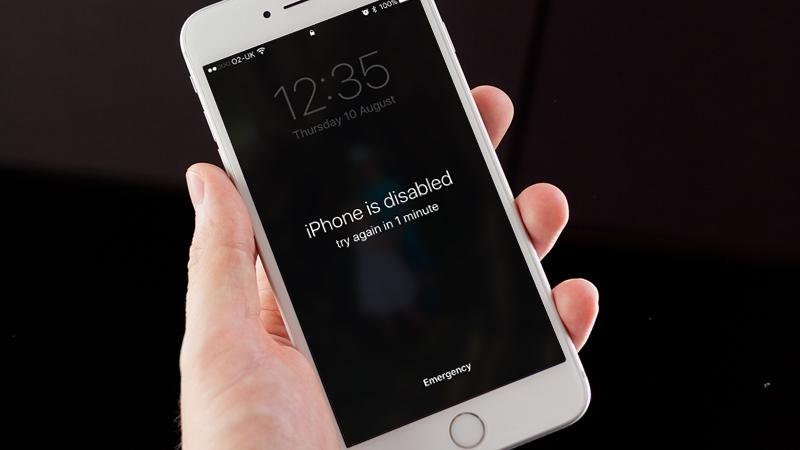 Figure 1. If you enter the wrong password six times in a row, then a message will be displayed stating that your iPhone has been disabled.
If you’re lucky then you might be able to unlock your iPhone and access the data stored on it else there is a probability that you may end up losing your data in the process of unlocking it.
Forgot iPhone passcode? What to do next?
Alright, I know it’s next to impossible that you will ever forget your passcode but we cannot overlook the fact that, yes there is a chance that you may forget it. The majority of us will say that we use fingerprint identity sensor (Touch ID) and hardly use a numeric passcode. Well, suppose your Touch ID stops working properly and to fix it you need to go to Settings < Touch ID & Passcode < Enter the Passcode.
Wait! What! You need to enter the passcode to get the Touch ID working again and you thought that you’d never need to remember the passcode. If you have a backup of your data, then all you have to do is simply reset your iPhone and restore your data from the backup. Unfortunately, you’ll only restore data that has been backed up and any new data added after that won’t be there. That said, let’s delve into some of the best solutions for forgotten iPhone password.
If you’ve forgotten the password, these options will help you out:
- Erase your iOS device with iTunes to remove the password
- Erase the passcode with iCloud
- Use Recovery mode if you’re unable to connect to either iCloud or iTunes
- Leverage an iPhone data recovery to recover deleted/lost data
Erase your iPhone with iTunes, restore files from it and remove the passcode
If you’ve synced your iPhone with iTunes, you can restore your files from it. Further, this will erase all the data and the passcode. To restore your data and remove the passcode, follow these steps:
i. Connect your iPhone to your computer and launch iTunes
ii. If you’re asked for the passcode, try another computer with which you’ve synced your iPhone, else proceed with either iCloud or Recovery mode
iii. Sync your iPhone with iTunes and make a backup of it
iv. On your iPhone set up the screen, choose Restore from iTunes backup
v. In iTunes select your iPhone and select the relevant backup
This process will restore all your data on iPhone. Now, configure a new passcode and never forget it.
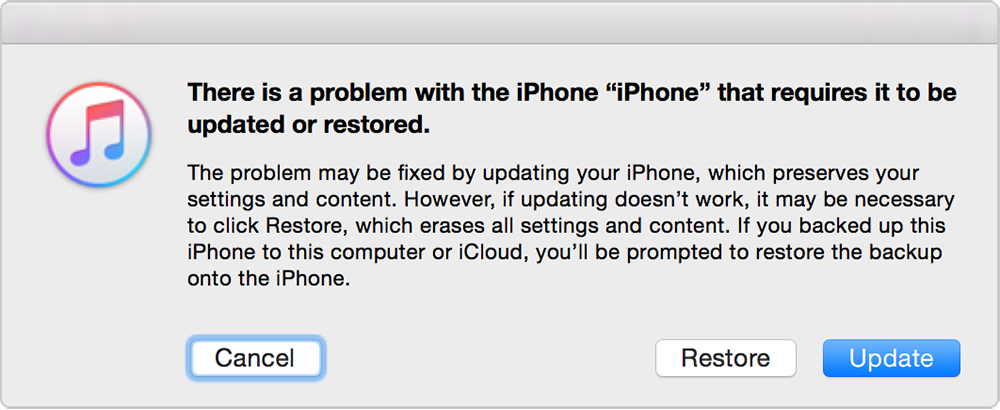
Figure 2 illustrates to erase the data & passcode and to restore your iPhone
Erase the passcode with iCloud
Follow these steps to erase the passcode of your iPhone with iCloud:
i. Go to iCloud.com and sign in with your valid Apple credentials to view the iCloud dashboard.
ii. At the top of the dashboard, select ‘All Devices’ and select your iPhone from the given list
iii. Click on ‘Erase’ to erase the passcode
iv. On the setup screen on your iPhone, choose the restore from a backup option to restore files from the iCloud backup
Important: You can erase your iPhone with Find My iPhone as long as it is connected to a Wi-Fi or cellular network.
Use Recovery mode to erase the passcode
If you’ve never synced your iPhone with iTunes or iCloud, then you need to erase the passcode in the Recovery mode. Follow these steps to erase the passcode:
i. Connect your iPhone to your system and force restart it. Different versions of iPhone have different settings; therefore, follow these settings depending on your iPhone
- iPhone 8/8 Plus: Press and release the Volume up button and then quickly press and release the Volume down button. Press and hold the Side button until the recovery mode screen appears
- iPhone 7/7 Plus: Press and keep holding both the Side and Volume down buttons until you see the recovery mode screen
- iPhone 6S and earlier: Press and keep holding the Home and the Side buttons until the recovery mode screen appears
ii. Finally, after restarting the iPhone, select Restore from the given options
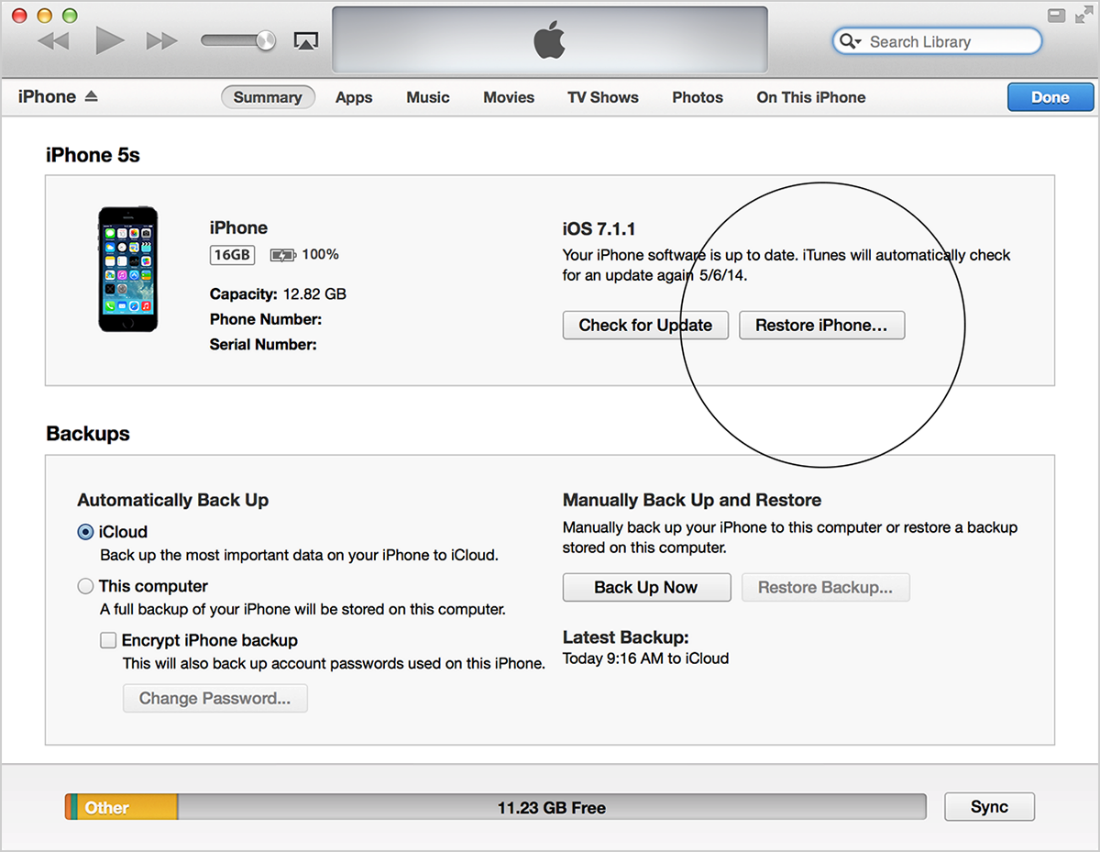
Figure 3 illustrates to restore iPhone via recovery mode
iii. Wait for the process to finish and then restore your files to your iPhone and set up a new passcode
Get more help
If due to any reason you lose your data stored on iPhone during the whole process, then you can utilize an iPhone data recovery software and recover all your lost data. Stellar Data Recovery for iPhone is a robust iPhone data recovery software which efficiently brings back all your lost data. Moreover, the software facilitates three recovery option namely:


- Recover from iPhone
- Recover from iTunes Backup
- Recover from iCloud backup
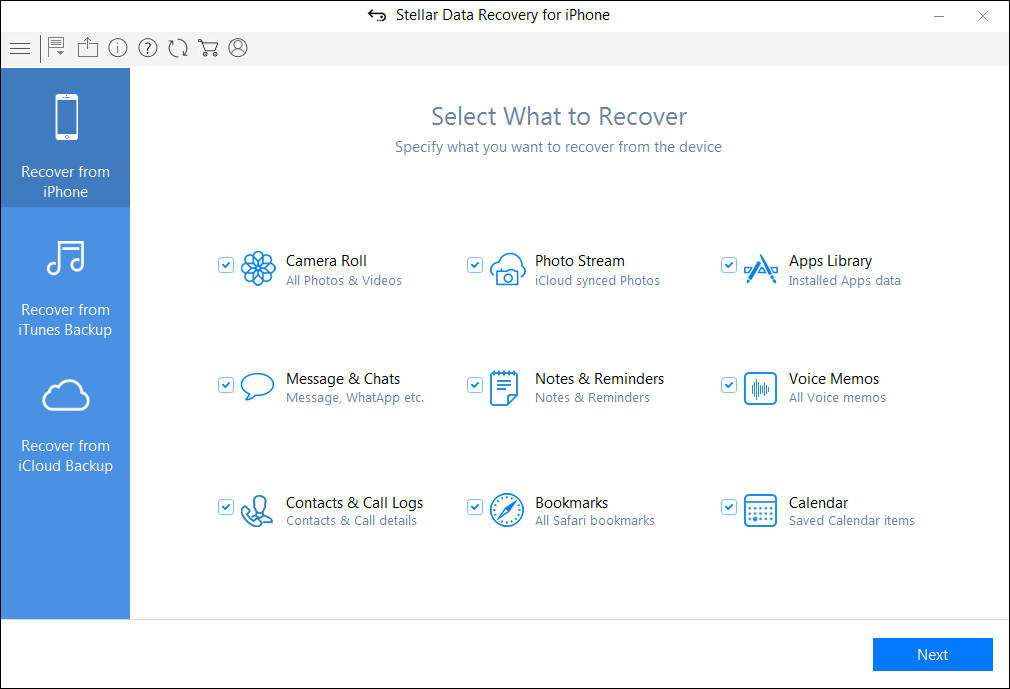
Figure 3 illustrates the home screen of Stellar Data Recovery for iPhone software
At Last
After restoring your iPhone , make sure that you never ever forget the passcode. The key is to create a strong passcode which is easy to remember. Further, if your iPhone gets stuck in recovery mode or due to any reason you’re unable to unlock your device, contact Apple support or visit the nearest service centre.
How to Recover Deleted iPhone Camera Roll Photos and Photo Stream Pictures?
Your iPhone is not only a medium to connect but also serves as a personal repository for your priceless photos, videos, and music. However, in case your iPhone crashes or you lose files due to accidental deletion, your data stands at risk and may be lost forever. But with Stellar Data Recovery for iPhone, your data is here to stay. This professional solution helps to retrieve your lost or accidentally deleted photos, audio, as well as video files from Camera Roll, Photo Stream, and App Library. It also offers a complete recovery of your iPhone data such as Contacts, Messages along with attachments, Notes, Call History, Calendars, Safari Bookmarks, iTunes, and iCloud backup files.
An iPhone stands apart for its high image quality, among its other notable features. With several iPhone releases over the years, its camera specifications have improved indescribably, and this has increased the percentage of buyers to a considerable extent. Though it cannot be likened to a professional DSLR, yet it stands superior in its category.
How to recover your deleted iPhone Photos?
If your collection of photos, audios, and video files gets accidentally deleted or lost due to iOS crash, the question that comes to mind is whether they can be recovered. If you have created a backup already, then all you need to do is to restore data from the most recent backup. However, if you have not created a backup either on iTunes or iCloud, then the situation needs attention.
Your photos and other multimedia files are important to you. Therefore, it is important to look for an efficient and reliable recovery tool. Here, Stellar Data Recovery for iPhone serves as a perfect solution with its straight forward and user-centric interface. This tool accommodates all the major specifications of different iPhone versions.
The Process: Let’s look at how Stellar Data Recovery for iPhone recovers your lost or accidentally deleted photos from your iPhone:
Step 1) Download, Install, and Launch Stellar Data Recovery for iPhone on your system
Step 2) Next, select Recover from iPhone option from the three alternates provided on the home screen. Select what you want to recover and click “Next”.

Step 3) Now connect the iPhone device to your system for initiating further recovery process. Alternatively, the device can be connected before you launch the tool
Step 4) The iPhone photo recovery tool will start scanning the connected device. A message will then pop up on the screen which reads: “_Please wait! Scanning your iPhone._” It will appear along with the live progress generator.
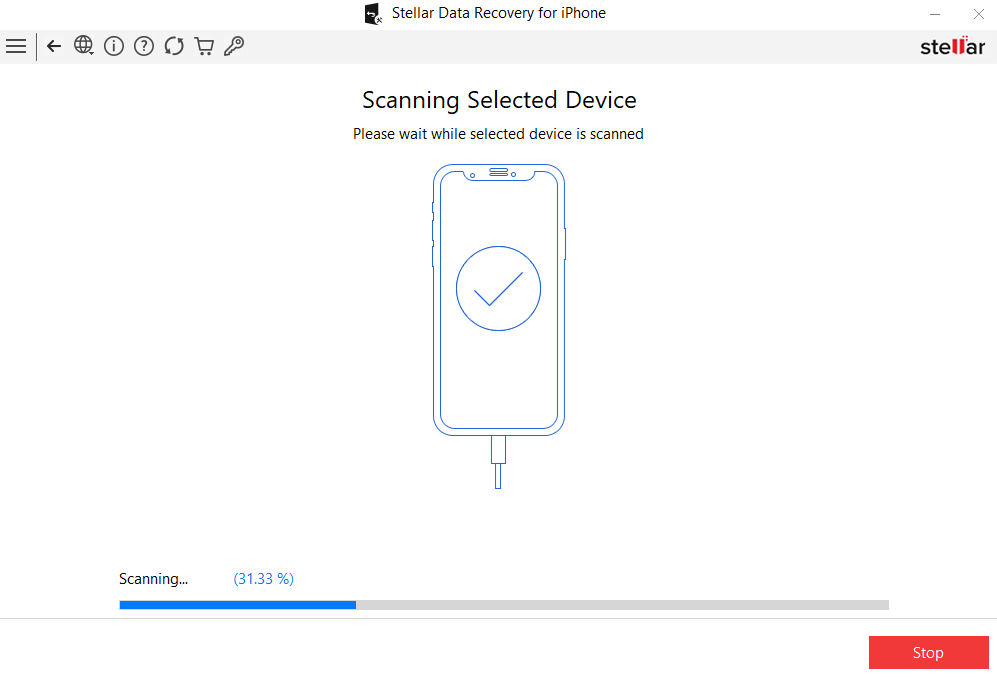
Note: Here, you can select to stop the scan process in between by selecting the Stop button
Step 5) Once the scanning is completed, the tool will enlist all the files and folders existing within the iPhone device.
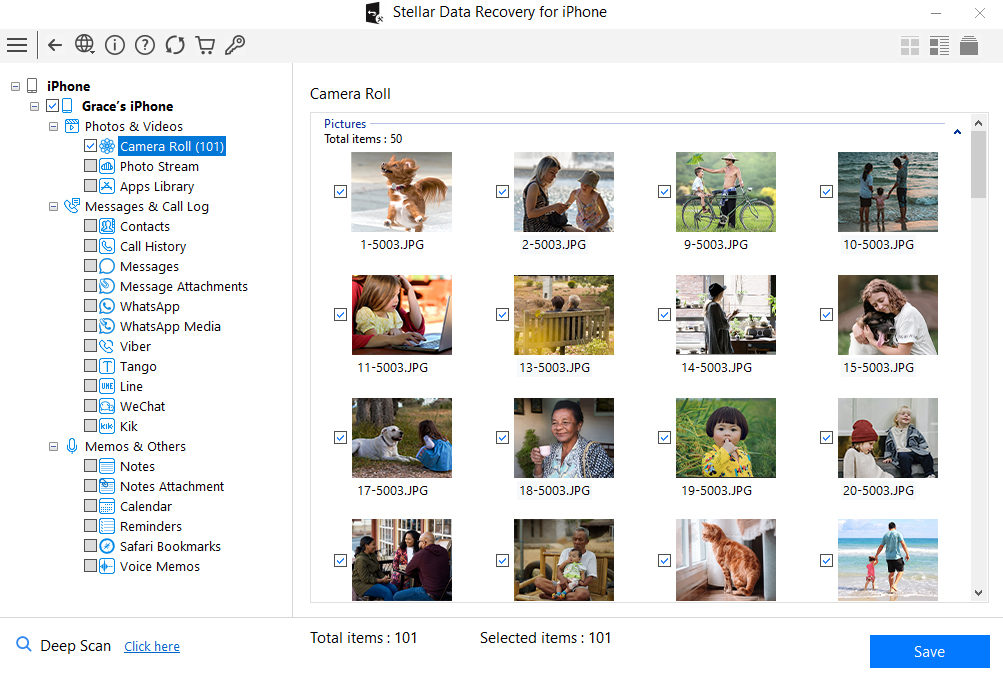
Step 6) From the left panel, you can select Photos & Videos category from the tree structure. It will then expand associated options that include Camera Roll, Photo Stream, and Apps Library.
Step 7) Select Camera Roll and Photo Stream and the tool will display all the items from these two folders in the middle pane
Step 8) Now from the middle pane, you can either select a single file for recovery, or you can select multiple items by checking the associated boxes
Step 9) Once you select all the items that you need to recover from Camera Roll and Photo Stream, click on Save button
Step 10) The Save Files window will appear. Click on Browse and provide the location for storing the recovered data on the hard drive. Else use, the default location provided by the software which is Desktop << iPhone Default Name.
Step 11) Click OK to proceed saving the recovered files.
Step 12) Exit from the tool and go to the selected location to access the Camera Roll and Photo Stream recovered pictures.
Stellar Data Recovery for iPhone also restores data from the following:
- If you are looking to recover data from your iPhone backup such as iTunes backup or iCloud backup, then you need to select Recover from iTunes backup or Recover from iCloud backup options. The tool also allows importing files from Windows and Mac machines to iPhones.
- After the scan is completed, the tool will display all integrated components of deleted iTunes backup or iCloud backup files within its panel from where it can be selected as per priority and preferences. The powerful algorithms are fully advanced to recover every single bit of data.
- The tool also recovers encrypted iOS iTunes backup files and restores it back to the device. You can also recover lost or deleted data from iPad using the iPhone Data Recovery tool. Backup files of small, medium and large scale are handled effectively by the tool.
- The tool also recovers bookmarks deleted accidentally from your iPhone default browser Safari. Since bookmarks hold information about useful links and websites, this feature can be very helpful for technically savvy users.
Why Stellar Data Recovery for iPhone takes time in scanning my iPhone?
Stellar Data Recovery for iPhone thoroughly scans your iOS device, computer, and iCloud to retrieve every bit of data. However, the scanning time of the software depends upon the following:
- The amount of data in your iOS device: Greater the amount of data on your iPhone more time it will take to scan.
- The size of RAM on your iPhone: Greater the RAM more will be the scanning time. For instance, the software will take more time to thoroughly scan an iPhone 12 with 6GB RAM compared to iPhone 11 that has 4GB RAM.
- RAM of your computer: The recommended system requirement of Stellar Data Recovery for iPhone is 8GB. Although it can scan and recover from 4GB RAM computer, but you may experience slow speed.
- Title: How to Recover Files after iPhone XR Factory Reset? | Stellar
- Author: Nova
- Created at : 2024-08-20 19:58:21
- Updated at : 2024-08-21 19:58:21
- Link: https://blog-min.techidaily.com/how-to-recover-files-after-iphone-xr-factory-reset-stellar-by-stellar-data-recovery-ios-iphone-data-recovery/
- License: This work is licensed under CC BY-NC-SA 4.0.