
How to Remove MDM from iPhone 15 Plus without password?
What Is Remote Management on iPhone 15 Plus
Providing employees with company-issued iPhones or other organizational devices has become a common practice in the corporate landscape. These devices serve as multifunctional tools, facilitating seamless communication, productivity, and access to critical business applications.
If you noticed the “Remote Management” screen on your iPhone 15 Plus, that’s the manifestation of MDM at work. As we have mentioned, MDM is a security feature to oversee and control devices used by their employees. This ensures that company policies are enforced and sensitive information is protected.
MDM allows administrators to configure settings, install applications, and enforce security protocols on connected devices. They can stop you from using certain things, such as the App Store and AirDrop. MDM also handles VPN settings and lists of blocked websites.
How to Remove Remote Management on iPhone 15 Plus via Settings
The primary reason people want to remove remote management on iPhone is that they’ve acquired it from their workplace or as a second-hand purchase. If the remote management profile isn’t removed, you won’t be able to use the iPhone fully. Sometimes, even a factory reset won’t unlock the iPhone if the remote management is still in place.
Thankfully, if the devices are still logged in with the MDM profile credentials, you can still resolve this through the Settings menu.
How to remove Remote Management on iPhone via Settings:
- Step 1: Locate iPhone Settings.
Open the "Settings" app on your iPhone 15 Plus. Scroll until you find "General" from the menu and tap.
- Step 2: Open your profile on VPN & Device Management.
In the General Settings, open the "VPN & Device Management" option and tap on the profile associated with the MDM.
- Step 3: Check for the
"Remove"button.
Look for a button that says "Remove" within the profile. If you see this button, you can proceed to remove remote management from iPhone on your own. Follow any on-screen prompts or confirmations to complete the removal process.


- Step 4: Contact MDM Admin if Needed:
If you do not see the "Remove" button, it means that you need to contact the MDM administrator for further assistance. Reach out to them to initiate the removal process.
How to Bypass MDM on iPhone 15 Plus with Ease via Third-party Tool
If, for any reason, you find yourself unable to approach the administrator or obtain the necessary login credentials for MDM removal on iPhone 15 Plus, you can use a third-party tool like Wondershare Dr.Fone Screen Unlock feature.
Dr.Fone ’s Screen Unlock is a quick and reliable feature designed specifically for unlocking various types of screen locks on iOS devices, including MDM. You can either bypass MDM restrictions or remove local MDM from the iPhone 15 Plus with ease.
How to bypass MDM on iPhone 15 Plus with Dr. Fone’s Screen Lock feature:
- Step 1: Launch the Dr.Fone Screen Unlock feature on your computer.
Start by opening Wondershare Dr.Fone on your computer. Open the "Toolbox" menu, then choose Screen Unlock > iOS.

- Step 2: Access MDM Unlock
Within the Dr.Fone software, locate and select "Unlock MDM iPhone" This action will facilitate the unlocking of the MDM lock on your device.

- Step 3: Select Bypass MDM
On the next screen, choose the “Bypass MDM” option. Then, proceed by clicking "Get Start" > "Start to Bypass" to begin the MDM bypass procedure.

- Step 4: Deactivate the Find My Feature
You will be asked to deactivate the Find My feature on your iPhone 15 Plus. To complete this step, access your device’s "Settings." Then, select your name at the top, navigate to "iCloud," and disable the Find My feature.
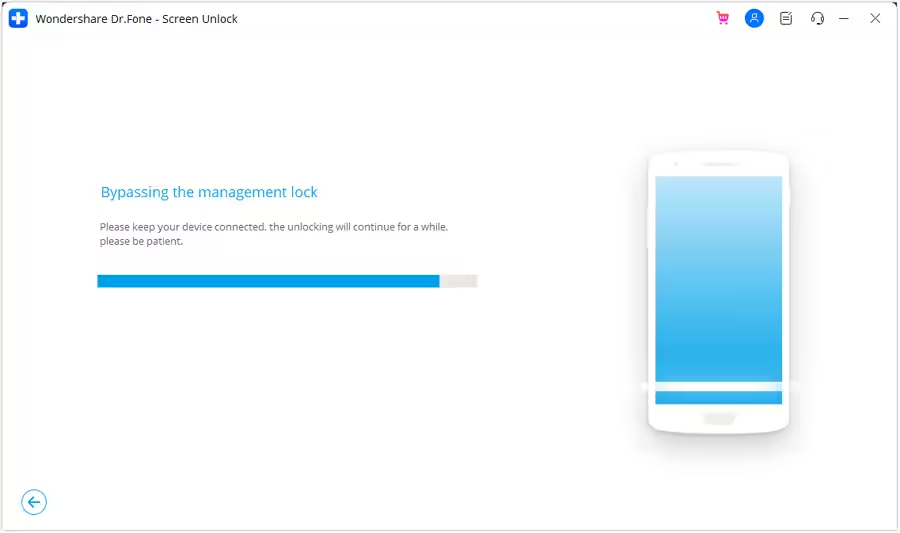
- Step 5: Monitor Bypass Progress
Next, the tool will begin the process of bypassing the remote MDM lock. Wait and track the progress on the following screen.
After successfully completing the process, you will receive a confirmation message. Click "Done" to confirm and close the window.
How to Remove Face ID on iPhone 15 Plus
For all the hardware and software that make for a great experience for nearly all users around the world, Face ID can have its fair share of issues. Sometimes, your face might not get recognized, sometimes it might not work altogether.
Lately, with the COVID-19 pandemic, we have seen how Face ID struggles to work for us, and why? Because it cannot scan our faces with masks! So, it makes sense to remove Face ID from our iPhones and rely solely on passcodes. Alternatively, you want to reset your Face ID on your iPhone 15 Plus and set it again if you have put on some ‘COVID weight’ owing to working from home.
Most of the time, the best and the simplest thing you can do to resolve your hardware and software issues is to restart the device in question. To restart your iPhone 15 Plus, long-press the Side Button until the power slider appears and drag it to shut the device off. Then, use the Side Button to start the phone again.
Sometimes, the issues have a way of persisting, and a restart does not resolve them. the TrueDepth system might have developed a fault and Face ID might stop working. Or you got the dreaded “problem detected with TrueDepth camera” message on your iPhone 15 Plus. In that case, you would like to know how to reset and remove Face ID on your iPhone 15 Plus to see if that helps, before you are required to go to an Apple Store for service.
Step 1: Go to
Settings>Face ID and Passcode.Step 2: Scroll and tap the option
"Reset Face ID"to remove Face ID on your iPhone iPhone 15 Plus.

How to Set Up Face ID on Your iPhone 15 Plus
Sometimes, you may just want to disable Face ID temporarily or the issue gets solved, and want to activate Face ID again. Setting up a Face ID on your iPhone 15 Plus is easy. To set up Face ID, sit in a comfortable spot with adequate lighting and follow these steps:
Step 1: Go to
Settings>Face IDand Passcode and enter your passcode. If you have not set up a passcode yet, you will necessarily have to create one now before proceeding forward.Step 2: Tap Set Up Face ID to start the process.
Step 3: Hold your iPhone 15 Plus in the portrait orientation at about an arm‘s length away from your face and then tap Get Started.

Step 4: Adjust to have your face inside the shown circle and then slowly rotate your head in a smooth motion to complete the circle. This step will be done one more time.
Step 5: When done, tap Done.
In case you are getting the following error:

There are a few things you can try to resolve this, you can try to update your iPhone 15 Plus to the latest iOS. At this point, you may even try running a beta version to see if that helps. If you are running a beta version, you may downgrade back to the release version to see if that resolves the error. Betas can both make and break things.
If this does not resolve it, you need to take the device to the nearest service center. The TrueDepth camera system has components that might have been damaged or might not be working properly, for whatever reason, and the service personnel is equipped to resolve this issue for you at the earliest.
Bypassing Activation Lock with a Professional Tool
For iPhone 5S to iPhone 15 Plus users who prefer an easier way to remove Activation Lock, Wondershare Dr.Fone - Screen Unlock (iOS) is a suitable option.
Dr.Fone is a set of modules that cater to a myriad of requirements that phone users can have from time to time, and one of them is the need to be able to disable the Activation Lock for Apple devices when the need arises. A need never arises in our wildest dreams, until it does, at the most inopportune time. It has, hasn’t it?

Here is how to use Dr.Fone - Screen Unlock (iOS) to quickly circumvent Activation Lock and get on with setting up your iPhone 15 Plus. Who needs to wait to talk with the previous owner or go through all other time-consuming methods when you have Dr.Fone?
- Step 1: Get Dr.Fone - Screen Unlock (iOS) .
- Step 2: From the list of modules on display, select Screen Unlock.
- Step 3: Select iCloud Activation Lock Removal.

- Step 4: Then select Start to initiate unlocking the iOS device’s Activation Lock.

- Step 5: Follow the instructions to continue to jailbreak the iPhone.

Step 6: After the jailbreak, continue to agree to the terms of use and note the device details displayed are correct.
Step 7: As the final step, click Start Unlock.

After a while, Dr.Fone - Screen Unlock (iOS) will notify you of a successful bypass. You can now restart the device and use it. This option is restrictive in nature as you will be unable to use the iPhone to make calls or access cellular services including iCloud. This option is best for when you want to see/ recover some data from the device that you would otherwise lose.

Unlock Locked iPhone 15 Plus by Restoring it to Default Settings – iTunes
iPhone users make sure that they connect and sync their devices with iTunes because their data is safe. iPhone users live without the fear of losing their data because it is backed up. Taking more advantage of this, iPhone users can restore their phone to default settings and can even unlock their iPhone without using a passcode.
Let us show you how to unlock iPhone 15 Plus without using a passcode;
Start the process by turning off your iPhone 15 Plus.
After that, plug in your phone to the computer and open iTunes.
Once the phone is connected with iTunes, click on ‘Summary’ that will appear on the screen’s left side.
After the summary screen is opened, you will see the option of ‘Restore iPhone’; click on that option.
This option will bring you to a new window that will be asking for your confirmation on the decision to restore your device.
As soon as that is done and iTunes has finished the process, your iPhone 15 Plus will be restored to default settings.


Unlock iPhone 15 Plus without Passcode or Face ID
A problem commonly faced by all iPhone users is that they forget the password, and then they are stuck because they cannot use their phone anymore. This might seem impossible because iPhone users cannot use the phone without a passcode, but let us show you a magical application that makes this impossible.
Dr.Fone - Screen Unlock, the well-known application among most iPhone users, can resolve the problem quickly. This is a very secure platform for iPhone users because it promises to safeguard user’s personal information. The application is easy to use, that even a new person can use it without facing any trouble. Let us highlight its features.
- It runs on all major iOS versions.
- It can unlock the phone. It doesn’t matter if it’s second-hand or if you forgot the password.
- Easy to handle and use, no technical skills are required.
- It can even unlock a disabled phone without using its passcode.
This might be possible that not all iPhone users know about Dr.Fone – Screen Unlock, so, for such users, let us take you through the steps that are required to unlock iPhone 15 Plus using Dr.Fone – Screen Unlock without a passcode.
- Step 1: Download and Install the Application
First of all, the user is supposed to download Dr.Fone – Screen Unlock from its official website and install it on your Windows or Mac system. Once it is installed, the application is all set and ready to use; launch it in the time of need and unlock your iPhone 15 Plus without a passcode.
After the application is launched, the Welcome Screen will appear with different options. The user is requested to select the option of ‘Screen Unlock.’


- Step 2: Connect Phone with System
In the second step, the user should connect their phone to the system and let Dr.Fone ‘s application automatically detect it. Whenever you are ready to initiate the process, click on the button ‘Unlock iOS Screen.’

- Step 3: DFU Mode Activation
Once the application has detected your iPhone 15 Plus, you now need to activate the DFU mode. Step by step illustration on how to activate DFU mode is shared on-screen.

- Step 4: Download Firmware Update
A new window will appear now on which the application will ask for some information regarding your iOS device. Provide the application with asked information and click on the ‘Download’ button to get the firmware update for your iPhone 15 Plus.

The user is requested to wait for some time, as the firmware update is being downloaded for your phone. Once that is done, now click on the ‘Unlock Now’ button to complete the process.

- Step 5: Confirmation Code
The application will now ask for the confirmation code. Just provide the on-screen confirmation code and let the process complete itself. As soon as that is done, the application will notify you through the interface. The process can also be repeated by clicking on the ‘Try Again’ button.

How to use Face ID on iPhone 15 Plus to pay with Apple Pay
- Step1: If Apple Pay is supported by banking institutions in your country, you can set it up by adding a supported bank‘s credit card, debit card, or prepaid card to the Wallet app on your iPhone 15 Plus.

Step2: When a card is added and ready to use, check that Apple Pay is enabled under Settings > Face ID and Passcode.
Step3: For App Store/ Book Store/ iTunes Store purchases, it works as always, you double-press the Side Button to authenticate and use your default card.
Step4: Look at your iPhone 15 Plus to authenticate yourself using your Face ID and make the purchase.
Step5: When paying at retail outlets, hold your iPhone 15 Plus (top being close to the reader) and wait for the checkmark and Done message.
Step6: To pay using Apple Pay on websites, choose Apple Pay as the payment method, double press the Side Button, look at your iPhone 15 Plus, and wait for the Done message and checkmark to finish the process.
- Title: How to Remove MDM from iPhone 15 Plus without password?
- Author: Nova
- Created at : 2024-08-20 19:32:23
- Updated at : 2024-08-21 19:32:23
- Link: https://blog-min.techidaily.com/how-to-remove-mdm-from-iphone-15-plus-without-password-by-drfone-ios-unlock-ios-unlock/
- License: This work is licensed under CC BY-NC-SA 4.0.