How to Remove remote management from iPhone SE?

What Is Remote Management on iPhone SE
Providing employees with company-issued iPhones or other organizational devices has become a common practice in the corporate landscape. These devices serve as multifunctional tools, facilitating seamless communication, productivity, and access to critical business applications.
If you noticed the “Remote Management” screen on your iPhone SE, that’s the manifestation of MDM at work. As we have mentioned, MDM is a security feature to oversee and control devices used by their employees. This ensures that company policies are enforced and sensitive information is protected.
MDM allows administrators to configure settings, install applications, and enforce security protocols on connected devices. They can stop you from using certain things, such as the App Store and AirDrop. MDM also handles VPN settings and lists of blocked websites.

How to Bypass MDM on iPhone SE with Ease via Third-party Tool
If, for any reason, you find yourself unable to approach the administrator or obtain the necessary login credentials for MDM removal on iPhone SE, you can use a third-party tool like Wondershare Dr.Fone Screen Unlock feature.
Dr.Fone ’s Screen Unlock is a quick and reliable feature designed specifically for unlocking various types of screen locks on iOS devices, including MDM. You can either bypass MDM restrictions or remove local MDM from the iPhone SE with ease.
How to bypass MDM on iPhone SE with Dr. Fone’s Screen Lock feature:
- Step 1: Launch the Dr.Fone Screen Unlock feature on your computer.
Start by opening Wondershare Dr.Fone on your computer. Open the "Toolbox" menu, then choose Screen Unlock > iOS.

- Step 2: Access MDM Unlock
Within the Dr.Fone software, locate and select "Unlock MDM iPhone" This action will facilitate the unlocking of the MDM lock on your device.

- Step 3: Select Bypass MDM
On the next screen, choose the “Bypass MDM” option. Then, proceed by clicking "Get Start" > "Start to Bypass" to begin the MDM bypass procedure.

- Step 4: Deactivate the Find My Feature
You will be asked to deactivate the Find My feature on your iPhone SE. To complete this step, access your device’s "Settings." Then, select your name at the top, navigate to "iCloud," and disable the Find My feature.


- Step 5: Monitor Bypass Progress
Next, the tool will begin the process of bypassing the remote MDM lock. Wait and track the progress on the following screen.
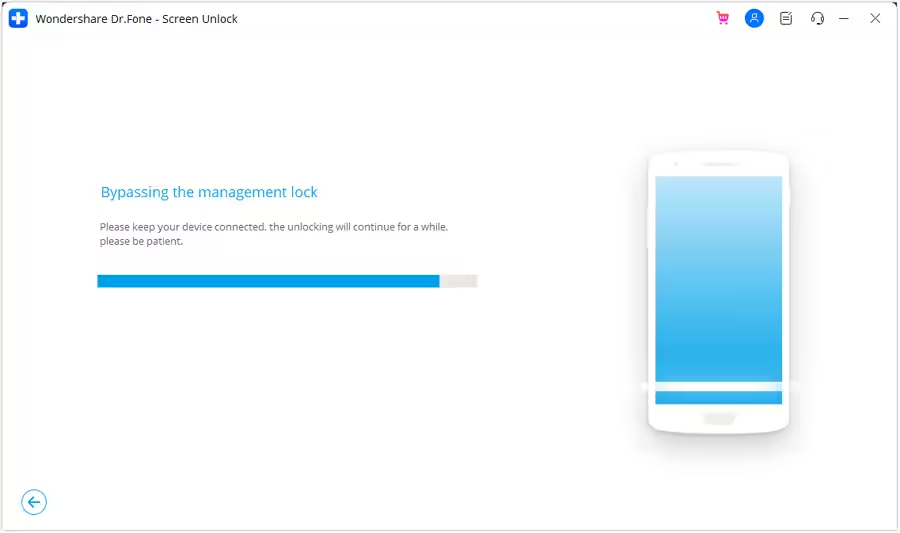
After successfully completing the process, you will receive a confirmation message. Click "Done" to confirm and close the window.
How to Remove Remote Management on iPhone SE via Settings
The primary reason people want to remove remote management on iPhone is that they’ve acquired it from their workplace or as a second-hand purchase. If the remote management profile isn’t removed, you won’t be able to use the iPhone fully. Sometimes, even a factory reset won’t unlock the iPhone if the remote management is still in place.
Thankfully, if the devices are still logged in with the MDM profile credentials, you can still resolve this through the Settings menu.
How to remove Remote Management on iPhone via Settings:
- Step 1: Locate iPhone Settings.
Open the "Settings" app on your iPhone SE. Scroll until you find "General" from the menu and tap.
- Step 2: Open your profile on VPN & Device Management.
In the General Settings, open the "VPN & Device Management" option and tap on the profile associated with the MDM.
- Step 3: Check for the
"Remove"button.
Look for a button that says "Remove" within the profile. If you see this button, you can proceed to remove remote management from iPhone on your own. Follow any on-screen prompts or confirmations to complete the removal process.

- Step 4: Contact MDM Admin if Needed:
If you do not see the "Remove" button, it means that you need to contact the MDM administrator for further assistance. Reach out to them to initiate the removal process.
How to Unlock Apple ID on iPhone SE


It is unfortunate you are facing a locked Apple ID. Apple tries its best to make users aware of safety protocols they need to follow to minimize and mitigate such unfortunate occurrences, such as using two-factor authentication, trusted devices, trusted phone numbers, passwords, passcodes, etc. that serve as deterrents to prevent unauthorized access to devices and accounts. Yet, when the unfortunate happens, what to do?
Here are the steps to unlock your Apple ID:
Unlock Apple ID Via Two-Factor Authentication
Apple implemented two-factor authentication a long time ago to prevent unauthorized access to Apple ID accounts. If you have it enabled, you would be able to use two-factor authentication to unlock your Apple ID again.
- Step 1: Go to https://iforgot.apple.com .

Step 2: Key in your Apple ID and proceed.
Step 3: Confirm your mobile number associated with the Apple ID.


If you have another device associated with the Apple ID and it is a trusted device, you can now receive instructions to proceed with a two-factor code on that device.

- Step 4: Use that code to unlock your Apple ID using two-factor authentication.
Unlock Apple ID Via a third party tool
Dr.Fone is a name that will be instantly familiar to anyone who has ever had any issue with their mobile devices and would be able to vouch for the quality and efficacy of this software at fixing issues quickly and efficiently.
Dr.Fone is a collection of carefully crafted modules that helps you when most needed. Ranging from helping you wipe your devices securely with Data Eraser to maintain your privacy when you sell your device or give it to service and helping you erase not just junk on your device but also user data such as SMS (whether single or batch) to free up some space on your iPhone SE, to Phone Transfer that helps you to easily transfer data you’re your old phone to your new iPhone 13 including restoring from iCloud Backups, Dr.Fone is a venerable utility from Wondershare that does it all and lives up to its name. Naturally, this tool was designed to help you unlock your Apple ID as well.

- Step 3: Click Unlock Apple ID to start the process.


- Step 4: Connect your device to the computer and wait for Dr.Fone - Screen Unlock (iOS) to detect it. You must know the passcode of your device.

You will be asked on your iPhone SE to Trust the computer, and then you will need to enter the passcode.
- Step 5: Unlocking Apple ID via Dr.Fone - Screen Unlock (iOS) will erase the contents of the device. You need to confirm this by typing
six zeroes (000 000)in the popup.

- Step 6: Follow the on-screen instructions to reset all your settings on the iPhone and then reboot to start the unlocking process.

Dr.Fone - Screen Unlock (iOS) will notify you when the process is complete.
How to use Face ID on iPhone SE to pay with Apple Pay
- Step1: If Apple Pay is supported by banking institutions in your country, you can set it up by adding a supported bank‘s credit card, debit card, or prepaid card to the Wallet app on your iPhone SE.
Parental Control Software
Step2: When a card is added and ready to use, check that Apple Pay is enabled under Settings > Face ID and Passcode.
Step3: For App Store/ Book Store/ iTunes Store purchases, it works as always, you double-press the Side Button to authenticate and use your default card.
Step4: Look at your iPhone SE to authenticate yourself using your Face ID and make the purchase.
Step5: When paying at retail outlets, hold your iPhone SE (top being close to the reader) and wait for the checkmark and Done message.
Step6: To pay using Apple Pay on websites, choose Apple Pay as the payment method, double press the Side Button, look at your iPhone SE, and wait for the Done message and checkmark to finish the process.
Unlock Disabled iPhone SE Without iTunes/ iCloud
We know and understand that the word troubleshooting can remind you of long telephone calls with support or making appointments and driving down to specialists and spending obscene amounts of money to get solutions. You do not want that. How about a way you could unlock your iPhone SE in a simple, 1-click way instead?
Dr.Fone - Screen Unlock (iOS) is a tool that can help you unlock your iPhone SE without iTunes or iCloud. It is a simple and easy-to-use tool that can help you unlock your iPhone SE in a few minutes. It is a safe and reliable tool that can help you unlock your iPhone SE without any data loss. It is compatible with all iOS devices and all versions of iOS. It is a simple and easy-to-use tool that can help you unlock your iPhone SE in a few minutes. It is a safe and reliable tool that can help you unlock your iPhone SE without any data loss. It is compatible with all iOS devices and all versions of iOS.
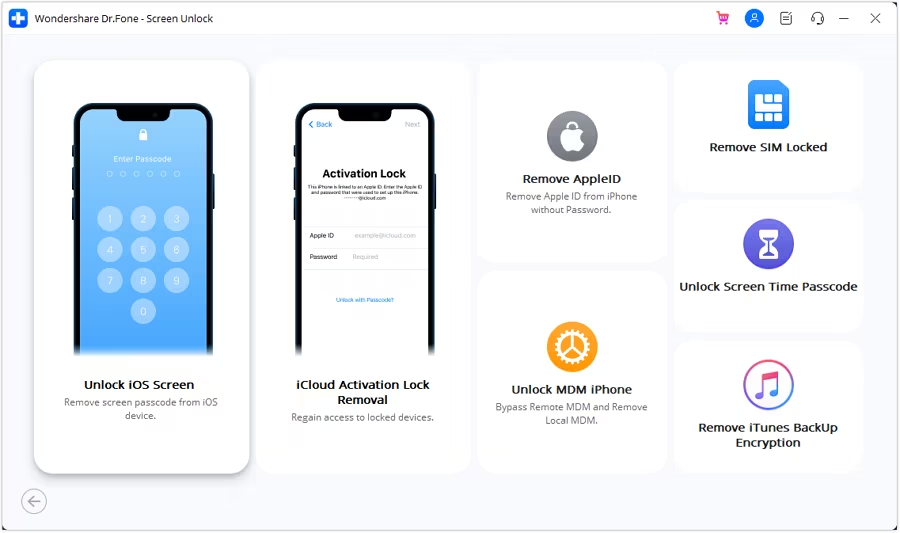
Step 1: Launch Dr.Fone and click the module titled
"Screen Unlock"Step 2: Choose the
"iOS"option, then select"Unlock iOS Screen"on the subsequent screen to continue unlocking your iPhone SE.
- Step 3: Follow the provided instructions to start the disabled iPhone SE in
Recovery Modeto unlock it. If for any reason the phone does not boot in Recovery Mode, there are instructions provided at the bottom to enter what is calledDFU mode.

- Step 4: Dr.Fone will read and display your phone model and the software installed on it. If the model displayed is incorrect, use the dropdown to pick the correct detail. Click
"Start"to download the specific firmware file for your particular iPhone SE model.

- Step 5: After the download completes, please click
Unlock Nowto start unlocking the disabled iPhone SE.

Your iPhone SE will be unlocked in a short span of time. Please note that all data would have been wiped out from the device. When you set the device up again, if you set it to use iCloud, data such as Contacts, iCloud Photos, iCloud Drive data, etc. will be downloaded onto your device again. The apps you had on your iPhone SE prior to it getting disabled can be downloaded again from the App Store. If you did not use iCloud but backed up the data manually, you will have to manually restore that data onto the device again.
How to Set Up Face ID on Your iPhone SE
Sometimes, you may just want to disable Face ID temporarily or the issue gets solved, and want to activate Face ID again. Setting up a Face ID on your iPhone SE is easy. To set up Face ID, sit in a comfortable spot with adequate lighting and follow these steps:
Step 1: Go to
Settings>Face IDand Passcode and enter your passcode. If you have not set up a passcode yet, you will necessarily have to create one now before proceeding forward.Step 2: Tap Set Up Face ID to start the process.
Step 3: Hold your iPhone SE in the portrait orientation at about an arm‘s length away from your face and then tap Get Started.

Step 4: Adjust to have your face inside the shown circle and then slowly rotate your head in a smooth motion to complete the circle. This step will be done one more time.
Step 5: When done, tap Done.
In case you are getting the following error:

There are a few things you can try to resolve this, you can try to update your iPhone SE to the latest iOS. At this point, you may even try running a beta version to see if that helps. If you are running a beta version, you may downgrade back to the release version to see if that resolves the error. Betas can both make and break things.
If this does not resolve it, you need to take the device to the nearest service center. The TrueDepth camera system has components that might have been damaged or might not be working properly, for whatever reason, and the service personnel is equipped to resolve this issue for you at the earliest.
How to use Face ID on iPhone SE to make purchases in App Store, Book Store, and iTunes Store
- Step1: Check if Face ID is enabled for purchases in these stores by going to Settings > Face ID & Passcode and ensuring that iTunes and App Store are toggled On.

- Step2: On any of these stores, when you tap on the option to buy some content, a payment confirmation popup will be displayed along with instructions to authenticate yourself using Face ID.

The instructions are simple: press the side button twice to authenticate yourself using your Face ID and make the purchase.
When done, a satisfying ting and a checkmark will confirm the action.
Activation Lock Primer
Apple products are costly, and they are prized. When a 5-year-old Android device might be left alone without anyone stealing it, you cannot risk that with an iPhone 6S, even today. Apple has built an Activation Lock in its devices to deter theft and so far, as we know, it has largely succeeded. If your iPhone SE 13 gets stolen, no one else can use it with their Apple ID unless they key in the credentials it was using previously (your credentials) and, even then, Apple has bolstered iCloud Find My Activation Lock to be more restrictive. You may have to key in a lot of information ranging from your device password (if you are also using the same Apple ID on a Mac) to your iOS device passcode too, obviously, your Apple ID password. It is a system that works in favor of Apple users.
Yet, in some cases, users want to get around the Activation Lock for genuine reasons, say, when you buy a used Apple device from someone. They may have forgotten to remove that device from their Apple account and Activation Lock would not let you use it. Or, you are an IT administrator, and you manage devices given out to employees. Some employees did not remove their accounts from their devices, and now those iPhones are riddled with Activation Lock. You can remove it using this step-by-step guide.
- Title: How to Remove remote management from iPhone SE?
- Author: Nova
- Created at : 2024-08-20 19:30:46
- Updated at : 2024-09-25 23:45:35
- Link: https://blog-min.techidaily.com/how-to-remove-remote-management-from-iphone-se-by-drfone-ios-unlock-ios-unlock/
- License: This work is licensed under CC BY-NC-SA 4.0.