
How to Repair Corrupt Excel 2013 Files | Stellar
How to repair corrupt Excel file
Stellar Repair for Excel is an excellent tool to repair corrupt or damaged MS Excel files. Mentioned below are the steps to perform Excel repair with this tool:
- Download & Run the Stellar Repair for Excel.

- A dialog box appears on your screen, click ‘OK’ to proceed.
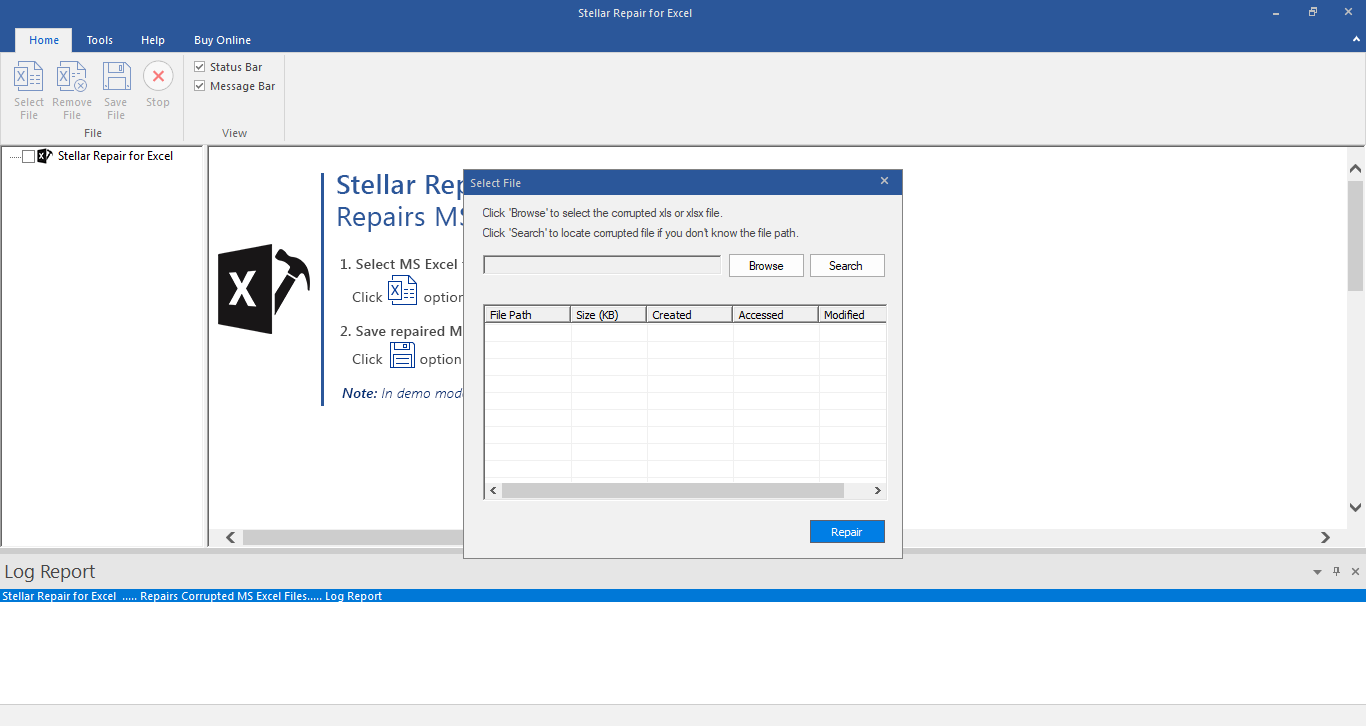
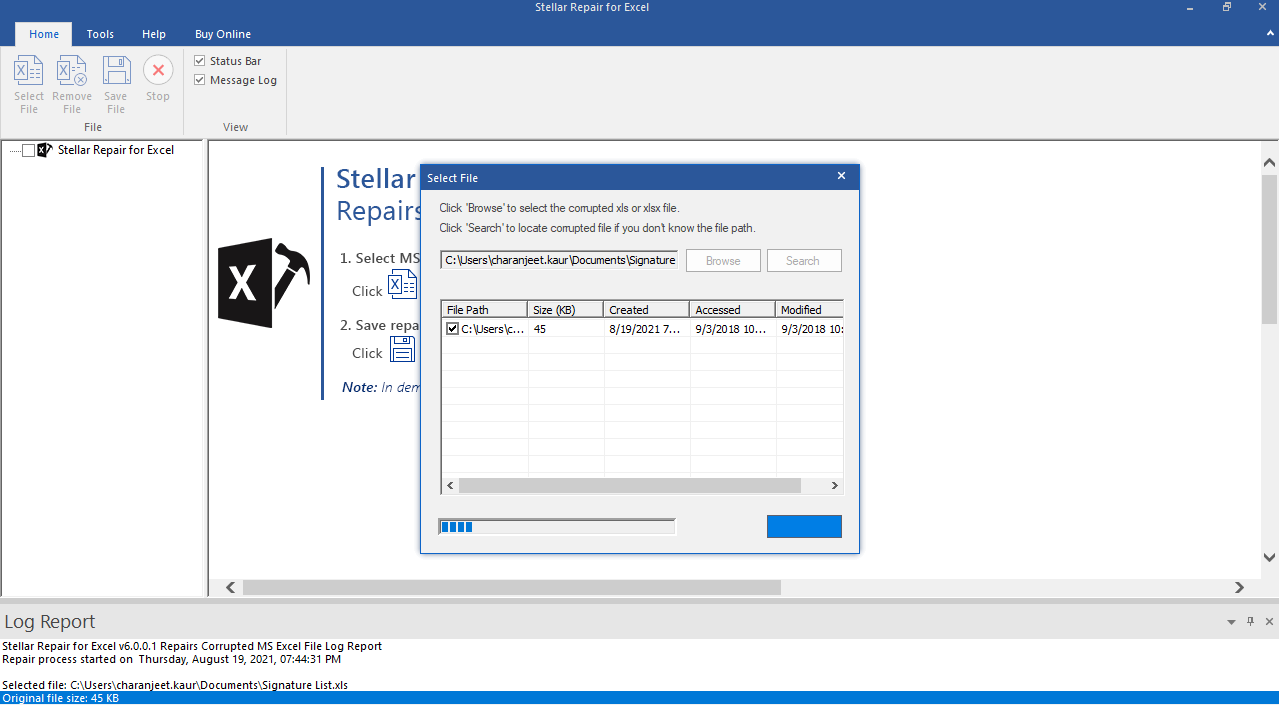
- To select your corrupt .XLS or .XLSX file, click ‘Browse’ button. However, if you do not know the location of your .XLS or .XLSX file, the software provides you the option ‘Search’ to search for your corrupt Excel files.

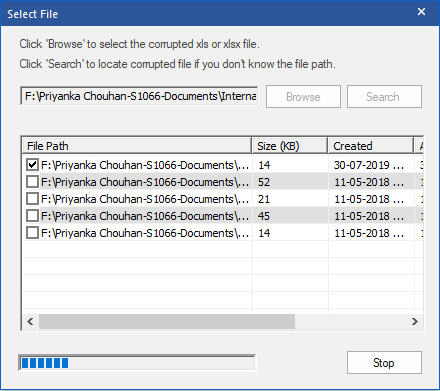
- Select the checkboxes against the files that you want to repair and click ‘Repair’. This starts the scanning process.
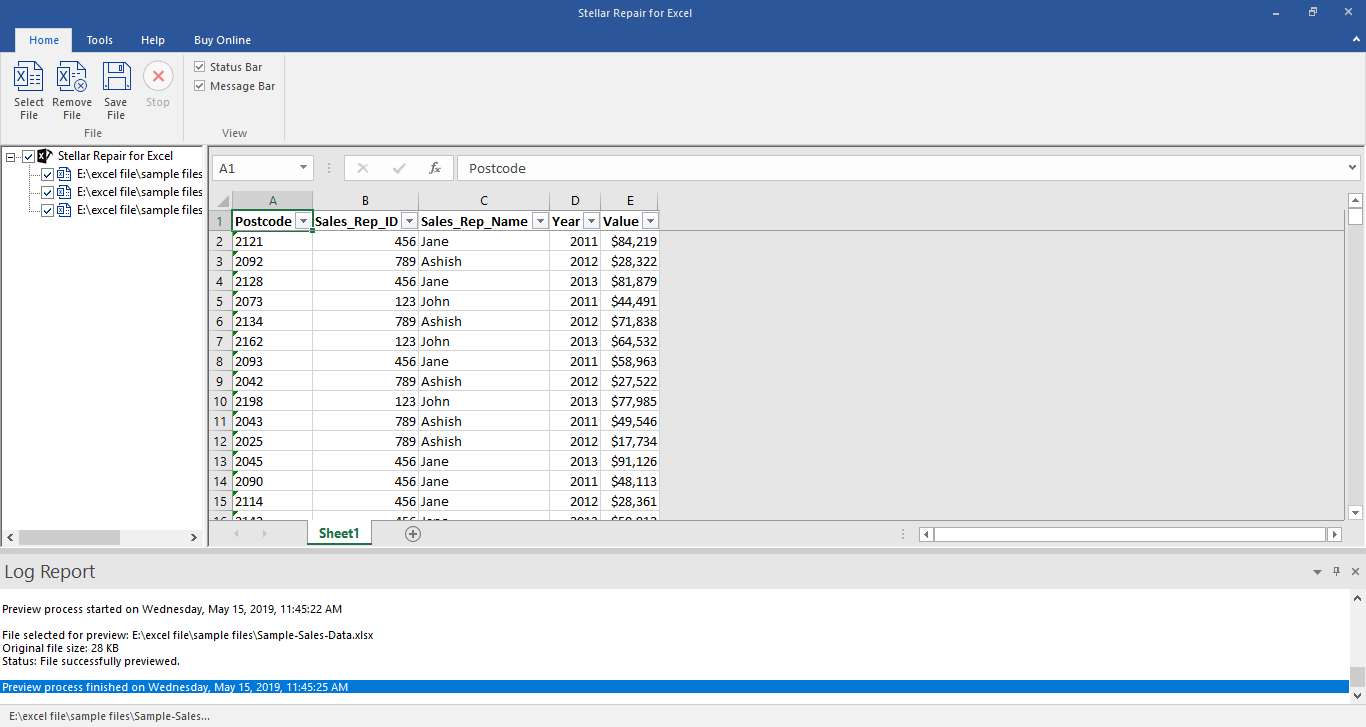
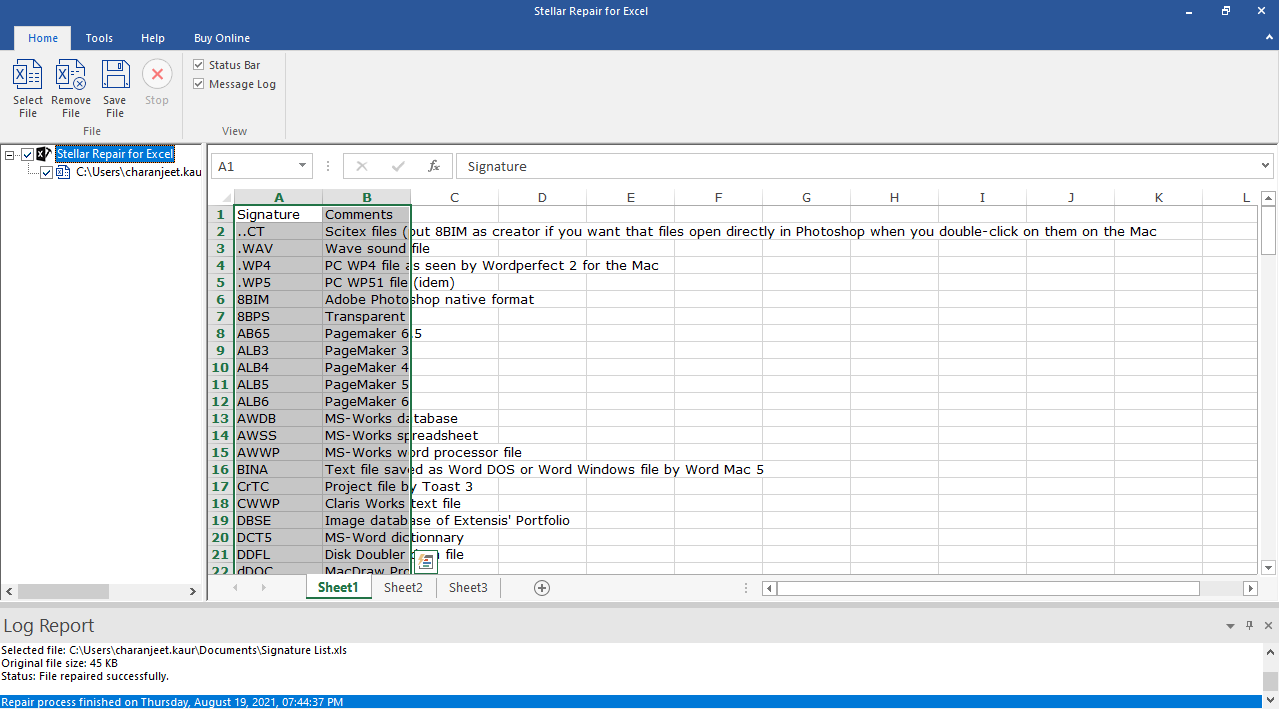
- The list of all the files that the software has scanned is displayed in the tree-view in the left pane. Click on a file from this tree-view to see its preview in the middle pane. From this list, you can select the file that you want to recover.
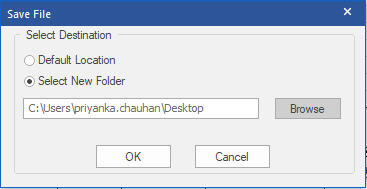
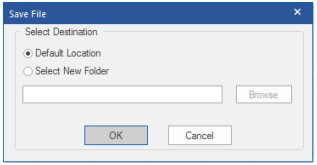
- You can either select the ‘Default location of file’ or ‘Select New Folder’ in the ‘Save Document’ dialog box to save the repaired files.
Stellar Repair for Excel Stellar Repair for Excel is the best choice for repairing corrupt or damaged Excel (.XLS/.XLSX) files. This Excel recovery software restores everything from corrupt file to a new blank Excel file.
How Do I Repair and Restore Excel File?
When an Excel file turns corrupt, the file might become inaccessible or you might receive errors. You may encounter errors, such as ‘the file is corrupt and cannot be opened,’ ‘Excel found unreadable content in “filename>”,’ ‘Excel cannot open “filename” because the file format or extension is not valid,’ etc.
Common Reasons for Excel File Corruption
There are several reasons that can turn the file corrupt. The most common reason is a damaged hard drive. Other factors that can cause corruption in an Excel file are as follows:
- System crash or abrupt shutdown of the system while the file is still open
- Viruses infecting the file with malicious code
- Bug in the operating system
- Bad sectors on the drive where the file is stored
- Large spreadsheets with formulas and other components
Whatever be the reason, if your business is dependent on an Excel file, corruption in the file could hamper your business continuity. Also, you may lose crucial data. In such a situation, you could try to repair the file.
Before We Begin
It is important to identify the root cause behind Excel file corruption. If the problem has occurred due to a faulty hard disk drive, contact your hardware vendor to get it fixed. Also, move the file to another local drive and check if it opens. If nothing works, proceed with the methods discussed below to repair and restore the file.
Methods to Repair and Restore Excel File
Try the following methods to fix corruption in an Excel file and restore it.
Method 1 – Use the Built-in ‘Open and Repair’ Tool
You can use the Excel built-in Open and Repair utility to repair the corrupt file. Follow these steps:
- Open your Excel application and click on Blank workbook.
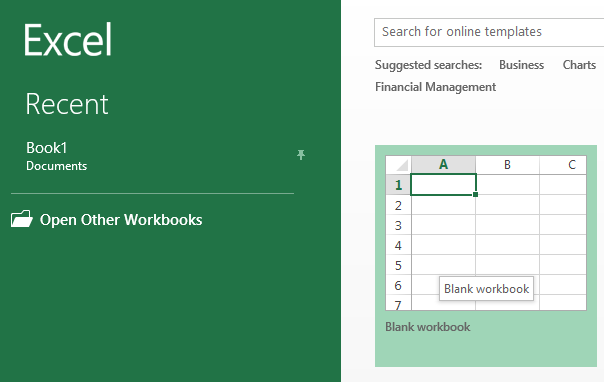
- On the blank workbook screen, click on the File tab.
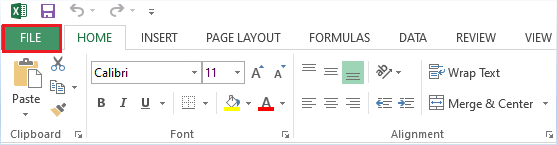
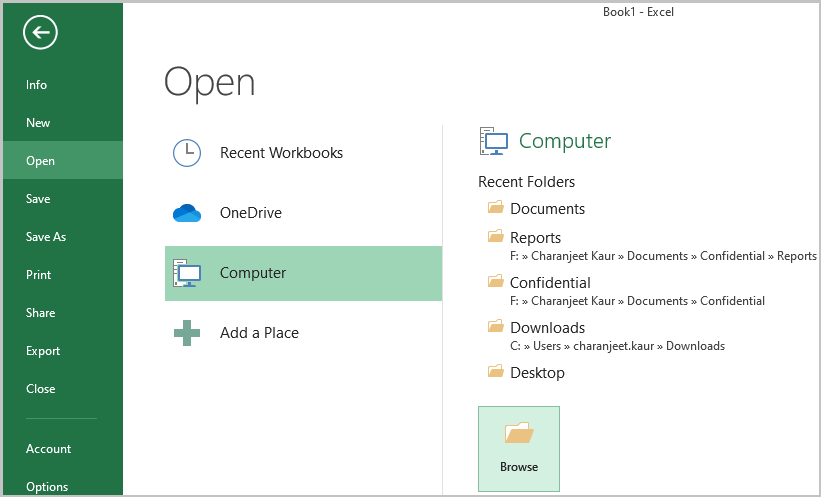
- Click Open > Computer > Browse.
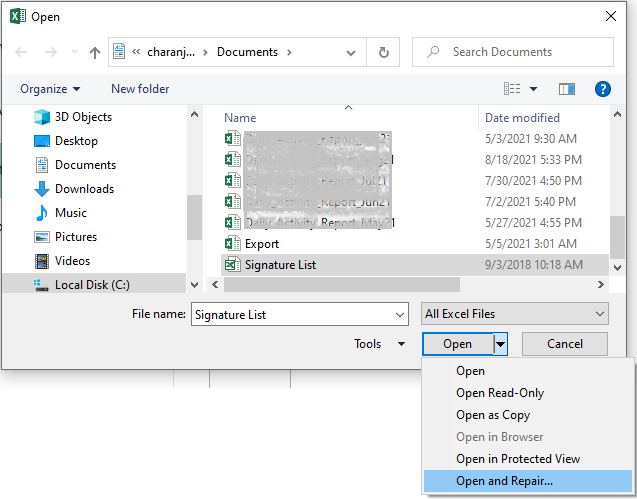
- Select the file you want to repair and then click on Open and Repair from the Open dropdown box.
- Click Repair to fix corruption in the Excel file and recover maximum data.
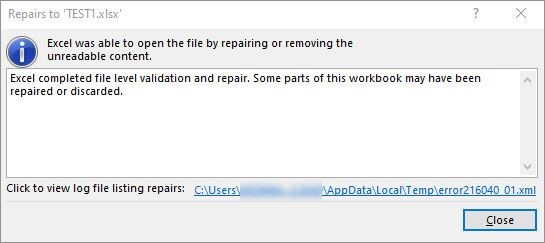
- If you get the following error message, click Yes to open the file.

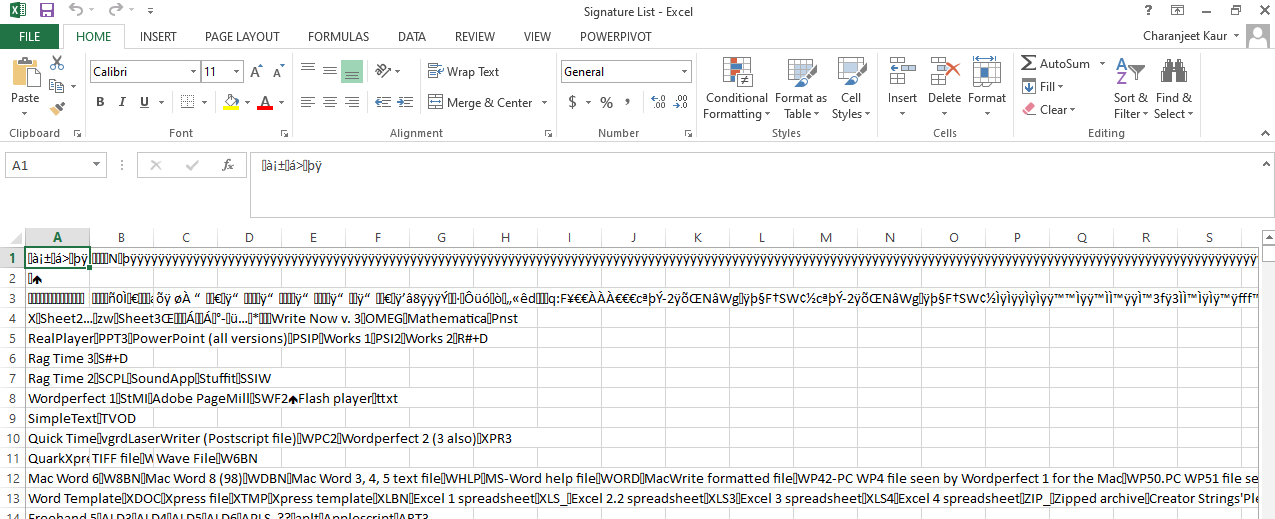
- If clicking Yes opens the file with garbage entries (see the image below), perform Step 1 – 5 and click Extract Data. This will only help you recover data without formulas and values.
Note: You may also try to recover the data from a corrupted workbook by using the methods suggested by Microsoft .
A better way to repair and restore an Excel file with complete data is to use a specialized Excel file repair tool .
Method 2 – Use Excel File Repair Tool
Stellar Repair for Excel is a powerful tool designed to help users fix corrupted .xls or .xlsx files without any technical assistance. Also, the tool recovers all the components from a corrupted workbook, including tables, pivot tables, cell values, formulas, charts, images, etc. You can preview the repaired file and its contents by downloading the free demo version from the link below. It is a useful feature that allows the user to validate the data before saving it.
[
](https://tools.techidaily.com/stellardata-recovery/repaire-for-excel/ “Free Download For Windows”)
Here’s the step-by-step instructions to repair a corrupt Excel file using the software:
- Run the software. The software main interface opens with an instruction to add some add-ins if you’ve engineering formulas in the file you want to repair.
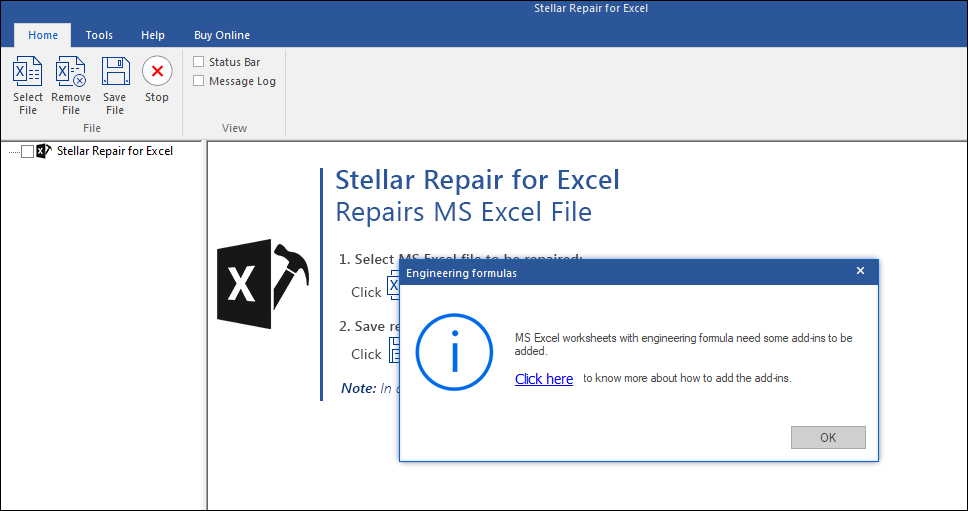
Click OK to proceed.
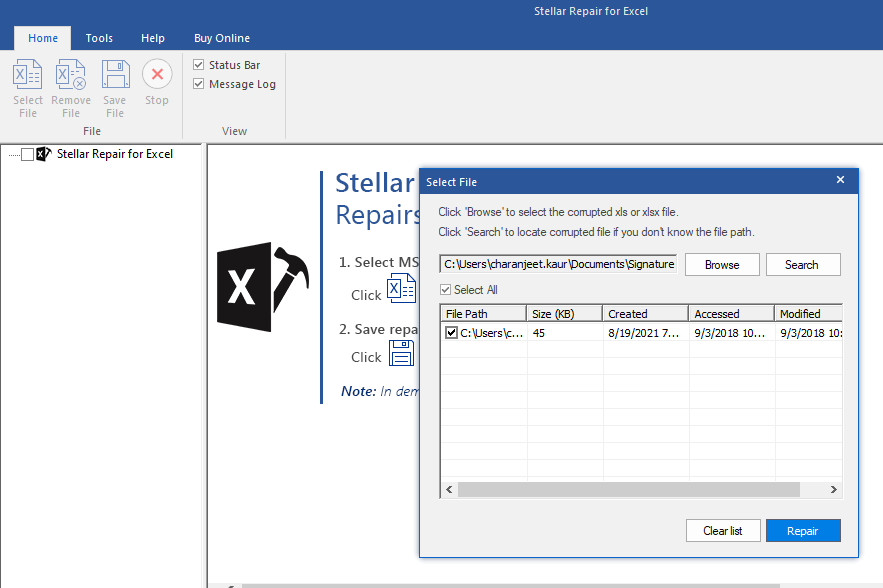
Select the file you wish to repair by using the Browse option.
Note: If you’re not aware of the file location, choose the ‘Search’ option to locate the file.
- A screen showing progress of the Excel file repair process is displayed.
- Preview of the repaired Excel file and its recoverable data is displayed.
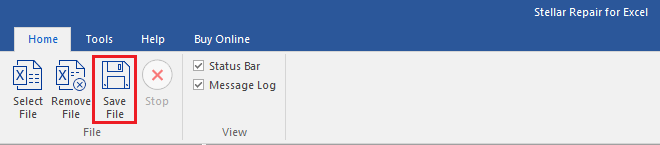
- After verifying the data, click on the Save File button on the File menu to save the repaired file.
- Select the location where you wish to save the repaired file on the Save File window and then click OK.
A confirmation message will pop-up after completion of the repair process. You can now try to open the file in your Excel program.
End Note
Even if you’re taking preventive measures, you might still experience corruption in an Excel file. So, it’s crucial to take regular backups of your workbooks. For this, ensure that the ‘Always create backup’ option is enabled in Excel. You can find it in General Options by clicking on the Tools button in the Save As dialog box. Enabling it will ensure that the Excel backup file is updated with the changes made in a spreadsheet.
Additionally, ensure that the Excel ‘AutoRecover’ feature is set to save a version of your Excel file after every 10 minutes. You can increase or shorten the interval as per your requirement.
[Solved] Excel Spreadsheet Disappears after Opening
Several Excel users have reported about experiencing ‘Excel spreadsheet disappears after opening’ issue. The problem occurs when attempting to open an Excel file by double-clicking on the file icon or name. The Excel file opens blank grey screen.

Figure 1 - Excel Blank Screen
User Instances of ‘Excel Open But Can’t See Spreadsheet’ Issue
Instance 1: The user said that “Excel 2016 opens to a blank screen and everything is greyed out. Ribbons at the top of Excel are also not present”.
Instance 2: The user reported that “Attempting to open a spreadsheet, either by double-clicking the file or by opening Excel, it opens but only a blank Excel window is visible. When trying to save that particular file, Excel behaves as though there is no file open at all and all the file saving options, such as save, save as, print, etc. are greyed out.”
Causes Behind ‘Excel Open But Can’t See Spreadsheet’ Issue & the Solutions Thereof
Following are some of the possible reasons behind the ‘Excel open but can’t see spreadsheet’ issue, along with their solutions:
Cause 1: Excel File is Hidden
You may have saved the Excel sheet as a hidden document.
Solution: Unhide Excel File
Verify if your Excel worksheet is hidden by following these steps:
- In Excel, click the View tab, and then click Unhide.
Note: If the ‘Hide’ tab under the View menu is greyed out, the sheet you’re trying to open is not hidden. In that case, proceed to the next workaround.

Figure 2 - Unhide Excel File
- A dialog box will pop-up showing the worksheet name that can be unhidden. For instance, below is an image of Unhide box that lists ‘Daily_Reports’ spreadsheet under Unhide workbook.

Figure 3 – Select and Unhide Excel Workbook
- Click OK to unhide your Excel sheet.
If this fails to work, there’s a possibility that the spreadsheet window pane may have slided to one side of the visible desktop. To bring back the displayed area, click the ‘Arrange All’ option under the View tab. If the issue persists, try the next solution.
Cause 2: Ignore Dynamic Data Exchange (DDE) Option is Enabled
Another reason behind the ‘Excel opens to a blank screen’ issue could be that the “Ignore other applications that use Dynamic Data Exchange (DDE)” checkbox is checked in Excel options.
Usually, when you double-click an Excel file, a DDE message is sent to Excel instructing it to open that particular file. But, if you have the ‘Ignore DDE’ option selected, the DDE message sent to Excel to open a workbook is ignored. As a result, the Excel workbook opens a blank screen.
Solution: Uncheck the Ignore DDE Option
Make sure that the ‘Ignore DDE’ option is unchecked by performing these steps:
Note: Skip these steps for Excel 2019 and Excel Office 365.
- In your Excel window, click File > Options.

Figure 4 - Select Excel Options
- From the left-side of the ‘Options’ window, choose Advanced.
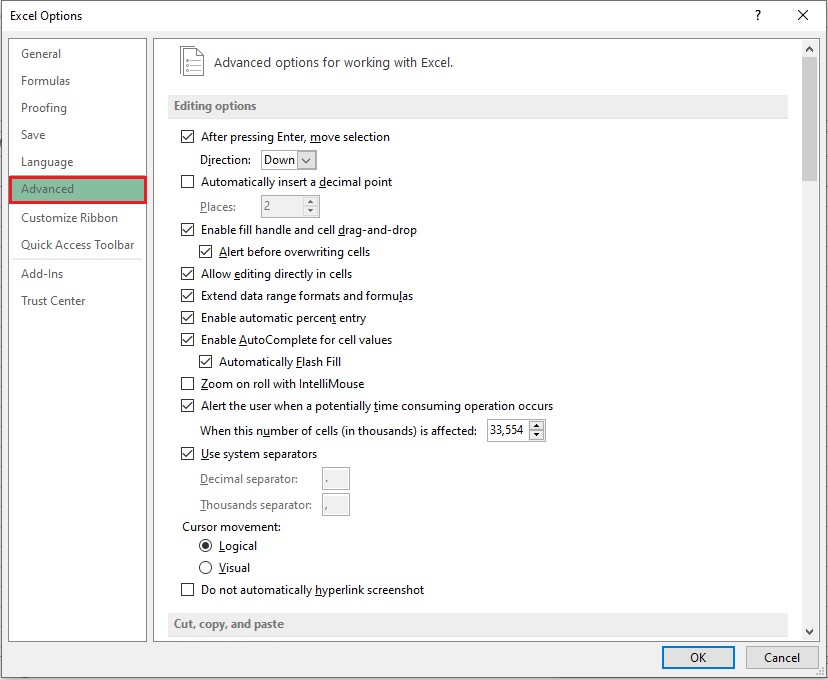
Figure 5 - Excel Options Window
- In ‘Advanced’ window, locate the General section, and then uncheck the “Ignore other applications that use Dynamic Data Exchange (DDE)” checkbox.
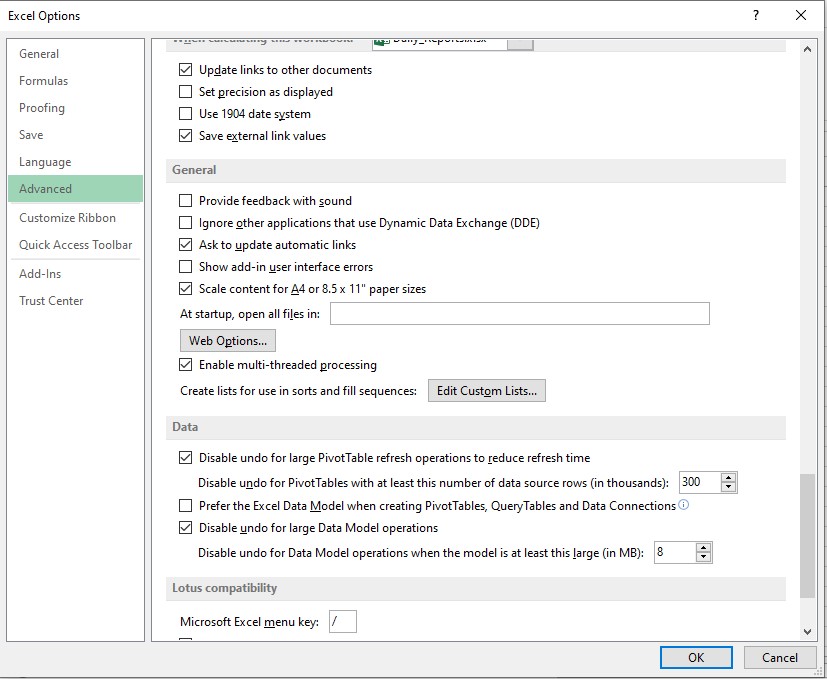
Figure 6 - Uncheck Ignore Other Applications that use DDE
- Click OK to apply the changes.
If these steps don’t work, proceed to the next workaround.
Cause 3: Issue within Office Program
Sometimes, problem within your Microsoft Office program might cause Excel to behave oddly and may result in an Excel spreadsheet disappeared issue.
Solution: Repair Office Program
Try repairing your Office program by executing the steps listed below, based on your Windows OS:
For Windows 10:
- Type Settings in the Windows search box.
- Click Settings.
- In ‘Windows Settings’ screen, select Apps.
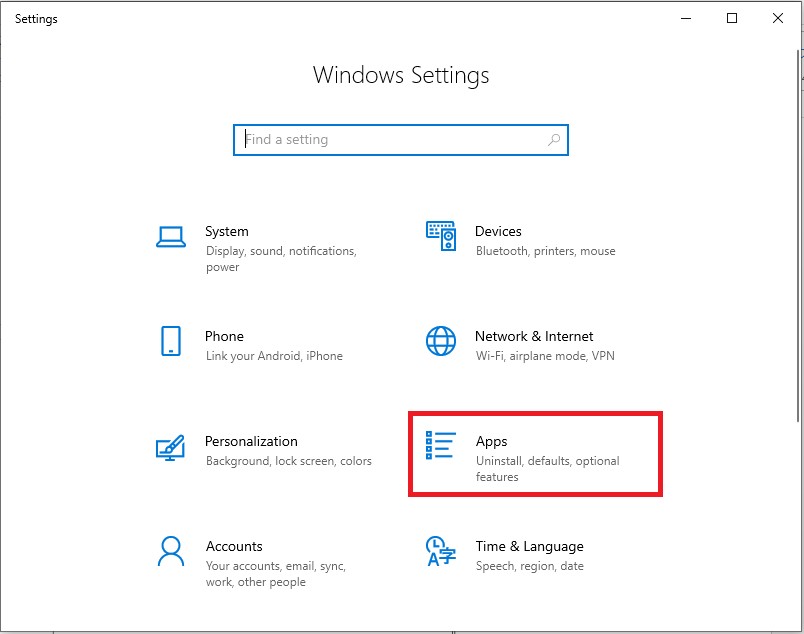
Figure 7 - Windows Settings Screen
- In ‘Apps & features’ screen, scroll down to your Microsoft Office program and tap on it, and then click the Modify

Figure 8 - Modify MS Office Program
- In ‘How would you like to repair your Office programs’ dialog box, select the Online Repairradio button, and then click the Repair
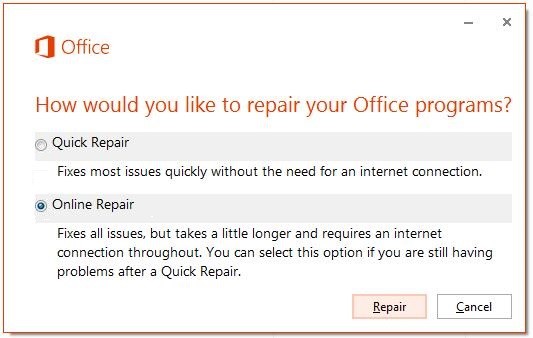
Figure 9 - Repair MS Office Program
For Windows 8:
- Open Control Panel and click the Uninstall a program option under Programs.
- Select Microsoft Office 365 and then click Change.
- In the window that opens, select Online Repair and then hit the Repair
You may be asked to restart your system after completion of the repair process.
For Windows 7:
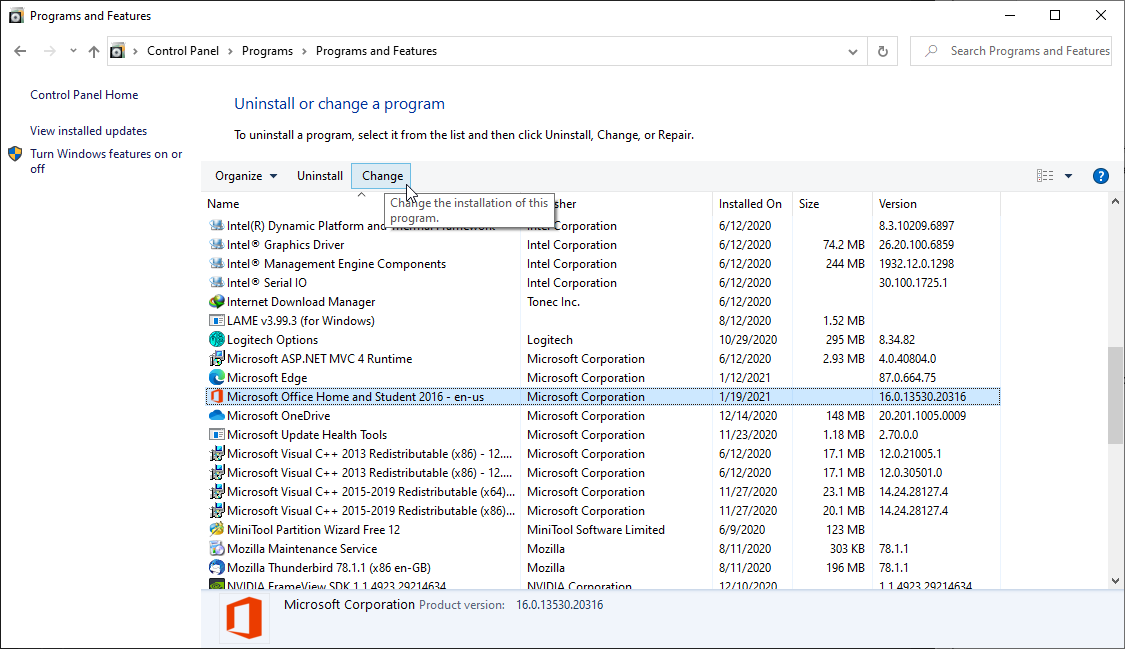
- In ‘Control Panel’ window, double-click Programs and Features.
- Under Uninstall or change a program section, select the Office program, and then select Change.
- In the dialog box that appears, choose Online Repair and then choose Repair.
If repairing your Office installation fails to resolve the issue, continue to solution 4.
Cause 4: Problematic Excel and COM Add-ins
Sometimes, Excel and COM add-ins may cause Excel file open a blank grey screen problem.
Solution: Disable the Add-ins
Disabling the Excel and COM add-ins one at a time may help resolve the problem. The steps are as follows:
- Click the File menu in your Excel file and select
- From ‘Excel Options’ left-side panel, click Add-Ins, and then choose COM Add-ins from the ‘Manage’ drop-down. Click the Go
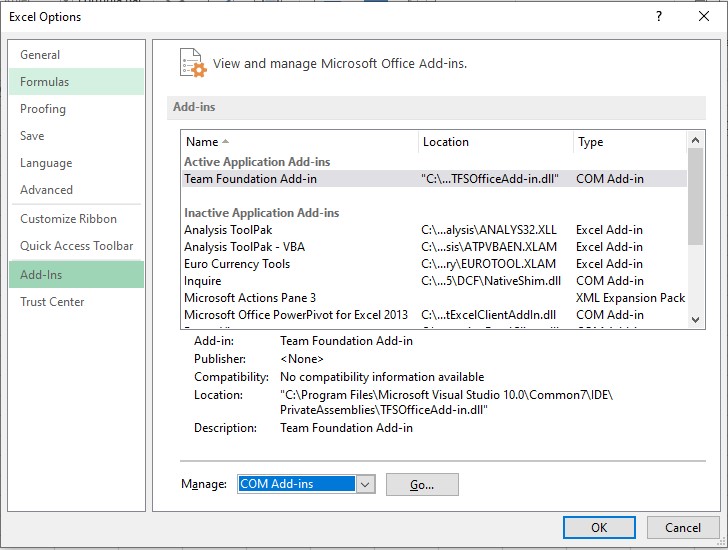
Figure 10 - Select COM Add-ins
- Uncheck one of the add-ins checkbox from the COM Add-ins window, then select OK.
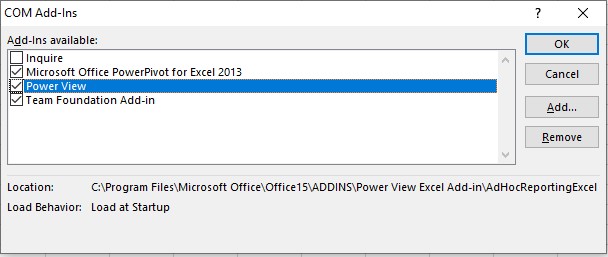
Figure 11 - Uncheck and Disable COM Add-ins
- Restart your Excel program.
If the issue persists, repeat the above steps (1 till 4), except that you need to choose a different add-in in step 3.
If you’re still experiencing the same problem after unchecking all the COM add-ins, repeat all the above steps, except choose ‘Excel Add-ins’ in step 2.
If Excel can load the file, then the add-in that you disabled last leads to the problem. If turning off add-ins does not work, try the next solution.
Cause 5: Problem with Excel File Associations
The Excel file opening a blank screen problem may occur if the file associations are not performing correctly.
Solution: Reset Excel File Associations
Try resetting the file associations in Excel to their default settings. For this, follow the below steps based on your OS.
For Windows 10 and Windows 8.1:
- Select the file that is opening incorrectly and copy it to the desktop.
- Right-click the file and click Properties.
- In the File’s ‘Properties’ window, check your file type next to Type of Filefrom the General tab. For instance, (.docx), (.csv), or (.pdf).
- Next, check to which app your file is associated with from the Opens withoption
If the file type is different than .xlsx, open the file in a different application by following these steps:
- Click the Change button next to the ‘Opens with’ option.
- Click More apps.
- From the list of applications, select the desired app and then check the Always use this app Click OK.
For Windows 8:
- Open Control Panel, click Default Programs, and then select Set your default programs.
- Choose Excel and then tap the Choose default for this program
- In ‘Set Program Associations’ window, choose Select All and then click Save.
For Windows 7:
- In Control Panel, choose Default Programs.
- Click the Associate a file type or protocol with a specific program
- Choose Microsoft Excel Worksheet and click on change program.
- Choose Microsoft Excel under Recommended Programs.
- If you’re unable to find Excel, browse the Excel installation folder.
- Select exe and then choose Excel.
What Next? Use Stellar Repair for Excel to Recover Your File
If the above solutions don’t help recover your Excel file, use an Excel file repair tool, such as Stellar Repair for Excel to recover it. The software can restore the Excel spreadsheet and its components, including tables, pivot tables, charts, formulas, etc. while preserving the spreadsheet properties and formatting.
Check out the video to recover Excel file by using Stellar Repair for Excel software.
Conclusion
This article described the possible causes behind the ‘Excel open but can’t see spreadsheet’ issue, along with their solutions. The manual solutions to resolve the issue require time and efforts. But, if you need to access your Excel file without any delay, use Stellar Repair for Excel software to recover your .xlsx/.xls file in just a few clicks.
How to Fix Excel Formulas Not Working Properly | Step-by-Step Guide
Summary: Excel formulas sometimes fail to function correctly and even return an error. This article explains what you might be doing wrong that prevents Excel formulas from working properly and solutions to resolve the issue. If your formulas have disappeared from the Excel spreadsheet and you are having trouble recovering them, you can use an Excel repair tool to recover the formulas.

When working with Excel formulas, situations may arise when the formula doesn’t calculate or update automatically. Or, you may receive errors by clicking on a formula.
Problems Causing the ‘Excel Formulas not Working Properly’ Issue and Solutions
Let’s check out the possible reasons that cause Excel formulas to work properly and solutions to resolve the issue.
Problem 1 – Switching Automatic to Manual Calculation Mode
Automatic and manual are the two modes of calculation in Microsoft Excel.
By default, Excel is set to automatic calculation mode. Everything is recalculated automatically when any changes are made in a worksheet in this mode. You may switch from automatic to manual mode to disable the recalculation of formulas, particularly when working with a large Excel file with too many formulas.
Excel will not calculate automatically when set to manual calculation mode. And this may make you think that the Excel formula is not working properly.
Solution – Change Calculation Mode from Manual to Automatic
To do so, perform these steps:
- Click on the column with problematic formulas.
- Go to the Formulas tab, click the Calculation Options drop-down, and select Automatic.

Problem 2 – Missing or Mismatched Parentheses
It’s easy to miss or incorrectly place parentheses or include extra parentheses in a complex formula. If a parenthesis is missing or mismatched and you click Enter after entering a formula, Excel displays a message window suggesting to fix the issue (refer to the screenshot below).

Clicking ‘Yes’ might help fix the issue. But Excel might not fix the parentheses properly, as it tends to add the missing parentheses at the end of a formula which won’t always be the case.
Solution – Check for Visual Cues When Typing or Editing a Formula with Parentheses
When typing a formula or editing one, Excel provides visual cues to determine if there’s an issue with the parentheses inserted in a formula. Checking for these visual cues can help you fix missing/mismatched parentheses.
- Excel helps identify parenthesis pairs by highlighting them in different colors. For instance, the pair of parenthesis outside is black.
- Excel does not make the opening parentheses bold. So, if you’ve inserted the last closing parentheses in a formula, you can determine if your parentheses are mismatched.
- Excel helps identify parentheses pairs by highlighting and formatting them with the same color once you cross over them.
Problem 3 – Formatting Cells in an Excel Formula
When adding a number in an Excel formula, don’t add any decimal separator or special characters like $ or €. You may use a comma to separate a function’s argument in an Excel formula or use a currency sign like $ or € as part of cell references. Formatting the numbers may prevent the formula from functioning correctly.
Solution – Use Format Cells Option for Formatting
Use Format Cells instead of using a comma or currency signs for formatting a number in the formula. For instance, rather than entering a value of $10,000 in your formula, insert 10000, and click the ‘Ctrl+1’ keys together to open the Format Cells dialog box.

Problem 4 – Formatting Numbers as Text
Numbers are displayed as left-aligned in a sheet in a worksheet, and text formatted numbers are right-aligned in cells. Excel considers numbers formatted as text to be text strings. Thus, it leaves those numbers out of calculations. As a result, a formula won’t work as intended. For example, in the following screenshot, you can see that the SUM formula works correctly for normal numbers. But, when the SUM formula is applied to numbers formatted as text, the formula doesn’t return the correct value.

Sometimes, you may also see an apostrophe in the cells or green triangles in the top-left corner of all the cells when numbers in those cells are formatted as Text.
Solution – Do Not Format Numbers as Text
To fix the issue, do the following:
- Select the cells with numbers stored as text, right-click on them, and click Format Cells.
- From the Format Cells window, click on Number and then press OK.

Problem 5 – Double Quotes to Enclose Numbers
Avoid enclosing numbers in a formula in double-quotes, as the numbers are interpreted as a string value.
Meaning if you enter a formula like =IF(A1>B1, “1”), Excel will consider the output one as a string and not a number. So, you won’t be able to use 1’s in calculations.
Solution – Don’t Enclose Numbers in Double Quotes
Remove any double quotes around a number in your formula unless you want that number to be treated as text. For example, you can write the formula mentioned above as “1” =IF(A1>B1, 1).
Problem 6 – Extra Space at Beginning of the Formula
When entering a formula, you may end up adding an extra space before the equal (=) sign. You may also add an apostrophe (‘) in the formula at times. As a result, the calculation won’t be performed and may return an error. This usually happens when you use a formula copied from the web.
Solution – Remove Extra Space from the Formula
The fix to this issue is pretty simple. You need to look for extra space before the equal sign and remove it. Also, ensure there is an additional apostrophe added in the formula.
Other Things to Consider to Fix the ‘Excel Formulas not Working Properly’ Issue
- If your Excel formula is not showing the result as intended, see this blog .
- When you refer to other worksheets with spaces or any non-alphabetical character in their names, enclose the names in ‘single quotation marks’. For example, an external 5reference to cell A2 in a sheet named Data enclose the name in single quotes: ‘Data’!A1.
- You may see the formula instead of the result if you have accidentally clicked the ‘Show Formulas’ option. So, click on the problematic cell, click on the Formula tab, and then click Show Formulas.
- If you’re getting an error “Excel found a problem with one or more formula references in this worksheet”, find solutions to fix the error here .
Conclusion
This blog discussed some problems you might make causing an Excel formula to stop working properly. Read about these common problems and solutions to fix them. If a problem doesn’t apply in your case, move to the next one. If you cannot retrieve formulas in your Excel sheet, using an Excel file repair tool like Stellar Repair for Excel can help you restore all the formulas. It does so by repairing the Excel file (XLS/XLSX) and recovering all the components, including formulas.

Resolve Compile Error in Hidden Module in Excel: Causes & Solutions
The hidden module in Excel refers to a container with VBA codes, custom queries, and complex macros. The compile error in a hidden (protected) module in the Excel worksheet usually occurs when doing different activities on a macro-enabled sheet, such as merging .xls files. The error can result in macros execution failure. You need to quickly resolve this compile error to restore full functionality of the VBA code. Below, we’ll be discussing the solutions to fix this Excel error. But before that, let’s see why this error occurs.
You may encounter the Compile error in hidden module due to one of the following reasons:
- The code in the workbook is not compatible with the Excel application.
- Manual queries created in a previous version are no longer compatible with your current version of Excel.
- Missing references.
- Invalid .exe files (control information cache files) are automatically created with ActiveX control insertion in Excel file.
- Protected module is corrupted.
- The workbook with hidden module is damaged or corrupted.
- Incompatible add-ins.
- Incompatible Excel file version.
- The module is protected or password-protected.
- Missing or corrupted mscomctl.ocx file.
Excel can throw the compile error while compiling the code that exists in the protected module. So, first check the error and identify the hidden module that is creating the issue. You can unprotect the module. Also, ensure that you have permission to access the VBA code in the module. If the error still exists, follow the below troubleshooting methods.
Method 1: Re-register ActiveX Control Files or mscomctl.ocx Files
You can get the compile error in the Excel file, containing the VBA code related to ActiveX controls or OCX files. The ActiveX control files and OCX files (mscomctl.ocx files) are the components of Microsoft’s standard controls library. The compile error in the hidden module can occur if these files are missing. In this case, you can use the Regsvr32 tool to re-register the OCX files. The Regsvr32 is a command-line utility to register and unregister OLE controls in the Windows registry.
Method 2: Delete .exd Files
The .exd files are temporary files created by Excel when inserting ActiveX controls objects. These temporary files can lead to a compile error if they are corrupted. So, if this issue has occurred, particularly in the Excel file containing ActiveX controls, then deleting .exd files might fix the issue. To delete the .exd file, follow the below steps:
- First, open the Run window by pressing the Windows+R keys.
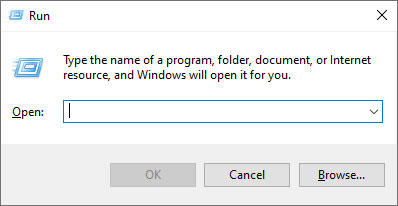
- In the Run window, type %appdata%.
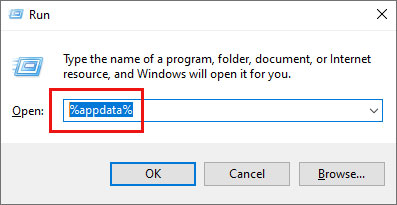
- In the Roaming window, click on the Microsoft option.
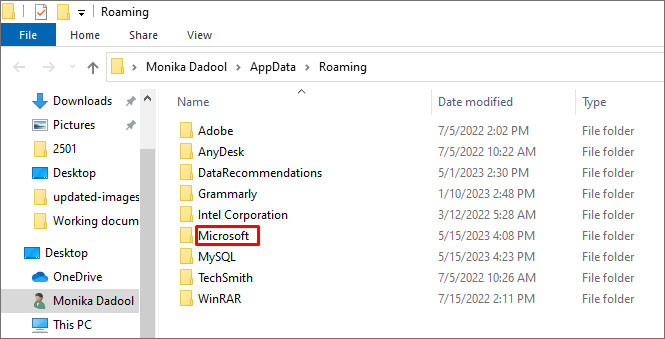
- Under Microsoft, you will see a list of folders. Search and click on Forms.
- Right-click on a file with .exd extension and select Delete.
- Once you delete the .exd files, restart your Excel application.
Method 3: Rollback the Office Updates
MS Office updates or upgrades may also cause the compile error in hidden module in Excel. If the error has occurred after downloading the recent Microsoft Office updates, try reverting to the previous version or uninstalling the recent updates to fix the issue.
Method 4: Unselect Missing References
The compile error in hidden module determine path in Excel can also occur if your file contains a reference to object library/type library, which is labelled as Missing. You can locate, check, and uncheck the references marked as ‘Missing’ to fix the issue. Here are the steps:
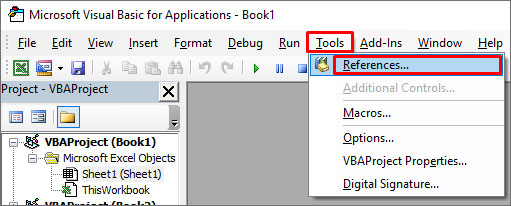
- Open your Excel and press Alt + F11 keys.
- The Visual Basic Editor is displayed.

- Go to the Tools option and then click References.
- In the References-VBAProject window, under Available References, search and unselect the references starting as “Missing”.
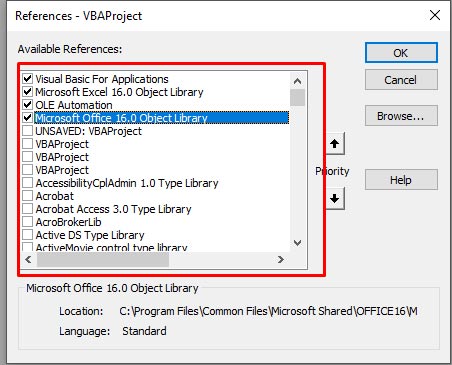
- Click OK.
Method 5: Check the Code in Module
The compile error in hidden module can occur if there are issues in the code within the module. The problems include incorrect or missing syntaxes, missing parameters/references, or the code contains incompatible functions or a wrong name of the object. You can check and fix these issues in the code by opening the VBA editor.
Method 6: Check and Remove Add-ins
In Excel, the compile error in macro-enabled files can also occur due to incompatible add-ins. You can check and disable the add-ins in Excel using the below steps:
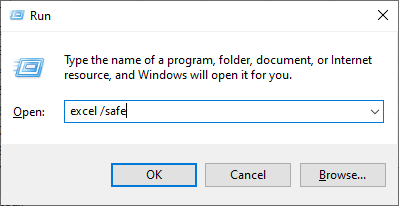
- First, open the Run window and type excel /safe and then click OK. The Excel application will open in safe mode.
- Now try to open the affected Excel file. If it opens without the error, then check and remove the latest installed Excel add-ins.
- Navigate to the File option and then select Options.
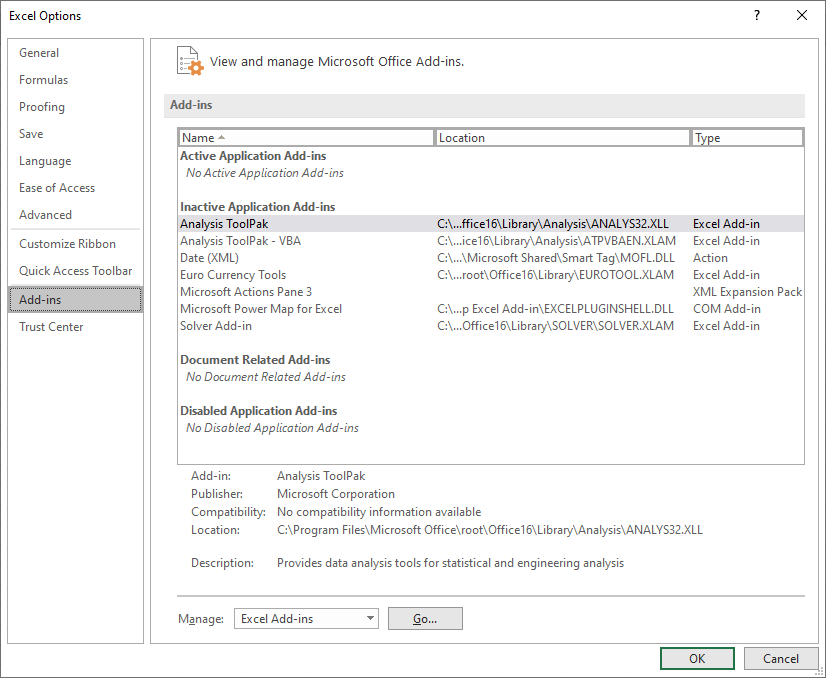
- In the Excel Options window, click Add-ins.
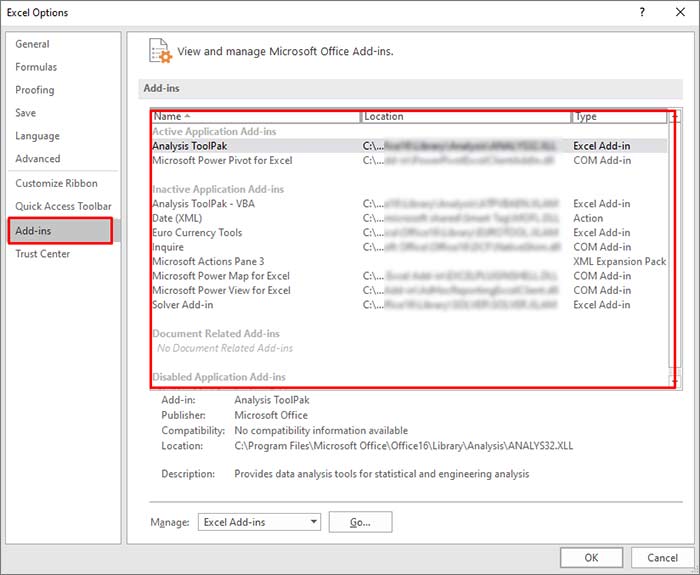
- Under Add-ins, search and select the latest add-ins, and then click on Go.
- In the Add-ins window, uncheck the add-ins and then click OK.

- Restart Excel and then check if the error is fixed or not.
Method 7: Repair the Corrupt Excel File
Corruption in the Excel file can affect the macros in the hidden module, which may result in the compile error. In such a case, you can try repairing the Excel file using Microsoft’s inbuilt utility -Open and Repair. To use this tool, follow these steps:
- Open your Excel application.
- Click the File tab and then click Open.
- Click Browse to select the affected workbook.
- The Open dialog box will appear. Click on the corrupted file.
- Click the arrow next to the Open button and then Open and Repair.
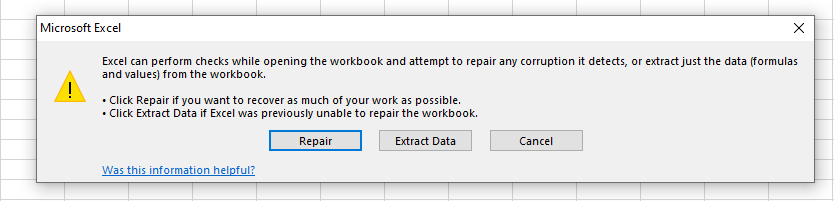
- You will see a dialog box with three buttons - Repair, Extract Data, and Cancel.

- Click on the Repair button to recover as much of the data as possible.
- After repair, a message is displayed. Click Close.
What if None of the Above Solutions Works?
If the above methods fail to get rid of the “compile error in hidden module” in Excel, then use an Excel repair tool such as Stellar Repair for Excel. This tool is specifically designed to repair the corrupted Excel file. It can recover all the components from corrupted Excel file (macros, queries, formulas, etc.) without changing their original formatting. The tool is compatible with all Excel versions and can be downloaded on a Windows system. You can download the free trial version of Stellar Repair for Excel to scan the corrupted Excel file and preview the data.
Closure
You can get the “compile error in hidden module” when Excel detects any issue while compiling the code in a protected module. It can occur when there is an issue with the macro-enabled Excel workbook or Excel add-ins. You can follow the above-mentioned methods to fix the issue. If the error occurs due to corruption in the database file, then you can try Stellar Repair for Excel . It can repair severely corrupted Excel files. It also helps recover all the Excel workbook’s components, including macros and queries. The tool has a simple and user-friendly interface.
Solved - The File is Corrupted and Cannot be Opened - Excel
Summary: Unable to open Excel file due to the error ‘The file is corrupted and cannot be opened’? Read this blog to find more details about the error, possible reasons behind it, and solutions to fix the error. In addition, the blog mentions about Stellar Repair for Excel software that can help fix the Excel error in a few clicks. Download the software now and see free preview of the file.
About the Error
Microsoft Excel is a widely used spreadsheet application that comes bundled with MS Office. Users tend to update the application with new security patches and features. Sometimes these updates can cause problems, and result in “The file is corrupted and cannot be opened” error.

Figure 1 – Excel File Corrupted Error Message
Other Possible Reasons behind ‘The File is Corrupt and Cannot Be Opened’ Excel Error
- Opening an older Excel version file in a newer version of Excel. For instance, opening Excel 2013, 2010, or earlier versions in Excel 2016.
- When attempting to open a Microsoft Office (Excel) email attachment in Microsoft Outlook 2010, MS Office 2010 reports a problem with the file preventing it from opening.
How to Fix the ‘Excel File is Corrupt and Cannot Be Opened’ Error?
Here are a few possible solutions that you can try to fix the ‘Excel file is corrupt and cannot be opened’ issue and open your Excel file.
Solution 1: Changing Component Services Settings
Solution 2: Changing the Protected View Settings
Solution 3: Repair Excel Files using Excel Repair Software
Solution 1: Changing Component Services Settings
[Caution] Changing Component Services settings requires making changes to the registry, and any mistake can harm your computer.
Follow these steps to change ‘Component Services’ settings:
Click ‘Start’ or ‘Win+R’ and type ‘dcomcnfg’ and press ‘Enter’.
In the navigation pane, expand the ‘Component Services’, and then expand ‘Computers’.

Figure 2 – Component Services Settings
- Next, right-click on ‘My Computer’, and then click ‘Properties’.
When the ‘My Computer Properties’ dialog box appears, click on the ‘Default Properties’ tab and then set the following values:
- Default Authentication Level: Connect
- Default Impersonation Level: Identify

Figure 3 – Illustrates My Computer Properties
- Click ‘OK’ to change ‘Default Properties’
Solution 2: Changing the Protected View Settings
[Caution] Disabling the ‘Protected View’ can put your system at high risk. Viruses attached to the Excel files can attack and infect your system. Be careful before using this option.
Excel 2010 file cannot open due to the ‘Protected View’ setting in Microsoft Outlook 2010. And so, changing the setting may help fix the error. For this, perform these steps:
- Open MS Excel 2010, go to the ‘File’ menu and click ‘Options’.

Figure 4 – Options
- When the ‘Excel Options’ window opens, click on ‘Trust Center’ and then on ‘Trust Center Settings’.

Figure 5 – Open Trust Center Settings
- Next, choose ‘Protected View’ and uncheck all the options including ‘Enable Protected View for Outlook attachments’ if you use Outlook for email.

Figure 6 – Uncheck Protected View Settings
- Click ‘OK’. Restart the application and try opening the Excel file again.
If none of the above solutions works for you, your Excel file is likely severely corrupt. To repair corrupt Excel files, you need to use advanced options like Stellar Repair for Excel tool. It repairs corrupt and damaged Excel files and helps in retrieving lost data.
Solution 3: Use Excel File Repair Tool
Considering the risks associated with the above solutions, it’s better to use an Excel repair tool to repair single or multiple corrupt Excel files at once. The process is simple, and even a novice can use the Excel file repair tool to repair Excel files with the help of the following steps:
- Download Stellar Repair for Excel and install it.

- Launch the tool. In the tool’s main interface, click ‘Browse’ to select the file. If you don’t know the file location use the ‘Search’ option.

Figure 7 – Illustrates Selecting Corrupt Excel File in Stellar Repair for Excel
- Select the file, and then click on Repair.

Figure 8 – Illustrates Initiating Excel File Repair in Stellar Repair for Excel
- The software scans and lists the Excel file in the left pane. Click on the file to preview its recoverable objects in the right pane.

Figure 9 – Illustrates Preview of Recoverable Excel File Objects
- Save the repaired file at either the default location or a user-specified location.

Figure 10 – Illustrates Saving Repaired Excel File in Stellar Repair for Excel
- Click ‘OK’ to save the repaired Excel file. After the repair process is completed, browse to the location and open it with MS Excel 2010 or any other version.

Figure 11 – Illustrates Saving Complete Message in Stellar Repair for Excel
You will be able to access your Excel file from the selected location.
Conclusion
You can use the first two possible solutions to fix the “The file is corrupted and cannot be opened” error. If you can access the file, save its data and restore the default settings. However, if the file is corrupt and the data retrieved using the first two solutions is inconsistent or incomplete, use Stellar Repair for Excel. This tool can help you recover Tables, Charts, Chart Sheets, cell comments, Images, and Formulas while preserving the worksheet properties and cell formatting. You can also preview the file and verify the data inside the file before saving it.
[Fixed] The Workbook Cannot Be Opened or Repaired By Microsoft Excel
An MS Excel workbook (.XLS/.XLSX) file may not open due to damage or corruption caused by various reasons, such as:
- Sudden power failure
- System crash
- Virus or malware intrusion
- Large or oversized Excel file
- Incompatible add-ins
- Drive errors
- Damaged MS Office/Excel program files
As a result, when you try to open or access a corrupt Excel document, the program displays errors, such as “The workbook cannot be opened or repaired by Microsoft Excel because it is corrupt.” This may lead to a data loss situation.

Methods to Fix ‘The Workbook Cannot Be Opened’ Error
When an Excel workbook gets corrupt, MS Excel automatically detects and starts the file recovery mode to open and repair the file. However, when it fails to repair the corruption or recover the Excel file automatically, it displays the error message, “The workbook cannot be opened or repaired by Microsoft Excel because it is corrupt.” In such a situation, you can follow these methods to repair and recover the Excel document manually.
If the manual methods fail to resolve the error, you can use an Excel repair software, such as Stellar Repair for Excel. The software repairs corrupt XLS/XLSX file, recovers all the data, and saves it in a new Excel document with 100% precision, while keeping the cell formatting and properties intact.
NOTE: Before performing the below methods to repair or recover Excel documents, create a backup copy of the original file. This will help you recover data by using an Excel repair tool and avoid permanent data loss.
1. Repair Excel Workbook Manually
If the automatic repair fails, you may try manual repair to fix the damage or extract the data from the damaged Excel workbook. The steps are as follows:
- Navigate to File > Open and then go to the location where the spreadsheet is located.
- In the Open window, select the corrupted workbook that you want to fix and then click on the arrow next to the Open button.
- From the available options, choose Open and Repair…

- Then click ‘Repair‘ if you want to recover maximum data from the workbook or click ‘Extract data‘ if the repair option fails to fix the issue. It will extract all the values, formulas, tables, etc., from the corrupt workbook.

If both options fail to fix the issue, head to the next method.
2. Remove Faulty or Incompatible Add-ins
Faulty or incompatible add-ins may also cause this error. To find and remove such add-ins, follow these steps:
- Press **Windows key + R.
**
- Type Excel /safe and press ‘Enter‘ or click ‘OK.’ This opens MS Excel in Safe Mode.
- Go to File > Options and then select ‘Add-ins.‘
- Choose ‘Excel Add-ins‘ from Manage: option and then click on the Go button to view all Add-ins.
- Uncheck the checkboxes of Add-ins and then click ‘OK‘ to disable them.
Now close the Excel program and run it normally. Click ‘File > Open‘ and choose the Excel file you want to access.
3. Repair MS Office Installation
Damaged Excel program files may also lead to such errors. However, you can easily repair MS Office installation to fix the problem. The steps are as follows:
- Open Control Panel and select ‘Uninstall a program.‘
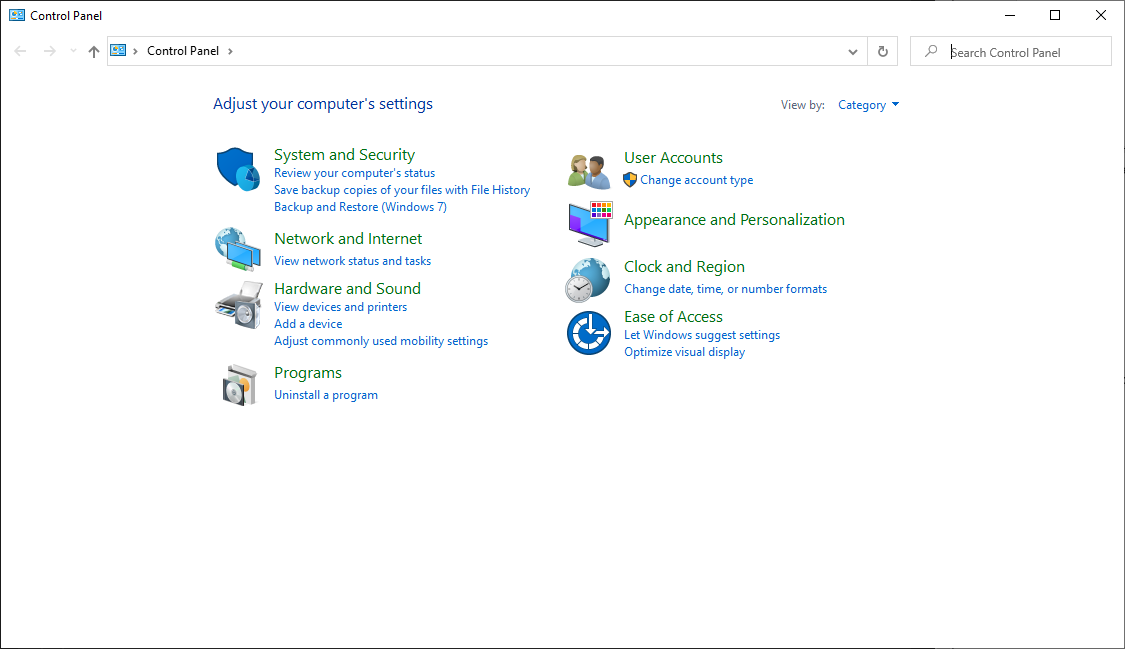
- Search and choose MS Office from the programs list. Then click on the ‘Change’ button.
- Select ‘Repair’ and follow the wizard to fix the damaged program files.

If this fails to address the issue, you can uninstall and then fresh install MS Office on your system. Alternatively, try accessing the file on another PC.
4. Use Excel Repair Software
The best option is to use an Excel repair software, such as Stellar Repair for Excel , to repair the file, resolve the error, and access the Excel (XLS/XLSX) worksheet. The software can repair an Excel file without any size limitation.
After recovering the Excel file using the software, you can open it in any MS Excel program without encountering the error message.
Conclusion
A corrupt or damaged Excel workbook may lead to errors, such as “The workbook cannot be opened or repaired by Microsoft Excel because it is corrupt,” and cause a data loss situation. The most efficient way to fix such corrupt Excel files is to repair them by using an Excel repair tool, such as Stellar Repair for Excel.
Unlike manual methods that may fail to resolve the issue or lead to further damage, this software extracts the data from the damaged Excel file and saves it in a new Excel workbook. Thus, it is 100% safe to run on an original Excel file, as it does not overwrite or alter the original file.
The software is free to download. You can scan, repair, and preview a corrupt Excel file by using the demo version. Once you are satisfied with the results, activate the software to save the repaired Excel workbook data in a new sheet.
- Title: How to Repair Corrupt Excel 2013 Files | Stellar
- Author: Nova
- Created at : 2024-03-11 15:38:46
- Updated at : 2024-03-14 13:57:35
- Link: https://blog-min.techidaily.com/how-to-repair-corrupt-excel-2013-files-stellar-by-stellar-guide/
- License: This work is licensed under CC BY-NC-SA 4.0.
