
In 2024, How to Use Life360 on Windows PC For Huawei Nova Y71? | Dr.fone
How to Use Life360 on Windows PC For Huawei Nova Y71?
Life360 is an online platform that utilizes geo-location services to help users share their real-time location with friends and family. The app allows people to create a family group and stay connected to each other through features like chatting, sharing location, sending safety alerts, etc.
As of now, you cannot run Life360 on computer as it is only available for Android and iOS. Why? Because as opposed to a PC, one can easily carry their device everywhere! It means whether your kid is stuck in traffic and needs your help or your parents have lost their way back home, Life360 will instantly send you an alert on your device.
However, that doesn’t mean you cannot use Life360 on a PC. While it may seem a bit odd, there are a couple of methods that’ll allow you to get the Life360 app for Windows. In today’s guide, we are going to share some of these methods that’ll help you run the Life360 app on Windows.
So, without wasting another second, let’s dive straight into the guide.
Part 1: Why people seek to use Life360 on PC?
First things first; why would anyone want to use a family locator app like Life360 on their PC? Well, the truth is everyone has their own reason to get Life360 for PC. For instance, let’s say you are in the middle of an important project and don’t want to be bothered by alerts on your smartphone. However, you still don’t want to compromise with the safety of your family members.
In this situation, you can simply run the Life360 app on PC. This will allow you to directly keep track of the whereabouts of family members on your Windows system and you won’t have to constantly check your phone.
Life360 can also be used on a computer when your phone’s battery has completely drained and there’s no power outlet nearby. In this case, you can simply power-on your laptop, start the Life360 app and send your current whereabouts to family members.
Part 2: Is it possible to use Life360 on Windows PC?
Life360 is an extremely useful app for people who are always concerned about their closed ones. The app is basically designed with a vision to keep family members connected and safe. In addition to location sharing, the app also provides exclusive features like crash detection, place alerts, speed alerts, battery monitoring, etc.
The app also makes it easier for parents to monitor their child’s movement. Using the app, you can always know that your kids have safely reached school and back home. For any parent, knowing whether the kids are safe, is one less thing to worry about.
However, as we mentioned earlier, Life360 hasn’t been released for Windows yet. So, there’s no direct way to install and run the app on a Windows PC. While Life360 may release a dedicated Windows software in the future, as of now, you can only run it using the alternative methods.
These methods include:
## Part 3: Use Life360 on Windows PC with Android emulatorThe first and the most convenient way to run Life360 on computer is to use an Android Emulator. An emulator is basically a software that creates a virtual Android system on your computer. As a result, you’ll be able to run Android apps on your computer.
While there are dozens of Android emulators, Bluestacks seems to be the most popular and user-friendly option among all. Unlike other emulators, Bluestacks is easy to set up and use.
Here’s how you can run Life360 on a computer using Bluestacks Android emulator./
Step 1: Head over to Bluestacks official website and tap the download button.
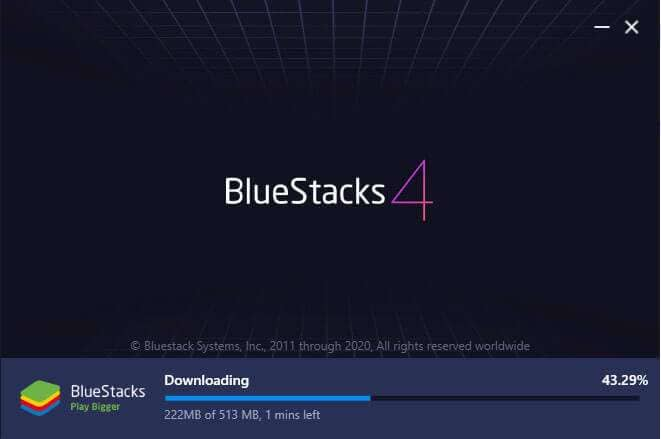
Step 2: Open the installer and tap the “download” button. This will initiate the download process on your System.
 Glarysoft File Recovery Pro - Helps to recover your lost file/data, even permanently deleted data.
Step 3: Once the installation process completes, Bluestacks will start to boot. Keep in mind that the first boot may take some time, depending on your system configurations.


Step 4: In the home screen, tap the “Google Play Store” icon. You’ll be asked to sign-in with your Google account. Enter the right credentials and log-in to the Google Play Store.

 Any DRM Removal for Mac: Remove DRM from Adobe, Kindle, Sony eReader, Kobo, etc, read your ebooks anywhere.
Step 5: In the top search bar, type-in Life360 and tap the “install” button to download the app.


WPS Office Premium ( File Recovery, Photo Scanning, Convert PDF)–Yearly
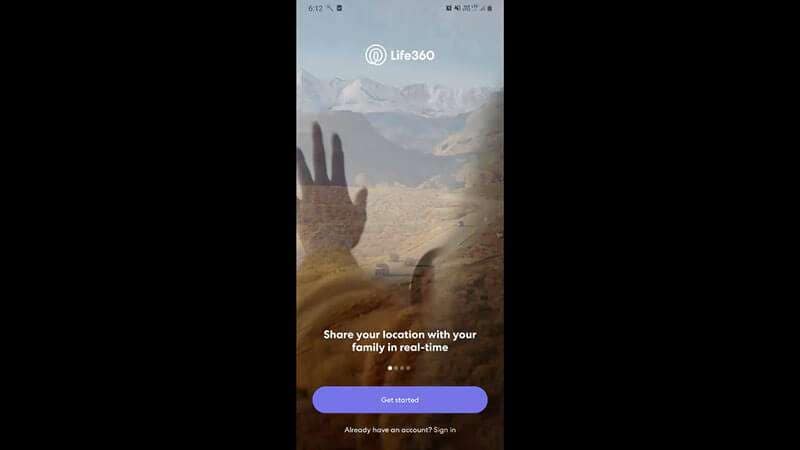
Step 6: Life360 is now installed on your computer. Open the app and enter your login details. You’ll now be able to run Life360 on your PC.

 /a>
/a> WonderFox DVD Ripper Pro
Part 4: Use Life360 by mirroring Android to Windows PC
While running an emulator is a great way to get Life360 on PC, it has its own set of challenges. For instance, running an Android emulator is not easy when you have a low-configuration PC. Emulators like Bluestacks requires high system configuration otherwise they take forever to load.
In this situation, we have another alternative for you to run Life360 on PC. You can simply mirror your Android to your Windows system. Mirroring the Android device will allow you to see its content on the PC itself.
Here’s how you can mirror the Android device on your PC.
Step 1: Make sure that Bluetooth is activated on both devices.
Step 2: On your Windows PC, open “Settings” and select the “Systems” tab.

Step 3: Choose the “Projecting to this PC” option in the left menu-bar and make sure that “Available Everywhere” is selected.

Step 4: If you’re running Android Pie or above on your device, scroll down to open notification drawer and select “Smart View” (or “Cast” in some devices). You’ll see your PC listed here. Tap the button to start Android mirroring.

Step 5: It may take some while for the connection to establish. Once it does, you’ll be able to cast your device screen onto your computer and you’ll be able to run life360 on your system.
Keep in mind that you’ll still require your device to navigate through the content on your computer. Any action that you perform on your device will be replicated on your computer screen as well.
Final Verdict
Life360 is probably among the top family locators for Android users. Apart from its extensive range of features, the app provides a user-friendly interface, which allows it easier for even elders to use the app without any issues. Even though there isn’t a dedicated Life360 software for Windows, you can follow the above-mentioned methods to run the Life360 on PC.
You Might Also Like
Location-based apps
GPS spoof for dating apps
GPS spoof for social apps
Pokemon Go on PC
AR game tricks

Change Phone GPS Location Easily
- ● Teleport GPS location to anywhere
- ● Play AR games without moving
- ● Spoof Location on the popular Apps
How To Teleport Your GPS Location On Huawei Nova Y71?
While playing games like Pokemon Go, you are in desperate need of finding more Pokémon. If so, changing your location is a necessity that needs to be figured out. For that, teleporting the GPS location of the Huawei Nova Y71 device is the optimal solution. To carry this out, Wondershare Dr.Fone - Virtual Location provides a perfect system for fake locations.
Part 1: Teleport to Anywhere in the World (Teleport Mode)
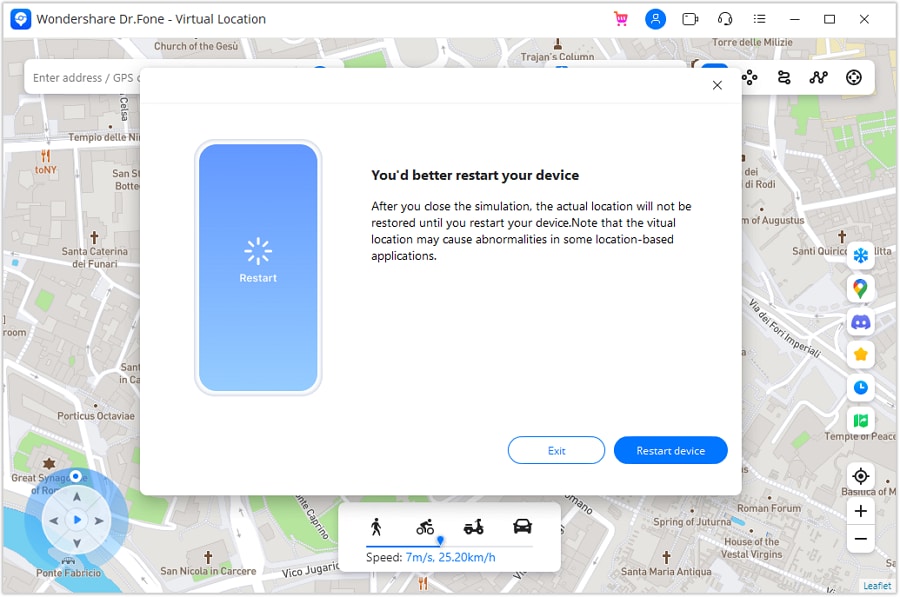
Note: Once you teleport or move to a virtual place, you can restore to the actual location by restarting the Huawei Nova Y71 device. You will see a prompt that reminds you to restart your device to restore the location of the connected device when you close the Virtual Location. Click Restart Device and close the program.
* Dr.Fone Mac version still has the old interface, but it does not affect the use of Dr.Fone function, we will update it as soon as possible.
The Teleport Mode offered in Virtual Location is a great way to change the location of iOS/Android devices. If you wish to show a different location to someone else, the best way is to use this mode on Virtual Location. This can be done by following the steps described below:
Step 1Activate Teleport Mode
Once you have connected your smartphone, continue to select the Teleport Mode option from the top-right section. The particular icon is represented by the first icon from the left in that section.

Step 2Add Location To Teleport
After activating Teleport Mode, click the search bar on the top-left to type in the location where you want to shift. After adding the location, hit Enter to proceed.

Note: If you can’t find your current location when searching spots on the map, you can click the Current Virtual Location icon on the right sidebar to show your current virtual location.
Step 3Confirm the Location For Teleporting
You will be directed to the particular, and the map will display it for confirmation. If you are willing to teleport to this specific location, click Move Here.

Step 4Location Successfully Changed On Computer
The location of the smartphone will be instantly changed to the selected location and will be displayed on the map.

Step 5Location Changed On the Smartphone
Open your smartphone and access its maps application. Look into the current location of the Huawei Nova Y71 device and verify it to be the same as the changed location on the computer.


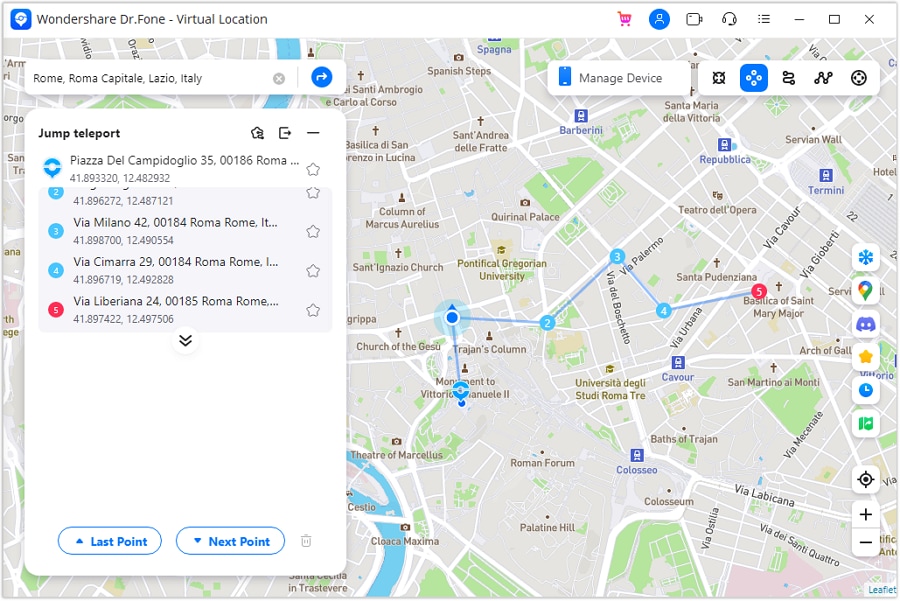
Part 2: Instantaneous Movement Between Multiple Points (Jump Teleport Mode)
Wondershare Dr.Fone - Virtual Location also allows the movement of the smartphone device between multiple places with the Jump Teleport Mode. If you want to make your location spoofing look realistic, the steps below will be beneficial:
Step 1Activate Jump Teleport Mode
You will have to first access the Jump Teleport Mode option from the second icon from the left in the top-right section. This can be done after teleporting the location of the smartphone device.
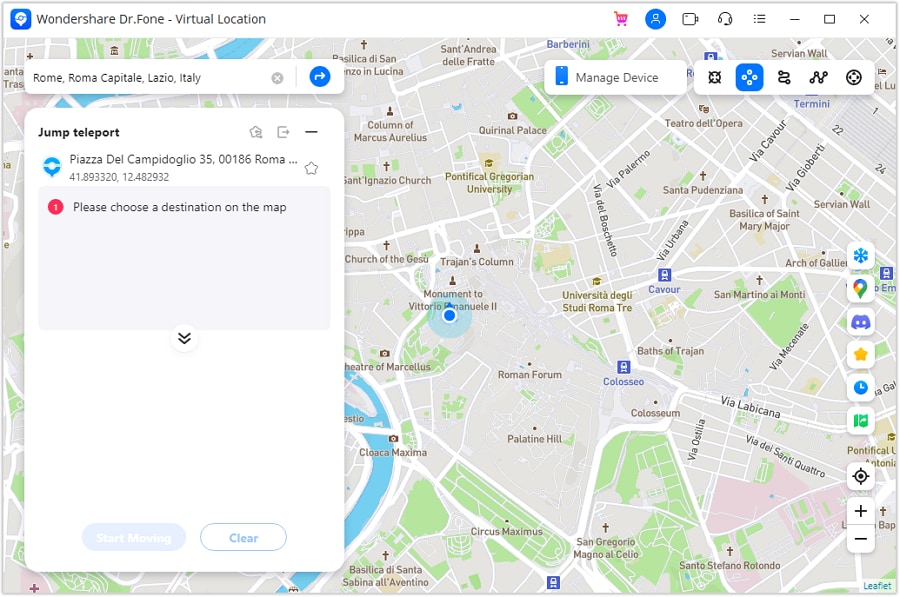
Step 2Set Spots to Jump Teleport
Continue to select the spots you want to pass one by one on the map by simply tapping on them with your mouse. After selecting multiple spots, click the Start Moving button at the bottom of the left panel to start the movement.

Step 3Change Location Between Set Spots
As prescribed, you can propagate amongst the set spots with the Jump Teleport Mode. Use the Next Point and Last Point buttons to shift your location.
How To Use Special Features - Virtual Location On Huawei Nova Y71?
Wondershare Dr.Fone - Virtual Location comes with multiple unique features that can be used to enhance the flow of spoofing location. With all these amazing features, you can easily change your iOS location without blinking an eye. Rather than making things complicated, Dr.Fone makes it easy for you to manage operations when you perform actions like changing Android locations.
 KoolReport Pro is an advanced solution for creating data reports and dashboards in PHP. Equipped with all extended packages , KoolReport Pro is able to connect to various datasources, perform advanced data analysis, construct stunning charts and graphs and export your beautiful work to PDF, Excel, JPG or other formats. Plus, it includes powerful built-in reports such as pivot report and drill-down report which will save your time in building ones.
 It will help you to write dynamic data reports easily, to construct intuitive dashboards or to build a whole business intelligence cockpit.
KoolReport Pro package goes with Full Source Code, Royal Free, ONE (1) Year Priority Support, ONE (1) Year Free Upgrade and 30-Days Money Back Guarantee.
Developer License allows Single Developer to create Unlimited Reports, deploy on Unlimited Servers and able deliver the work to Unlimited Clients.
Part 1: Circle Route (For Multi-Stop Route)
The circle route feature is under the multi-stop route mode. When your starting point is close to the ending point, a pop-up asks if you want to set up a circle route. Click Yes to create a circular path on the map.

Part 2: Realistic Mode (For One-Stop Route and Multi-Stop Route)
This particular feature makes the simulation look realistic with the ability to fluctuate the speed of the simulation. If you wish to turn on realistic mode for the one-stop or multi-stop route, look for the respective checkmark option in the panel on the left.


Part 3: Fluctuation Mode (For Teleport Mode)
Whenever you are teleporting your smartphone device to another location, you can try using the fluctuation mode feature offered against it. As you activate Teleport Mode from the top-right section and search for a location, you will discover the Fluctuation Mode toggle in the confirmation tab. Turn on the toggle to slightly switch the location from the selected point to show realistic motion.

 Jet Profiler for MySQL, Enterprise Version: Jet Profiler for MySQL is real-time query performance and diagnostics tool for the MySQL database server. Its detailed query information, graphical interface and ease of use makes this a great tool for finding performance bottlenecks in your MySQL databases.
 Part 4: Cooldown Timer (For Teleport Mode and Jump Teleport Mode)
While teleporting the location of your smartphone to different places for playing games like Pokemon Go, you are bound to activate a cooldown timer within your location-changing app to show realistic movement. By locating the Cooldown Timer on the right pane of icons, activate it, and this feature will automatically calculate the cooling time by measuring the distance between your destination and the starting point.

It is recommended not to start the movement until the cooldown time is completed to avoid unnecessary bans. Moreover, you can also activate the Auto jump after cooldown in the Jump teleport mode after turning on the Cooldown Timer.
This option will automatically jump you to the next destination once the timer ends. It is helpful for games like Pokemon Go, where the game servers can detect frequent jumps with no cooldown time.
Part 5: Import/Export GPX File
You can also import and export specific navigated locations from Dr.Fone in the form of GPX files. While you can export GPX files for keeping a record of your location, you can also import such files for inserting specific locations to simulate or teleport to. Find out how you can import and export GPX files with this location-changing application:
Step 1Export the GPX File
If you have defined a proper location to simulate at a particular instant using Dr.Fone - Virtual Location, you can have this location exported by clicking the Export icon on the top of the left panel. This will open a window where you can set the location for saving the GPX file.

 Easy GIF Animator is a powerful animated GIF editor and the top tool for creating animated pictures, banners, buttons and GIF videos. You get extensive animation editing features, animation effects, unmatched image quality and optimization for the web. No other GIF animation software matches our features and ease of use, that’s why Easy GIF Animator is so popular.
Step 2Import a GPX File
For importing a GPX file on the platform, click the Import button on the right pane. As this opens a window, select the GPX file you wish to import to the platform.


Step 3Wait for the File to be Read
Wait for a moment until Dr.Fone - Virtual Location recognizes the specific locations within the GPX file and displays them on the map.


Part 6: Historical Records
If you want to use a similar track record on your smartphone again, you can access the historical records saved on the platform for easy access.
Step 1Open Historical Records
Click the Historical Records button on the right pane to access the entire history involving the connected smartphone and the location spoofing platform.

Step 2Access Any Location from the History
Select the Go button adjacent to any particular historical record to re-launch a similar simulation for the Huawei Nova Y71 device. You can also click Clear All to delete all historical records.

Part 7: Favorite List
You can also set up favorite locations within the platform to define quick accessibility to your favorite locations. To do that, you have to follow the guidelines shown next:
Step 1Favorite Specific Locations
While setting up locations in Jump Teleport Mode, One-Stop Route, or Multi-Stop Route, you can tap on the Favorite icon adjacent to every marked location or favorite an entire route with the Favorite icon on the top of the left panel.

Step 2Access your Favorite Section
To look for your favorite locations, look for the Favorite icon on the right pane to open a list containing all locations you have marked. You can choose the Move option to automatically move into a particular location in no time.

- Title: In 2024, How to Use Life360 on Windows PC For Huawei Nova Y71? | Dr.fone
- Author: Nova
- Created at : 2024-08-25 00:52:06
- Updated at : 2024-08-26 00:52:06
- Link: https://blog-min.techidaily.com/in-2024-how-to-use-life360-on-windows-pc-for-huawei-nova-y71-drfone-by-drfone-virtual-android/
- License: This work is licensed under CC BY-NC-SA 4.0.