
Step-by-Step Guide: Restoring Microsoft Teams Camera Functionality in Windows

Step-by-Step Guide: Restoring Microsoft Teams Camera Functionality in Windows
Key Takeaways
- Try restaring your computer and updating the camera’s driver to fix camera issues with Microsoft Teams.
- Make sure to grant Teams, your browser, and teams.live.com access to the camera to prevent permissions-related issues.
- Make sure other apps aren’t using the camera to free it up for Teams.
Using Microsoft Teams for video conferencing is the norm for many teams worldwide. However, you can’t be an effective contributor in such an environment if the camera isn’t working in Teams. We’re going to show you how to fix it.
Preliminary Fixes to Get the Camera Working Again in Teams
To begin troubleshooting the issue, restart your Windows computer. This can resolve any temporary glitch that Windows or Teams is experiencing. If the camera still isn’t working, update the camera’s driver and then update your Windows computer .
If that doesn’t work, test your camera to ensure it’s functioning properly. If, after troubleshooting it, you discover that the camera is faulty, we recommend calling in a hardware professional to repair it. If it is an external camera, you could also consider buying a replacement webcam .
However, if there’s nothing wrong with the camera, you can proceed to the next troubleshooting steps.
1. Grant Microsoft Teams Access to the Camera
It could be that the camera isn’t working in Teams because the app doesn’t have permission to access it. To fix that, press Win+i to open Settings, and then head to Privacy & Security > Camera. If the toggle for “Camera” is off, click it to turn it on.
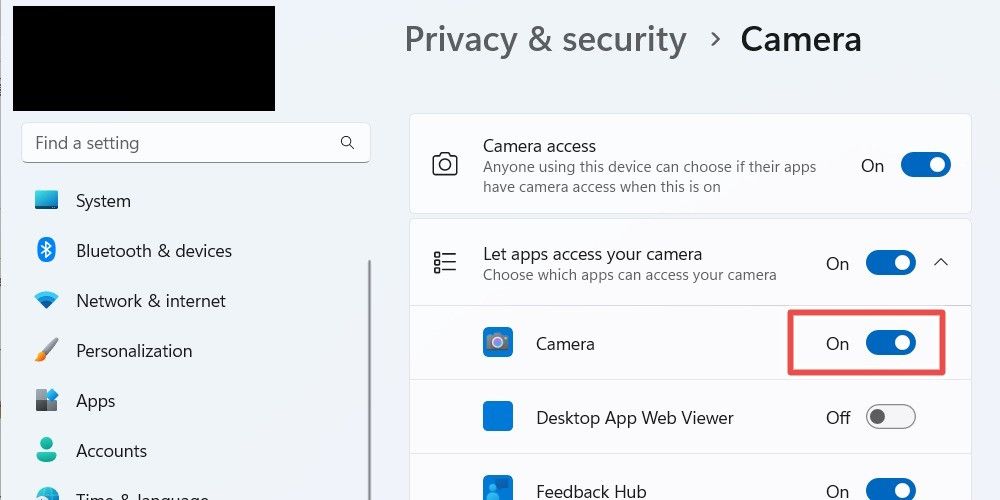
Every app on your computer should be able to use the camera now. Now, open Teams and start a video conference call to test if it works.
2. Grant Your Browser Access to the Camera
If you’re using Teams in a browser, the camera might not work if your browser is preventing the website from accessing your camera. To fix this, you’ll have to go into the browser’s settings and grant it access.
We’re only covering Chrome and Edge in this fix, as those are the only browsers that officially support Teams.
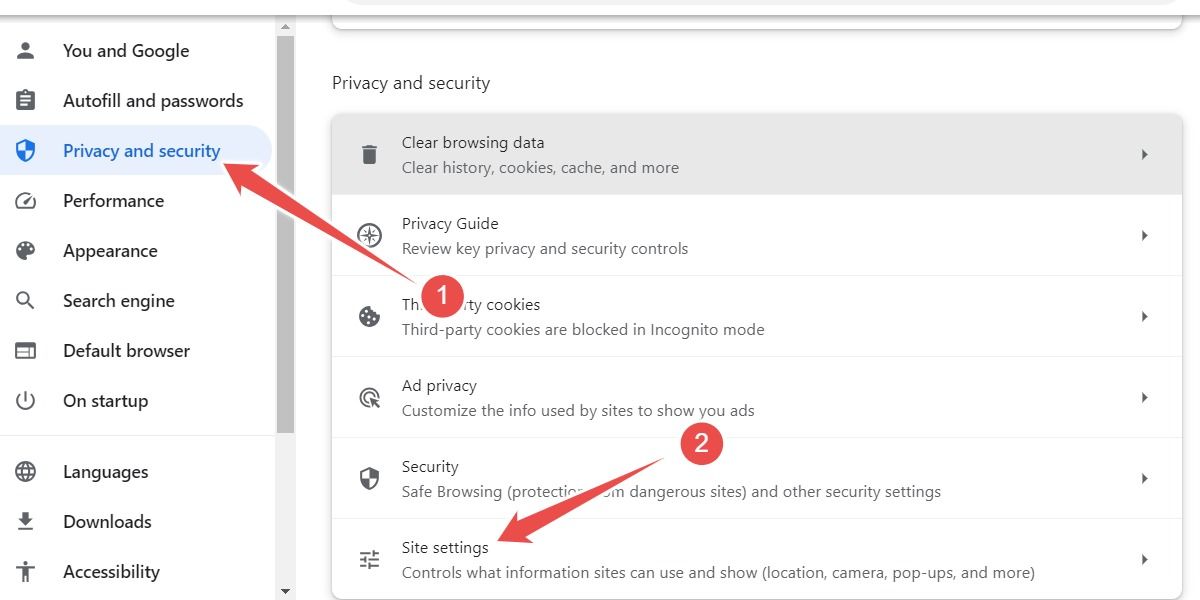
In Chrome, click the three-dot icon in the top-right corner and select “Settings.” Next, click on Privacy and Security > Site Settings.
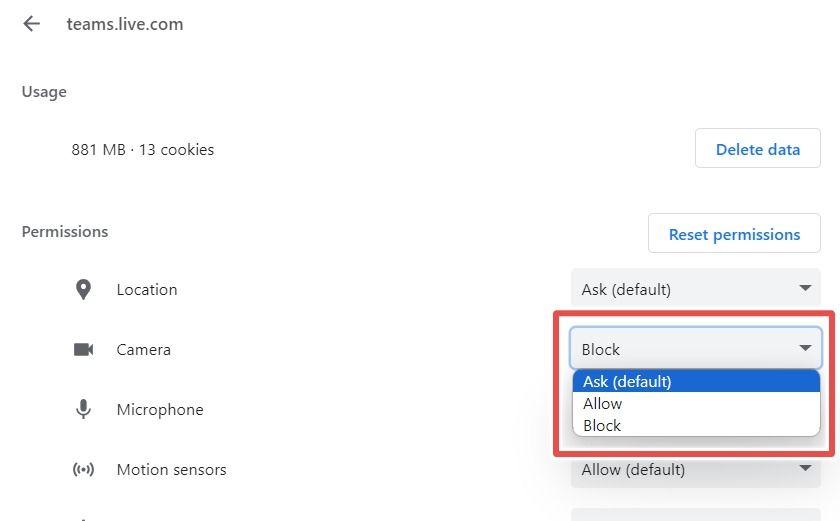
Next, expand “teams.live.com,” click on the “Camera” dropdown, and select either “Ask” or “Allow.”
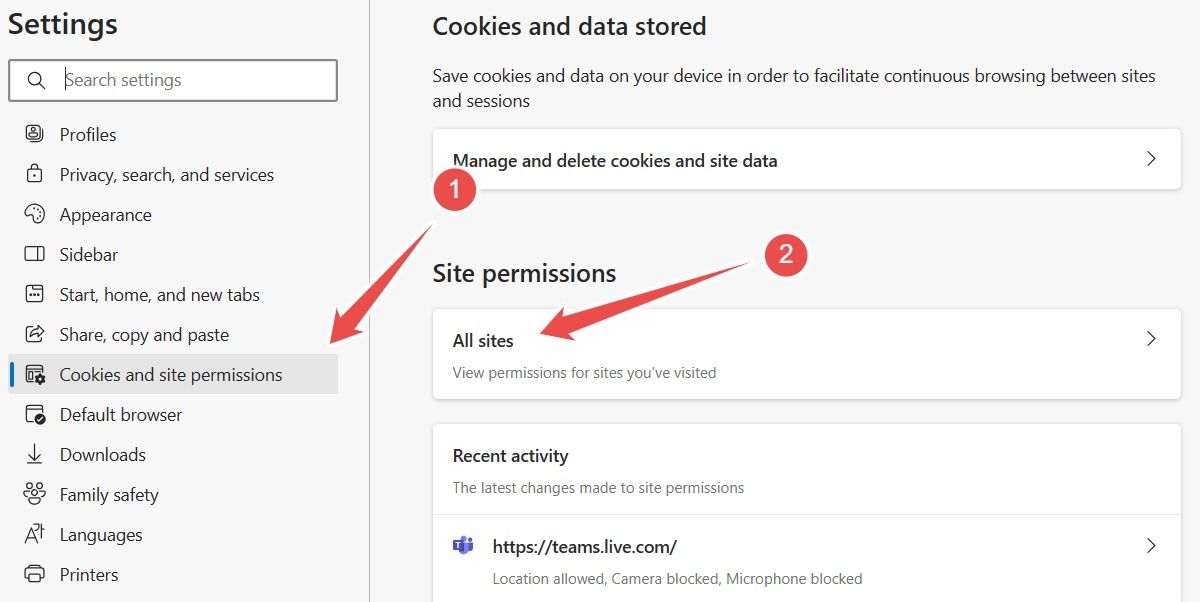
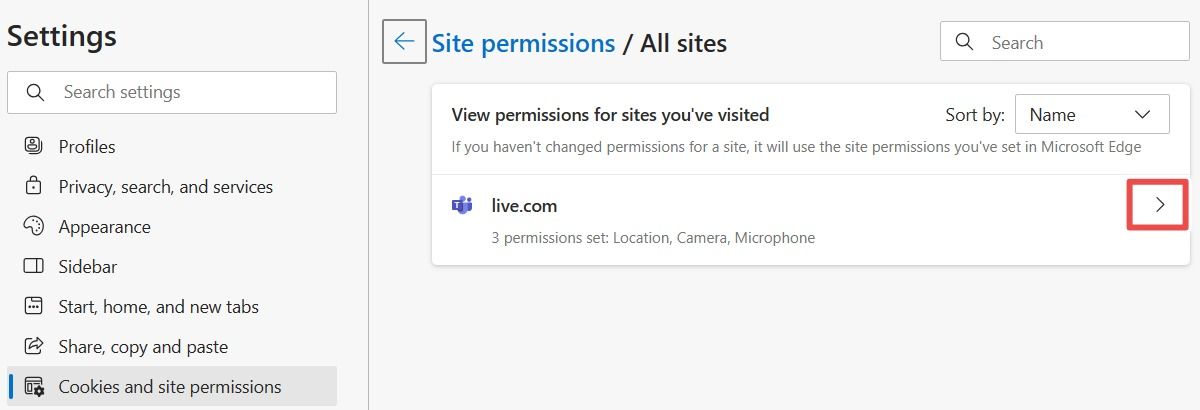
If you’re using Edge, click the three-dot icon in the top-right corner and select “Settings.” Head to Cookies and Site Permissions > All Sites.
Click the right caret icon next to “live.com.”
Click the dropdown next to “Camera” and select either “Ask” or “Allow”
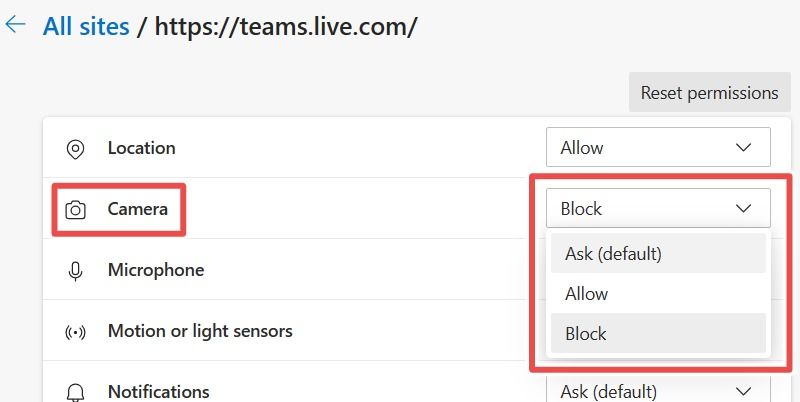
Keep in mind that if you set it to “Ask,” the browser will always ask you for permission to use the camera before starting the video call. Selecting “Allow” will grant the browser access every time without asking you.
3. Make Sure Other Apps Aren’t Using the Camera
The camera on Windows can only be used by one app at a time. You should check if other apps like Skype, Zoom, and Google Meets are using the camera. If one of them is, close the app to free the camera, which will allow Teams to use it.
4. Clear the Microsoft Teams Cache
A corrupted cache can cause all sorts of problems for Microsoft Teams, and clearing it can help. To do that, close Teams and press Win+R to open Windows Run. Depending on the version of Teams you’re using, the files you need to delete will be located differently.
For the classic Microsoft Teams app, enter the following in the Run text box and click “OK.”
%appdata%\Microsoft\Teams
For the new Microsoft Teams app, copy and paste the following in the Run text box, then click “OK.”
%userprofile%\appdata\local\Packages\MSTeams_8wekyb3d8bbwe\LocalCache\Microsoft\MSTeams
Delete all the files in the folder that opens. Then, launch Teams, and see if the camera is working. If none of the folders mentioned above exist on your computer, you’ll have to reset Teams to clear the cache.
5. Reset or Reinstall Microsoft Teams
Keep in mind that resetting or reinstalling Teams this will wipe all your settings and configurations in Teams. You’ll have to log in again and configure everything back to the way it was.
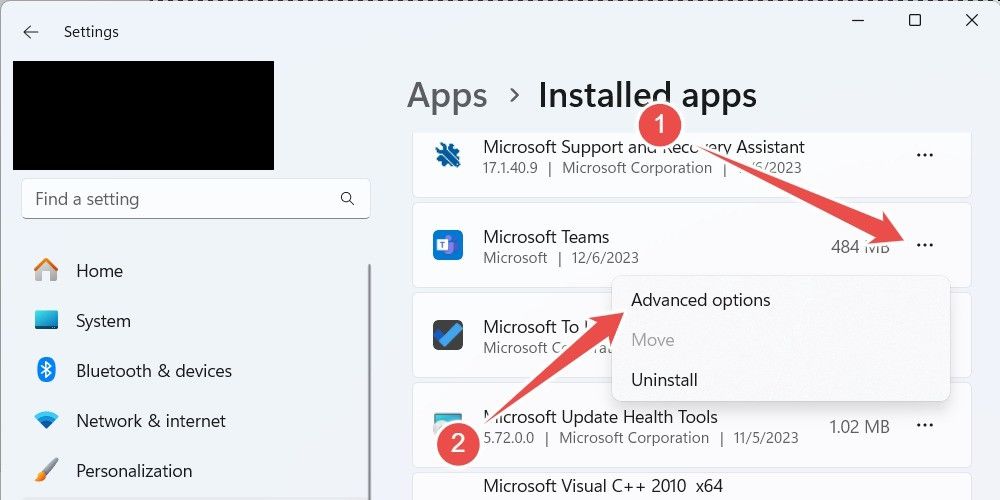
To reset Microsoft Teams, press Win+i to open the Settings app. Then, head to Apps > Installed Apps, find “Microsoft Teams,” click on the three-dot icon next to it, and select “Advanced Options.”
In the Reset section, click “Reset.”
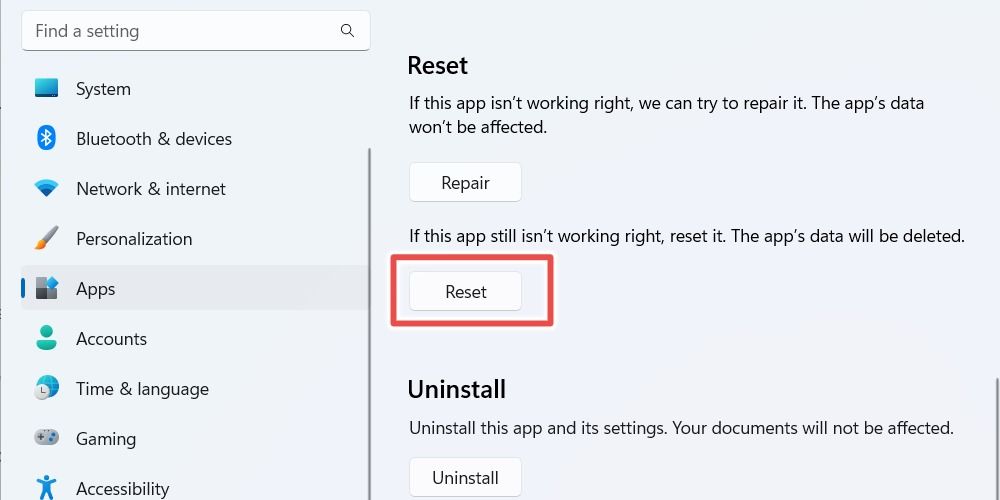
Confirm your decision by clicking “Reset” in the popup.
If this doesn’t work, it could mean Teams is corrupted beyond repair. To fix that, uninstall and then reinstall the app.
If your camera is working but producing a bad image, your internet might be too slow for your video broadcast quality, or you may need to use better lighting .
- Title: Step-by-Step Guide: Restoring Microsoft Teams Camera Functionality in Windows
- Author: Nova
- Created at : 2024-08-26 11:18:59
- Updated at : 2024-08-29 12:38:26
- Link: https://blog-min.techidaily.com/step-by-step-guide-restoring-microsoft-teams-camera-functionality-in-windows/
- License: This work is licensed under CC BY-NC-SA 4.0.