
Troubleshooting a Non-Responsive Windows Start Menu: Effective Solutions

Troubleshooting a Non-Responsive Windows Start Menu: Effective Solutions
Key Takeaways
- First, try restarting your PC to fix a broken Start Menu.
- If the Start Menu is missing completely, navigate Settings > Personalization > Taskbar and ensure that the taskbar is not hidden.
- If the menu remains unresponsive, restart Windows Explorer, update Windows, re-register all Windows Store apps, repair the damaged system files, or reset the PC settings.
If your Windows Start Menu has disappeared or it won’t open when you press the Windows key, fix a few system components on your Windows 11 or Windows 10 PC to make the menu working again. Here’s how to do that.
As a basic fix, give your Windows 11 or Windows 10 PC a reboot to see if that resolves the problem. If it doesn’t, use the troubleshooting methods below.
Make the Taskbar Visible
The Windows Start Menu sits on the taskbar, and if the menu has disappeared, ensure you haven’t hidden the taskbar . Here’s how to check that.
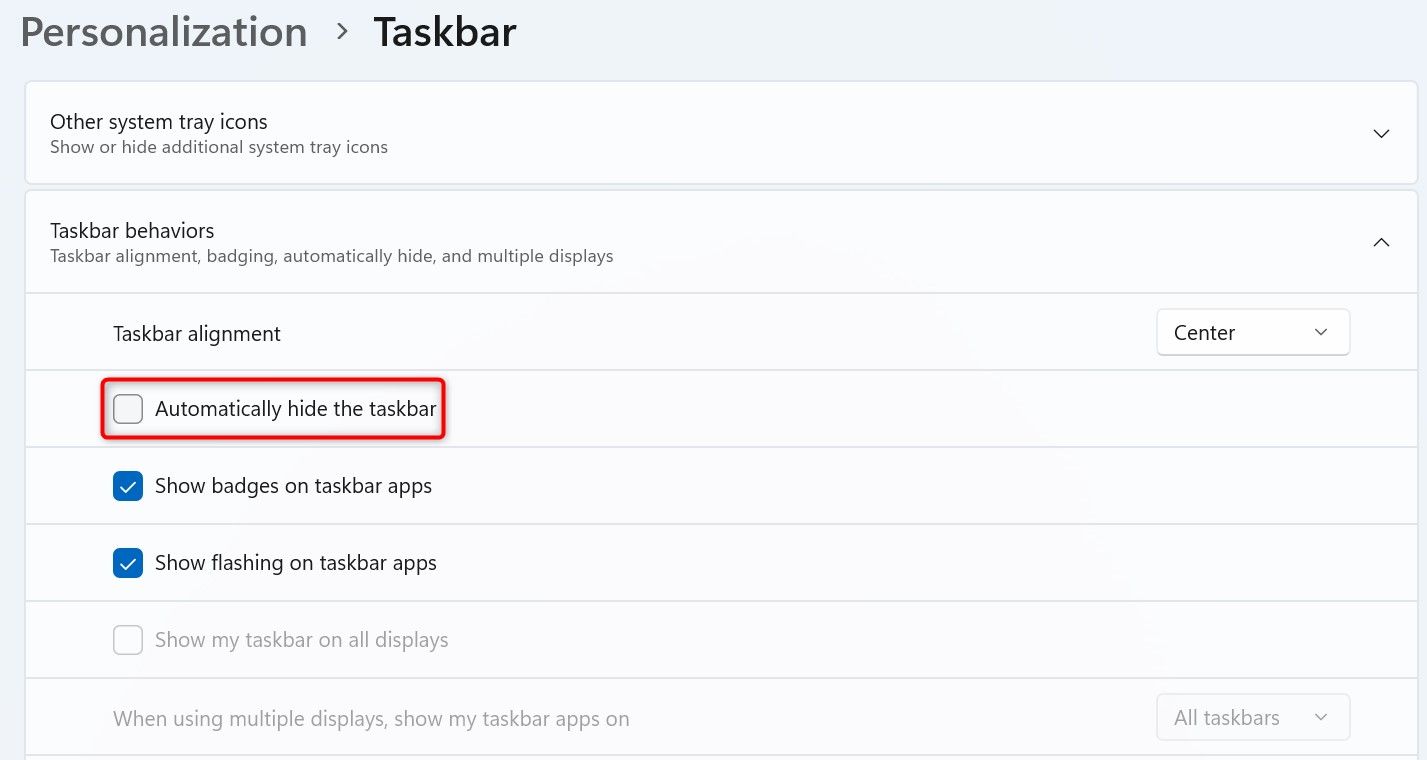
On Windows 11, navigate to Settings > Personalization > Taskbar. Select “Taskbar Behaviors” and turn off “Automatically Hide the Taskbar.”
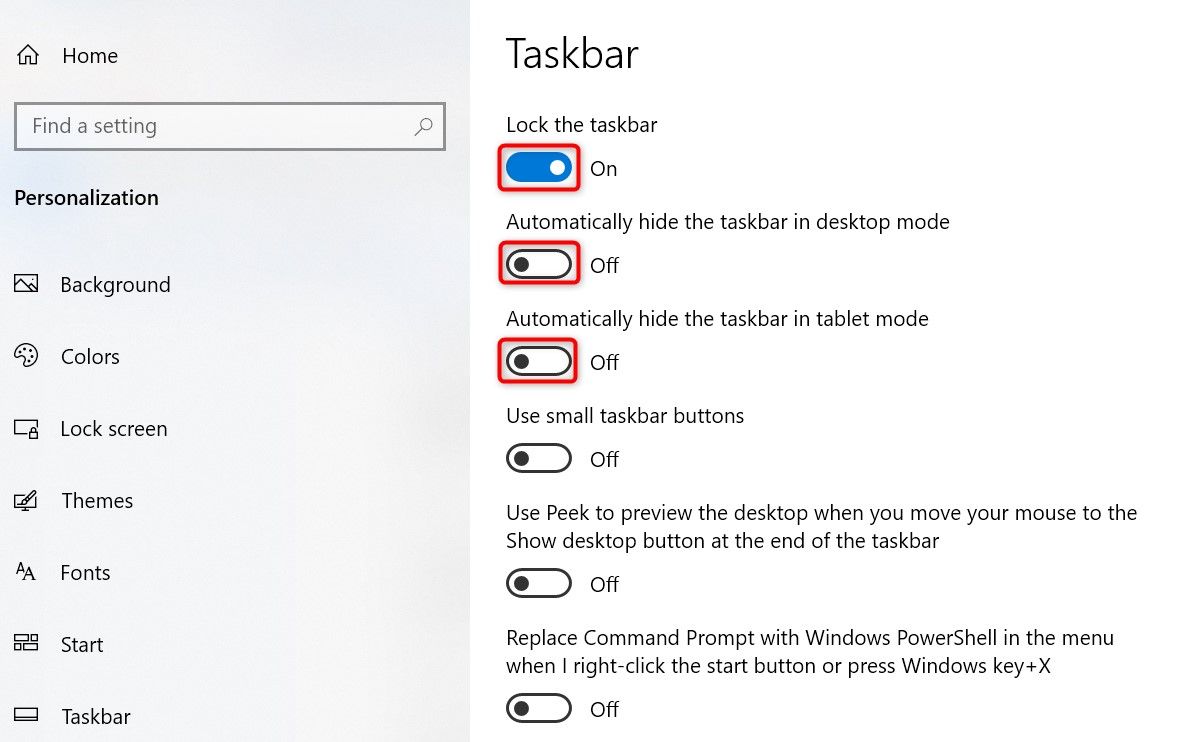
On Windows 10, head into Settings > Personalization > Taskbar. Turn on “Lock the Taskbar” and turn off “Automatically Hide the Taskbar in Desktop Mode” and “Automatically Hide the Taskbar in Tablet Mode.”
Restart Windows Explorer
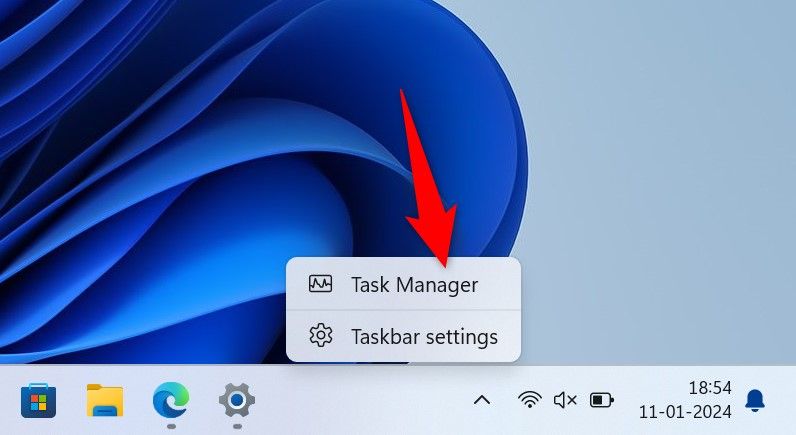
Restarting Windows Explorer will fix many issues related to the taskbar, File Explorer, and Start Menu. To perform a restart, right-click the Windows taskbar and choose “Task Manager.” If the taskbar isn’t working, press Windows+R to open Run, type “taskmgr”, and press Enter.
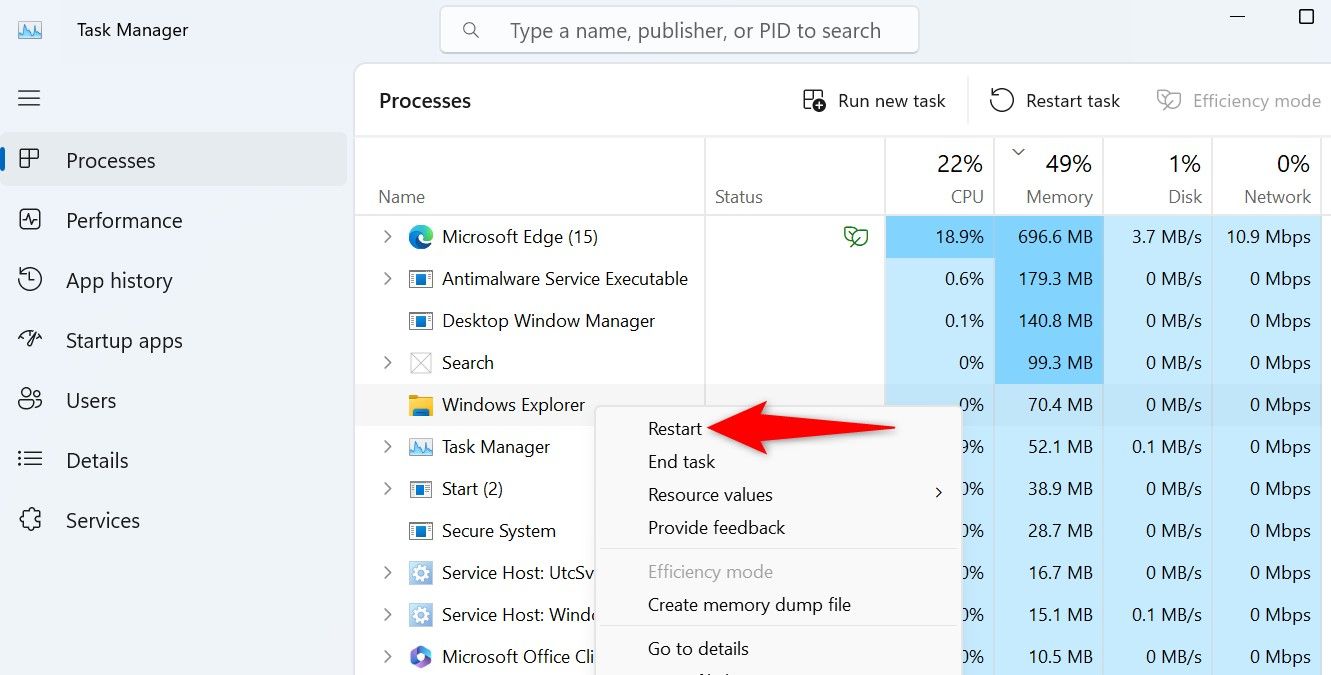
In Task Manager, access the “Processes” tab. Find and right-click “Windows Explorer” and choose “Restart.”
Wait a couple of seconds while Windows restarts Windows Explorer.
If Windows Explorer fails to restart automatically for some reason, open up another Run box by pressing Windows+R, then type “explorer.exe” into the box and hit Enter.
Update Windows to Fix Start Menu Issues
Your Start menu issue may be due to a bug present in the Windows operating system itself. In this situation, a Windows update might fix the problem.
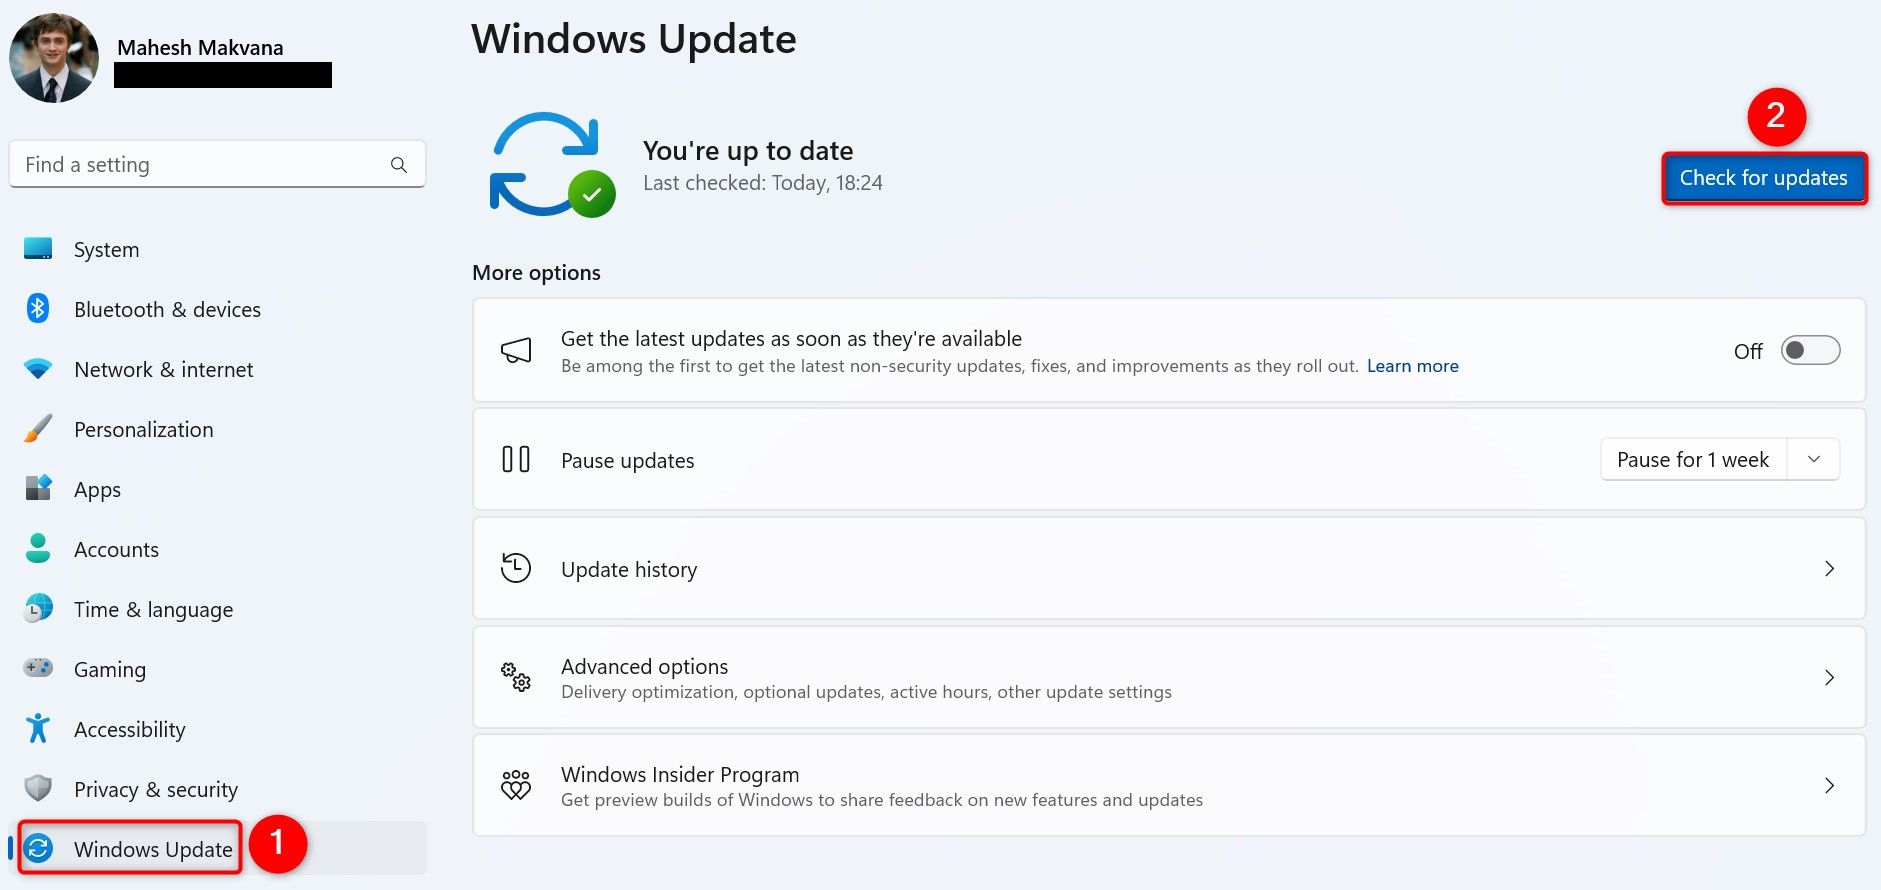
If you’re using Windows 11 , navigate to Settings > Windows Update. On Windows 10 , go to Settings > Update & Security > Windows Update.
On the right pane, click “Check for Updates” and download and install the available updates.
Re-Register All Windows Apps
Microsoft Store apps can appear in the Start Menu. If one or more of these apps are dysfunctional and aren’t registered in Windows correctly, the Start Menu can stop working. Fix that by re-registering all Store apps on your PC.
To do that, open Run by pressing Windows+R, then type “PowerShell” in the box and press Ctrl+Shift+Enter (this launches PowerShell with admin rights ).
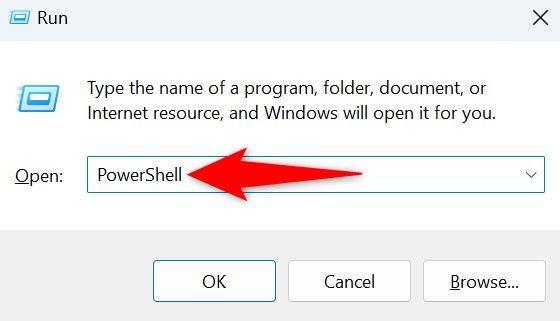
In the User Account Control prompt, choose “Yes.”
Type the following command in the PowerShell window and press Enter:
Get-AppXPackage | Foreach {Add-AppxPackage -DisableDevelopmentMode -Register “$($_.InstallLocation)\AppXManifest.xml”}
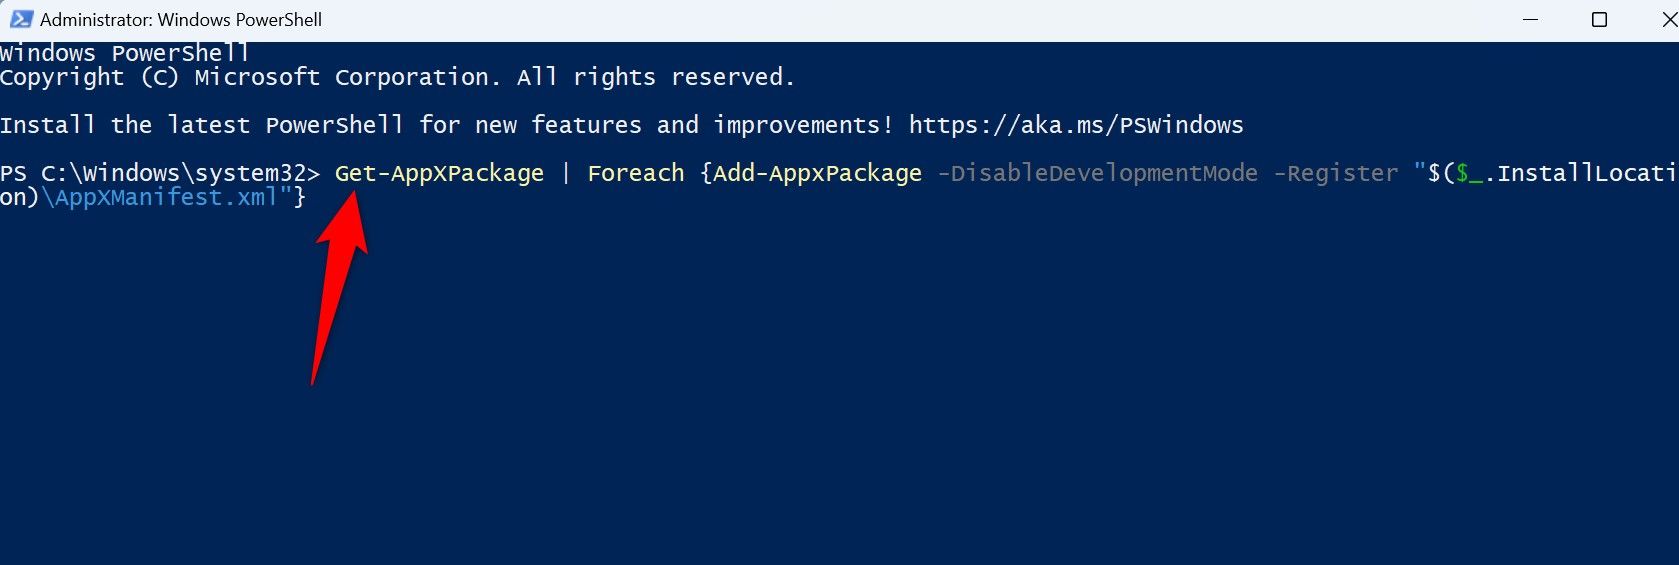
Wait while PowerShell re-registers the Store apps, then reboot your PC.
Repair Windows’ Corrupted System Files
When Windows’ system files get damaged, many system components (including the Start Menu) stop working. One way to check and fix these corrupted core files is by using System File Checker (SFC).
SFC is a built-in Windows tool that allows you to find and replace all the faulty system files on your computer. It performs the task on its own and requires very little interaction from your end.
To use it, open Run using Windows+R. Type “CMD” in the open box and press Ctrl+Shift+Enter to open Command Prompt with admin rights .
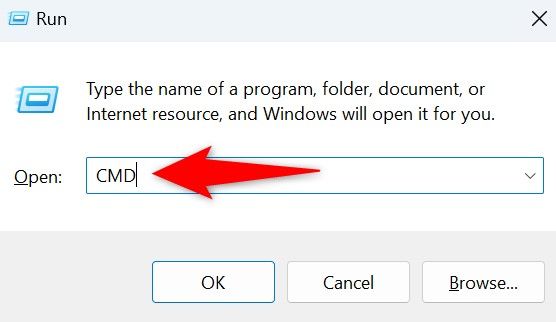
In the User Account Control prompt, select “Yes.”
Type the following command and press Enter. The DISM command downloads the files required to fix any corrupted files on your PC.
DISM.exe /Online /Cleanup-image /Restorehealth
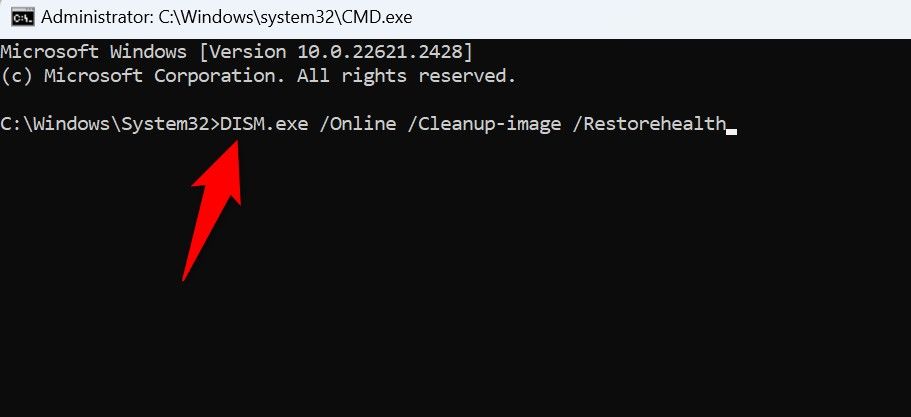
Next up, type the following command and press Enter to start fixing your system’s bad files.
sfc /scannow
Restart your PC once the scan has finished.
Reset Your PC
If a system configuration problem has caused the Start Menu to malfunction, you can reset Windows to fix the problem. A reset returns all of your system settings to their default values.
You get the option to keep your files while erasing the custom setting options.
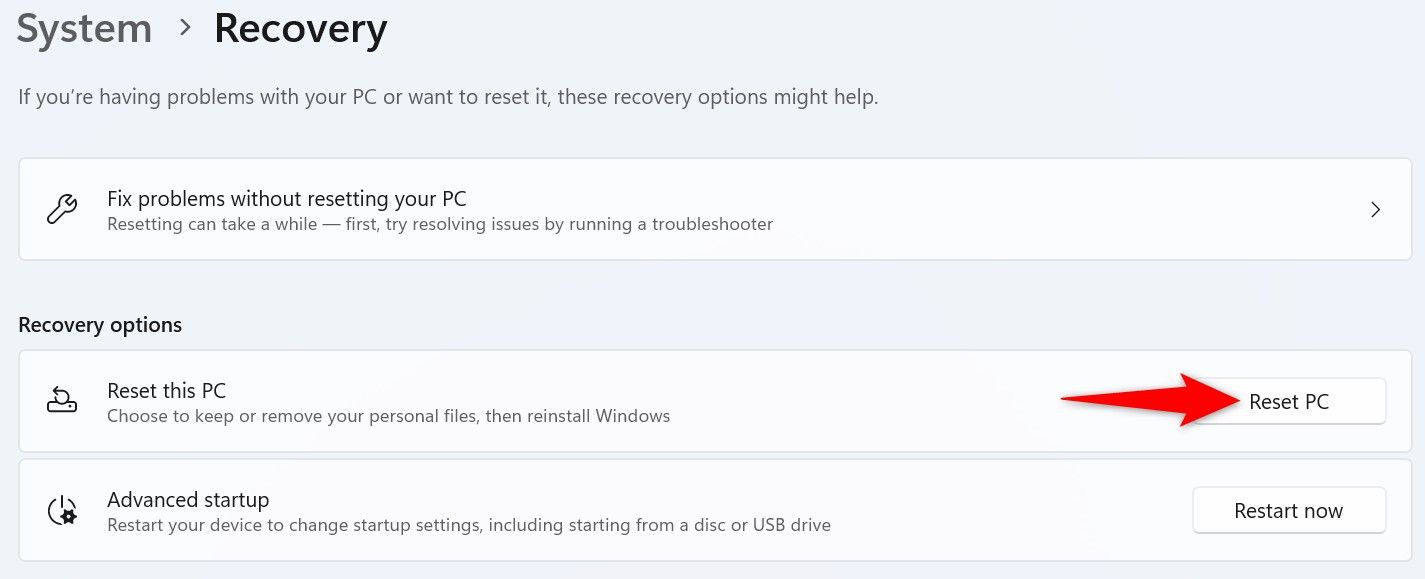
To begin, on Windows 11 , head into Settings > System > Recovery. Next to “Reset This PC,” click “Reset PC.”
On Windows 10 , navigate to Settings > Update & Security > Recovery. In the “Reset This PC” section, click “Get Started.”
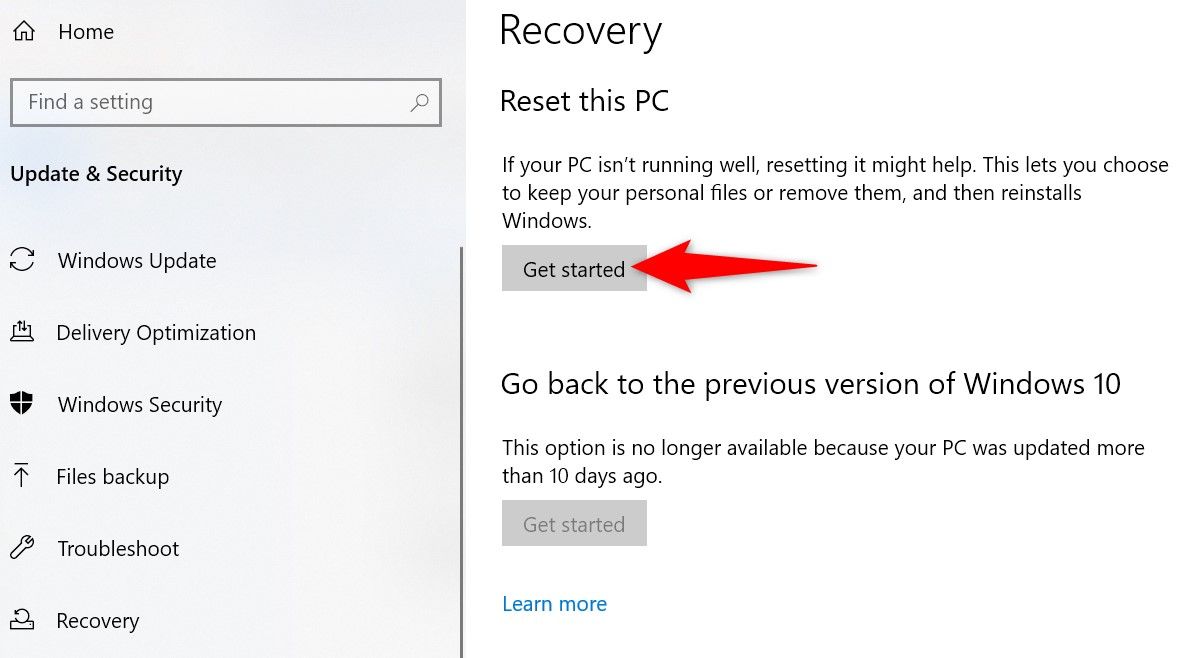
Choose “Keep My Files” and follow the on-screen instructions. The Start Menu should be working after you reset your system.
- Title: Troubleshooting a Non-Responsive Windows Start Menu: Effective Solutions
- Author: Nova
- Created at : 2024-08-26 12:33:41
- Updated at : 2024-08-29 10:32:43
- Link: https://blog-min.techidaily.com/troubleshooting-a-non-responsive-windows-start-menu-effective-solutions/
- License: This work is licensed under CC BY-NC-SA 4.0.